The growth of cryptocurrency tokens over the last year demonstrates the significance and expanded use of asset tokenization. As the practice of releasing cryptocurrency tokens has grown in popularity, developing tokens now necessitates a specialized understanding of writing smart contracts, which form the basis of tokenization on blockchain.
What you’re about to learn is something you will often do (or not so often) in your journey as a smart contract developer. This article aims to make your experience a rather easy and unforgettable one.
If you are a beginner and need to become more familiar with tools like the XDCPay wallet, XinFin Remix, and how to test XDC, take a look at the articles below, where you can find all you need to be ready to deploy your XRC20 tokens.
BTW, to be able to create an XRC20 token, you may need to look at some of the previous articles:
How to Create an XRC-20 Token the Simple Way
XinFin Remix — Learn How to develop smart contracts using XinFin Remix
What is OpenZeppelin?
Openzeppelin is a framework or standard for building secure dApps (decentralized applications) and conducting some security audits to ensure the safety of your application. You can read more about it on their website and get a comprehensive guide on its different use cases in their documentation. There are other standards, though openzeppelin libraries are widely used by most developers to create tokens.
Many big crypto projects use Openzeppelin for their token standards and specifications, so at least you know that Openzeppelin is battle-tested.
Now, let’s begin
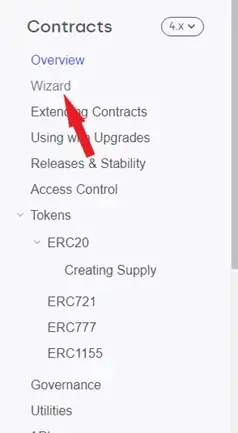
For the sake of this exercise, we will be using the Wizard, one of OpenZeppelin’s features. You should find it in the documentation as shown below:
The Opezeppelin Wizard is a tool that will allow us to create the code necessary for us to deploy smart contracts in ERC20, ERC721, ERC1121, and Governor.
First, give it a name and symbol. You can give your token any name of your choosing, but in this tutorial, I’d be naming my token “Husky”:
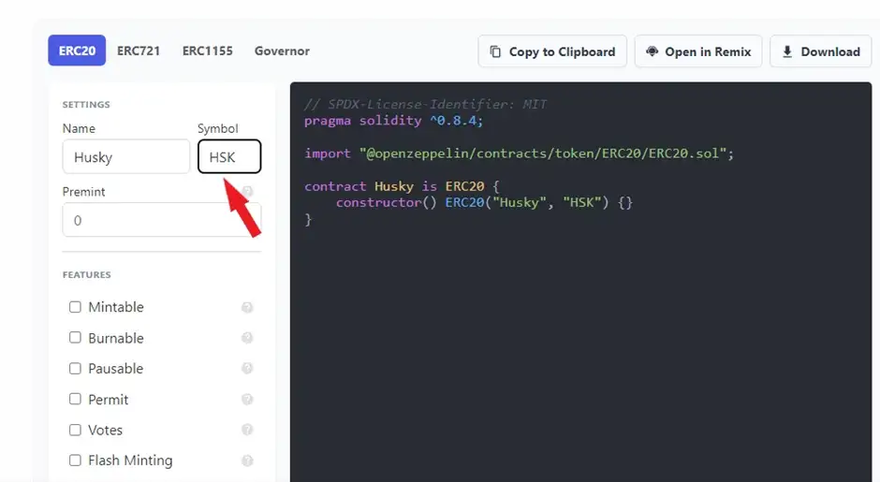
You will note that the name for your contract and the symbol are automatically inserted into your code (check the coding environment on the right).
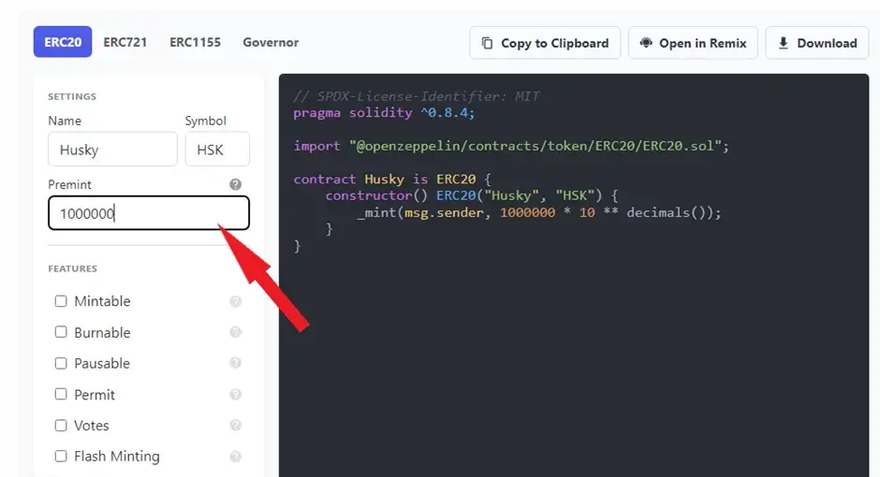
Next, specify the number of tokens you want to be in supply in Premint. In my case, it is 1,000,000 (one million) tokens. The Wizard does the rest for us: powering our token to the power of decimals required.
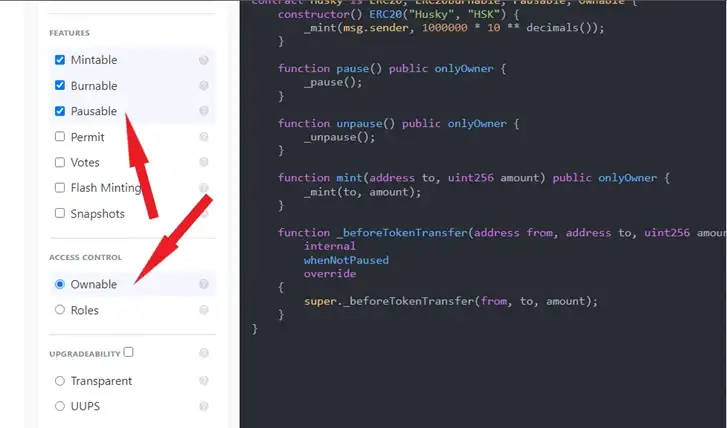
The next thing is to add a few methods:
- Mintable: By checking this feature, you’re specifying that you want the supply of your token to be increased in the future; that is, the initial 1 million tokens will increase over time.
- Burnable implies that we want to be able to destroy tokens in the future; that is, the supply can be decreased at some point.
- Pausable means that you want to be able to pause your token supply at some periods, either for security reasons or a break over the weekend.
- Permit will allow users to send the token without paying a gas fee.
- Votes will allow users to be able to be involved in decentralized voting.
we will only be using the first three options. Do make sure that the ownable option is checked.
Now it’s time to copy our smart contract code and go to the XinFin Remix IDE to deploy our contract. Create a new file in the name of your token and end it with “.sol” and then paste your code.
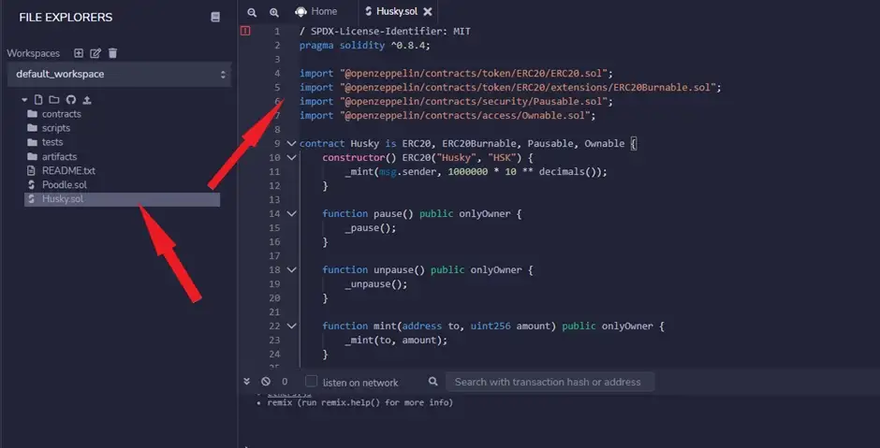
Let’s go ahead and compile. Select Compiler 0.8.2 (or whatever matches the version on the top of your smart contract) and click on compile
Next, go ahead to Deploy and Run Transactions and select Injected Web and the file to deploy the Husky token or whatever you named it
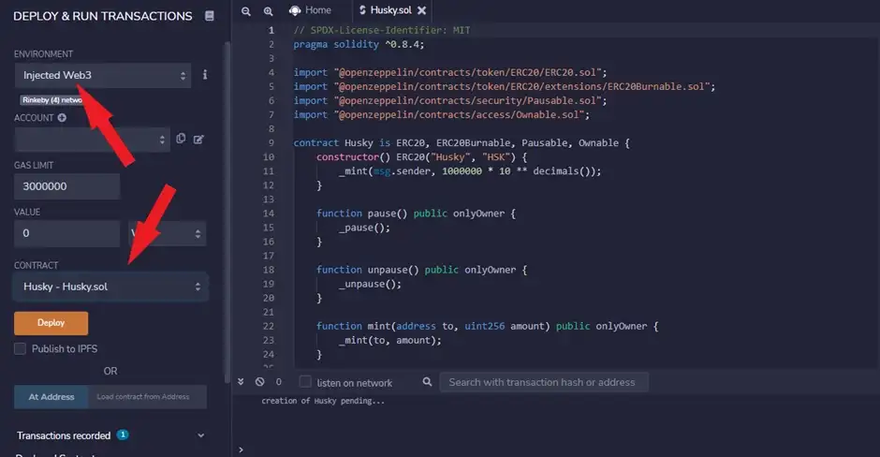
In your XDCPay, make sure you’re connected to the Apothem Test Network and have some test XDC from the faucet in your XDCPay let’s go ahead and deploy! Click approve on your XDCPay wallet, and your XRC20 smart contract should be deployed into the XDC Network after a few seconds! Woohoo!!
When it’s done, you will see a couple of functions on the sidebar, and you will see all the options of our token and the actions we can perform with it.
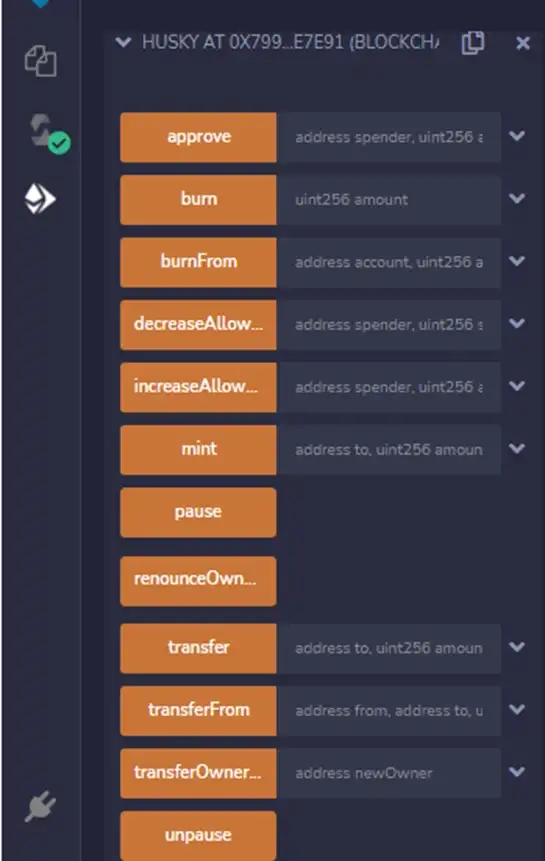
Unlike the custom deployment of an XRC20 Token, you will notice that our contract has functions on Mint, Burn, and Pause based on the options we selected in the wizard earlier.
Some Demonstrations:
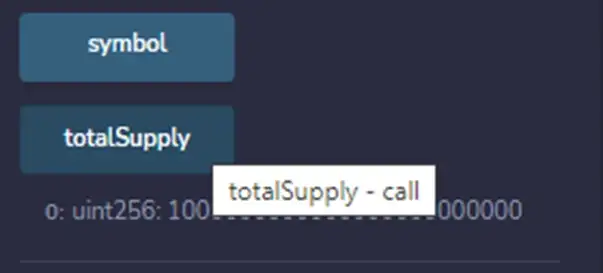
This function specifies the total supply as specified in the premint plus the number of zeros specifying a token, just the way we set it.
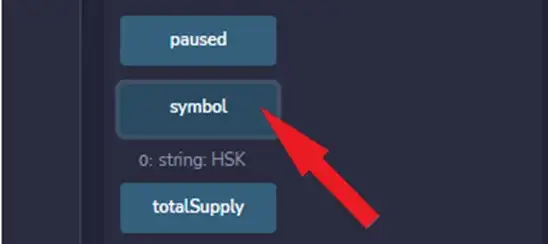
The above displays the symbol of our token as expected.
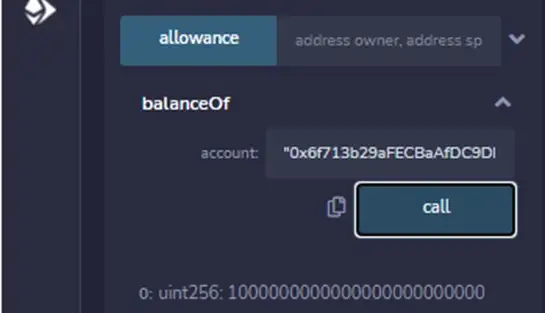
The “balance of” function displays the number of tokens allocated to a particular address. Go ahead to XDCPay and copy your address to paste into the slot, and you should get the same result.
If you get all these results, your contract is working fine, and guess what? You have just added valuable knowledge to your blockchain developer arsenal!
Tools required for smart contract development on XDC Network
If you have any questions, please feel free to post them on https://xdc.dev


Discussion (1)