XSWAP DEX is a decentralized exchange that enables crypto traders to exchange digital assets without the need for an intermediary. However, manually managing trades on XSWAP can be a tedious and time-consuming task that necessitates constant market monitoring. That's where Hummingbot comes in - it's an open-source software that automates trading on XSWAP DEX and other decentralized exchanges. Traders can use Hummingbot to create and execute customized trading strategies automatically based on predetermined conditions, freeing up time and allowing them to take advantage of market fluctuations without being tethered to their screens. Using Hummingbot, traders can potentially increase their earnings by automating their trading on XSWAP DEX.
Intro To Hummingbot
Hummingbot is the leading open-source crypto trading bot with connectors to 30+ exchanges and a 16k-strong global community of developers and traders.
Hummingbot’s main value proposition is enabling users to run high-frequency trading bots on various cryptocurrency exchanges without having to build and maintain low-level API integrations. Connectors maintain persistent WebSocket or REST API connections to exchanges, allowing users to run automated trading strategies (or bots) that execute quickly, performant, and efficiently.
While Hummingbot is a general toolbox that can be used to build any trading bot, we focus on market-making and arbitrage bots because using those strategies benefits our exchange and protocol partners.
Why use Hummingbot?
- Open source and free — Hummingbot is a local software client that never exposes your keys externally. The entire codebase is publicly auditable on Github.
- CEX and DEX connectors — We support most major centralized and decentralized exchanges, allowing you to hedge and arbitrage between them seamlessly
- Advanced market-making strategies — With sophisticated strategies like Avellaneda, Hummingbot is the only trading bot designed for professional market makers and liquidity providers.
Let’s start with easy to setup HummingBot
Now, let’s Download and Install the HummingBot on Windows.
The Hummingbot codebase is designed and optimized for UNIX-based systems such as macOS and Linux. For Windows users, we recommend running Hummingbot in Windows Subsystem for Linux (WSL).
WSL lets developers run a Linux environment directly on Windows, unmodified, without the overhead of a traditional virtual machine or dual boot setup. With WSL, Windows 10/11 users are able to run a Linux Virtual Machine without performance loss and the need for dual boot. See here for more detail about WSL.
Install WSL
- Open Powershell as admin
- Search for “Powershell” on the start menu, right-click and “run as administrator”
Run the Install WSL command “wsl — install” By default, WSL uses the Ubuntu distribution of Linux, which is compatible with Hummingbot.
Start WSL

After the installation, type wsl on the Powershell or the Command prompt.
Note that the first time WSL is executed, you will be asked to create a new default username/password.
- Install Ubuntu from Windows Store
Alternatively, after WSL is installed, search for Ubuntu in the Windows Store and install it as an app in the Start menu. That way, you don’t have to run Powershell every time you use Hummingbot.

While installing, it will restart your system, so don’t worry about it. Once installed successfully, it will ask to set the username and password.
Now, Install Docker in WSL
- Install Docker
With WSL, you now have a Linux Virtual Machine under Windows.
Linux on Windows
Follow the instructions below to complete the Docker installation process.
Remove older / currently installed versions of Docker first.
sudo apt-get remove docker docker-engine docker.io containerd runc
- Update the package index
sudo apt-get update && sudo apt-get upgrade -y
- Install necessary packages
sudo apt-get install apt-transport-https ca-certificates curl software-properties-common gnupg lsb-release
- Add Docker’s official GPG key
curl -fsSL https://download.docker.com/linux/ubuntu/gpg | sudo apt-key add -
- Setup the repository
sudo add-apt-repository “deb [arch=amd64] https://download.docker.com/linux/ubuntu $(lsb_release -cs) stable”
- Install Docker
sudo apt update && sudo apt-get install docker-ce
- Start the Docker service.
sudo service docker start
- Allow docker commands without requiring sudo prefix. If you are running as root, replace $USER with your username
sudo usermod -aG docker $demo
- Restart the terminal first before running the create.sh script (Important!)
exit
Warning: Please restart the terminal — close and restart your terminal window to enable the correct permissions for the docker command before proceeding to the next step.
Install Hummingbot from Source
- To install dependencies, run:
sudo apt-get update
sudo apt-get install -y build-essential
- To install install miniconda, run:
wget https://repo.continuum.io/miniconda/Miniconda3-latest-Linux-x86_64.sh
sh Miniconda3-latest-Linux-x86_64.sh
exec bash
- To clone the Hummingbot repository, run:
git clone https://github.com/hummingbot/hummingbot.git
- Now, Navigate into the Hummingbot folder:
cd hummingbot
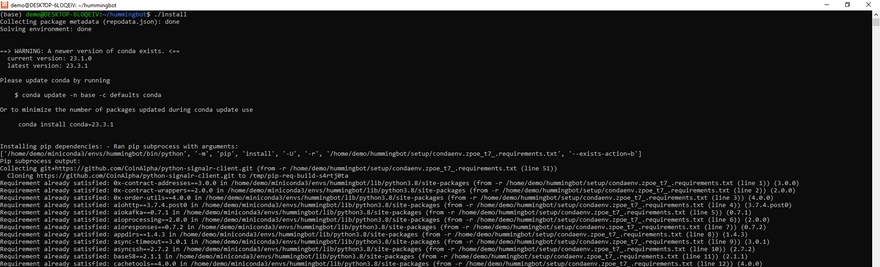
- To run the install script
./install
- Now, Activate the conda environment
conda activate hummingbot

- Once activate the conda, Compile the Hummingbot
./compile
- Let start the Hummingbot
bin/hummingbot.py
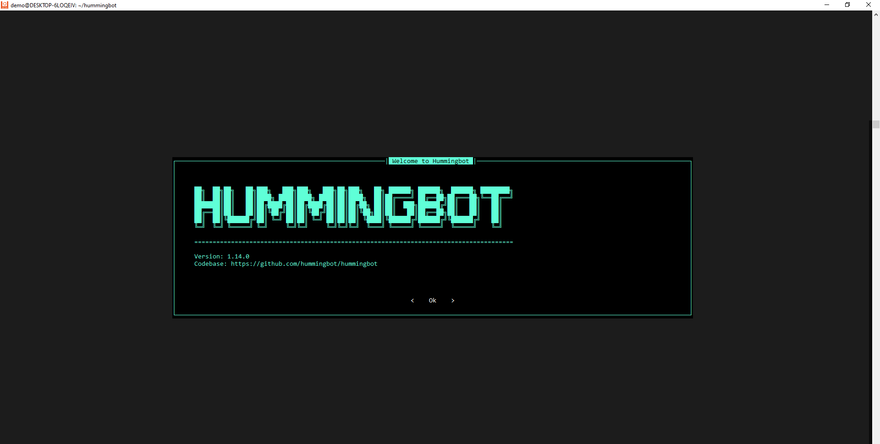
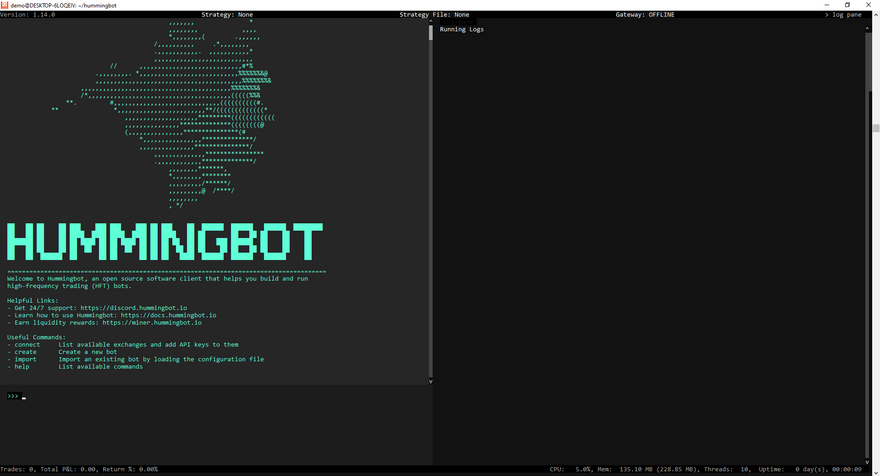
Once successfully connected to the Hummingbot, you will be redirected to the “Welcome to Hummingbot” screen.
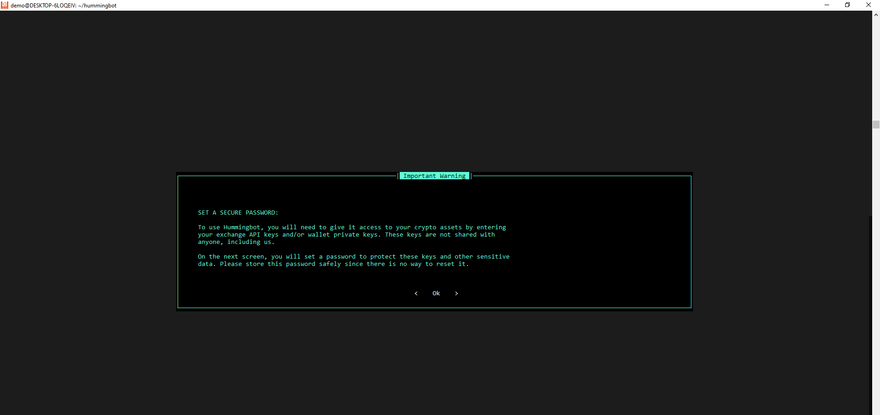
- You will be prompted to the “Important Warning” screen; Please read it carefully before using HummingBot.
- After clicking on Ok button, now you need to set the password for the “HummingBot”.
- Once you have set the password, you need to do “Config Migration”. Once migration completed successfully, you will be able to see the Hummingbot screen:
Generate certs
The first step is to generate self-signed certificates from the Hummingbot client. These certificates let your bots securely communicate with Gateway.
- Start your Hummingbot. After entering your password, run “gateway generate-certs”:
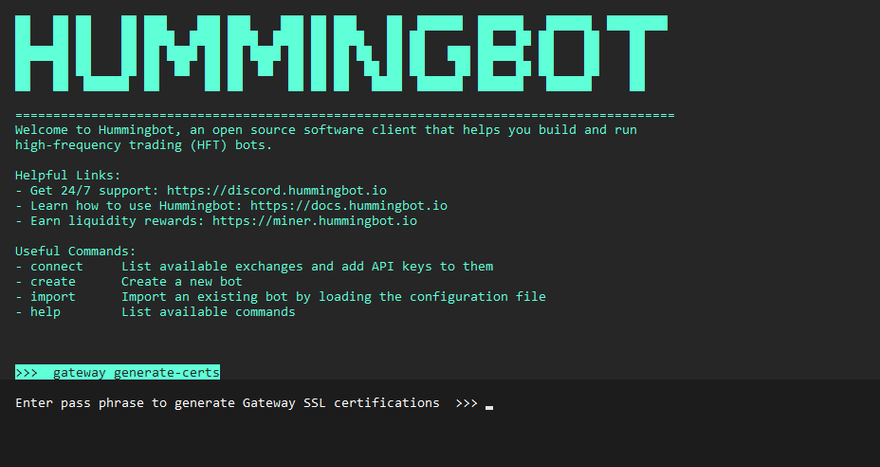
- Enter a secure passphrase, and then Hummingbot will generate self-signed certificates that a server can use to authenticate its connection with this client.

Tip: Make sure to save both passphrase and certs_path since you’ll need them later.
Install Gateway from source
Install the following dependencies:
- NodeJS (use 16.0.0 or higher) First, install the PPA to get access to its packages. From your home directory, use curl to retrieve the installation script for your preferred version, making sure to replace 16.x with your preferred version string (if different):
cd ~
curl -sL https://deb.nodesource.com/setup_16.x -o /tmp/nodesource_setup.sh
Then run the script with sudo:
sudo bash /tmp/nodesource_setup.sh
Now install the Node.js package
sudo apt install nodejs
Verify that you’ve installed the new version by running node with the -v version flag:
node -v
Yarn: run npm install -g yarn after installing NodeJS
Then, follow the instructions below:
To clone repo and enter the created directory:
$ git clone https://github.com/hummingbot/gateway.git
$ cd gateway
To install dependencies:
$ yarn
To compile Typescript into Javascript
$ yarn build
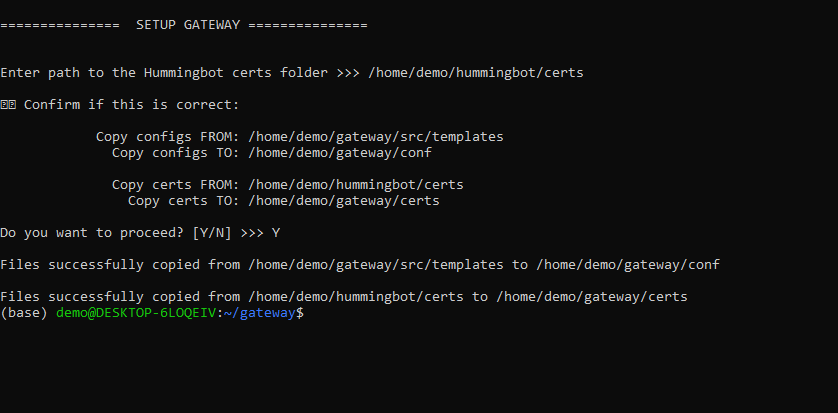
- Run Gateway setup script, which helps you set configs and certificates
$ chmod a+x gateway-setup.sh
$ ./gateway-setup.sh
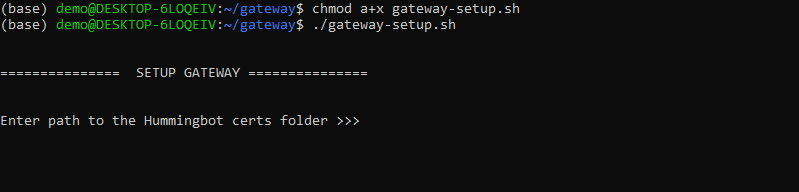
- The gateway-setup script configures Gateway by:
Copying the default configuration files from /src/templates to /conf/ folder
Copying the Hummingbot self-signed certificates into the /certs/ folder. Enter certs_path when prompted.
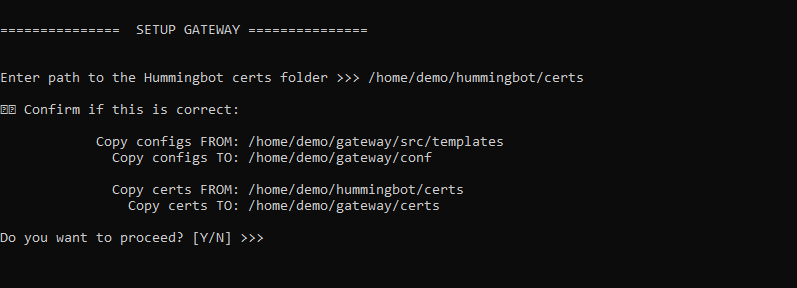
Setup Gateway Confirmation:
- Afterwards, start Gateway using passphrase:
$ yarn start --passphrase=
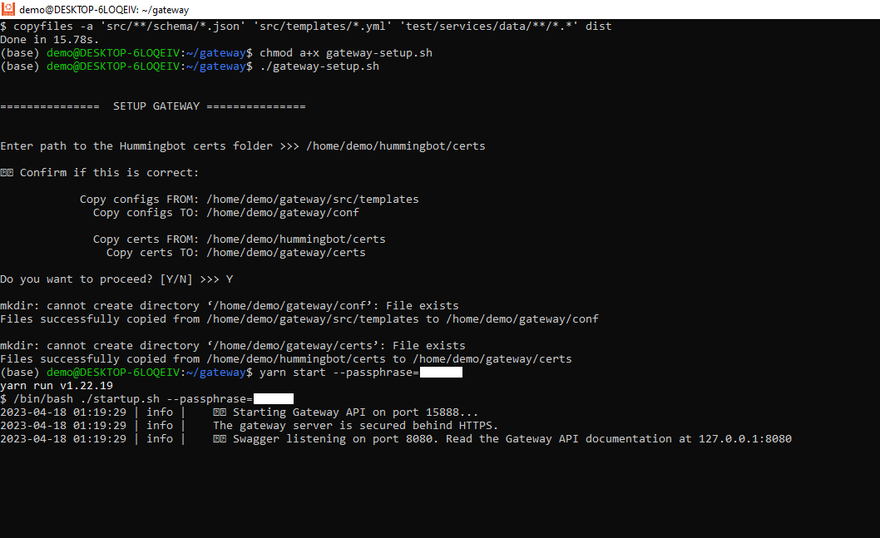
Running Gateway
After a successful installation using via either method, you should see Gateway running on the default port 15888: (Refer above screenshot)
yarn run v1.22.19
$ /bin/bash ./startup.sh --passphrase=<passphrase>
2023-04-18 01:19:29 | info |    ⚡️ Starting Gateway API on port 15888...
2023-04-18 01:19:29 | info |    The gateway server is secured behind HTTPS.
2023-04-18 01:19:29 | info |    ⚡️ Swagger listening on port 8080. Read the Gateway API documentation at 127.0.0.1:8080
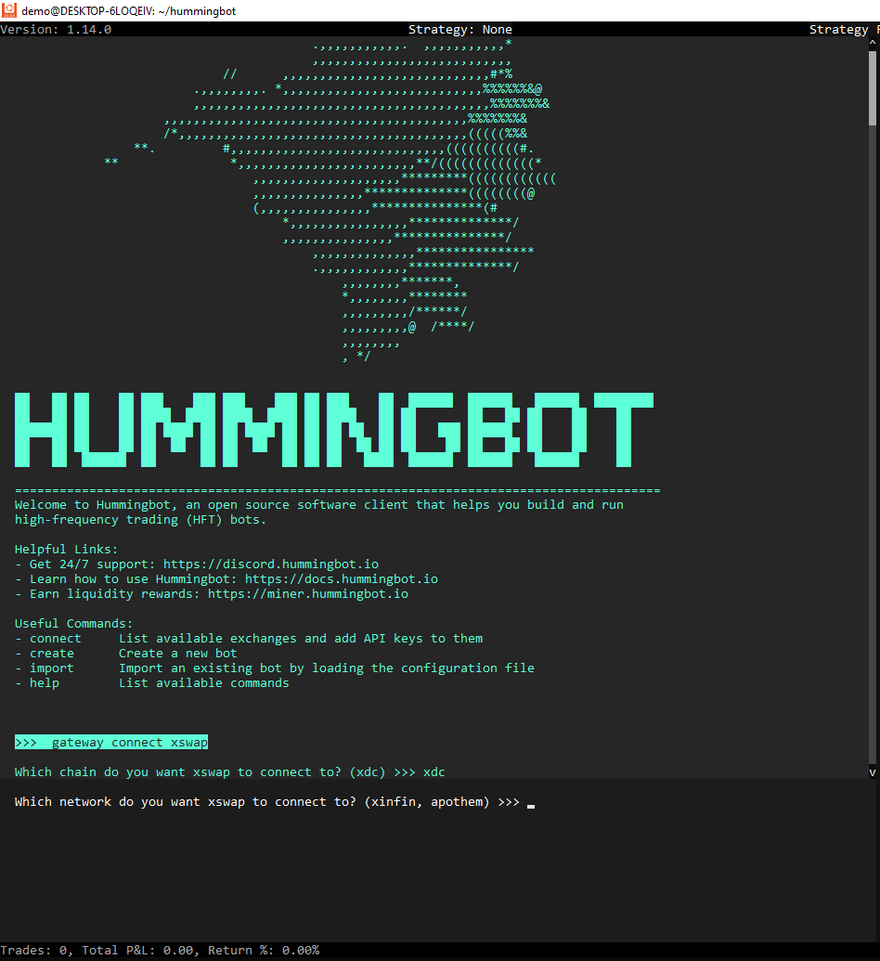
Now go back to your Hummingbot client or restart it if you have exited. In the upper right corner, you will be able to see the GATEWAY: ONLINE if your Hummingbot client is connected to Gateway.
After Gateway is running, see Testing to understand how to test the endpoints on a standalone basis before using it with Hummingbot.
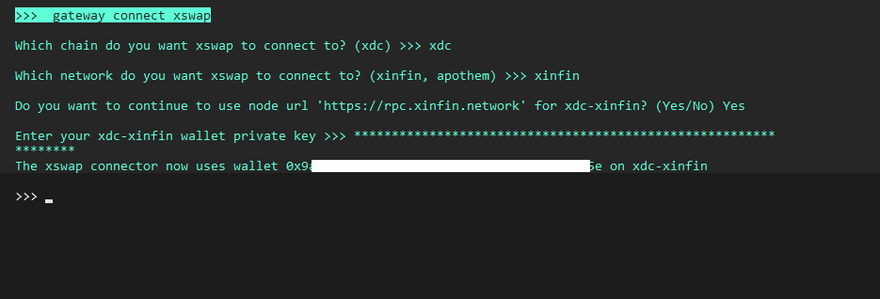
Connection
Note: Kindly select the suggested words only otherwise it will throw error.
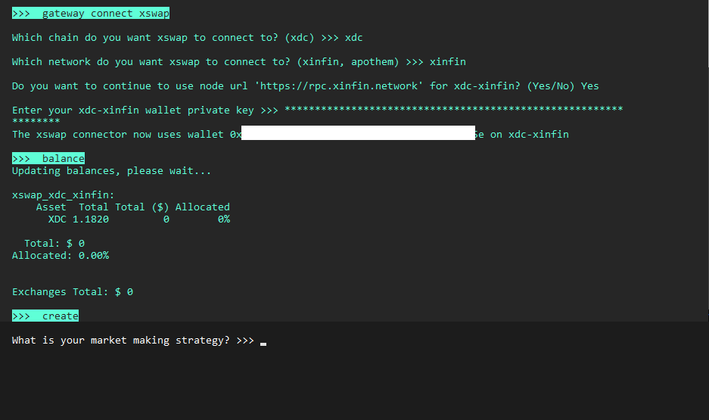
- To connect your wallet, run:
gateway connect xswap
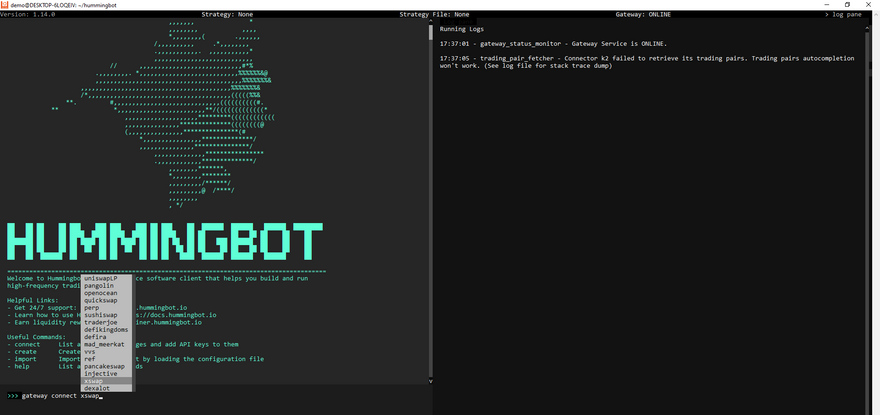
Now, select Which chain do you want xswap to connect to? (xdc) and Which network do you want xswap to connect to? (xinfin, apothem)
Now enter the xinfin-mainnet private key:
Note: Enter your Private key manually.
If connection is successful, you will notified by the below message:
The xswap connector now uses wallet [walletaddress] on xdc-xinfin
Great! You have connected to the wallet. Now you can start trading with your own strategies.
Use the “create” command to set up an “amm_arb strategy”.
- Now, to Create & Run the Strategy, refer below link: https://docs.hummingbot.org/gateway/running-dex-bots/#create-strategy

With the integration of Hummingbot's automated trading software, XSWAP DEX becomes a more efficient and effective platform for crypto traders. By automating their trades on XSWAP DEX with Hummingbot, traders can maximize their profits, save time, and capitalize on market movements without the need for constant monitoring. As the world of decentralized finance continues to grow, solutions like Hummingbot are essential for traders seeking to stay ahead of the curve and remain competitive in the fast-paced world of crypto trading.


Discussion (1)
sudo add-apt-repository "deb [arch=amd64] download.docker.com/linux/ubuntu $(lsb_release -cs) stable"