Chain IDE is a cloud-based IDE for creating decentralised applications to deploy on the XDC Network. It fastens the development cycle and has pre-installed plugins that save users time and effort. It provides a complete and ready-to-use environment for innovative contract development.
The following are general steps for deploying a storage smart contract on the XDC Apothem Test Network.
- Setting up a Wallet
- Write down a Storage Smart Contract
- Compile a Storage Smart Contract
- Deploy a Storage Smart Contract
- Create a Flattened File using Flattener Library
Verify a Storage Smart Contract
Contract Interaction
Setting up a Wallet
Install XDCPay 2.0 Wallet or MetaMask
When deploying a smart contract to a blockchain or when making a transaction to a deployed smart contract, a gas fee must be paid, and for that, we need to use a crypto wallet, which can be XDCPay 2.0 Wallet or MetaMask. If you want to use XDCPay 2.0, click here to get XDCPay 2.0 wallet, and if you want to continue with MetaMask Wallet, click here to install MetaMask. Head to the chainlist website https://chainlist.org, search for the XDC Apothem Network, click on connect wallet, and get the Apothem Network added to Metamask.
Obtaining Test XDC tokens
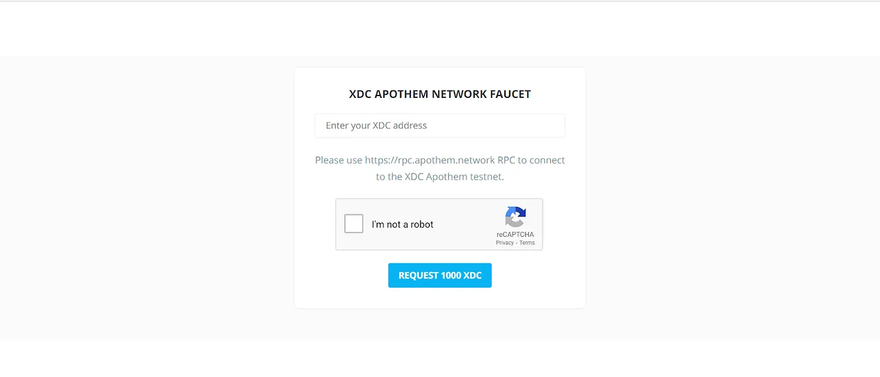
Once the XDC Apothem Test Network has been added to MetaMask, navigate to the XDC Network Faucet to receive test tokens. Tokens must pay gas fees to deploy and interact with the smart contract. On the faucet page, paste your MetaMask wallet address, click on you are not the robot and complete the verification Then click on Request 1000 XDC, and the faucet will send you 1000 XDC tokens to your metamask address.
Write down a Storage Smart Contract
You need to write down all the required functions that you want to implement in your storage smart contract. A general storage smart contract has the following functions:
- Store(): store value in variables
- retrieve(): returns the stored value
The ChainIDE team has prepared a simple storage smart contract that includes all the required functions; you may use this built-in template and add/delete functions according to your requirements.
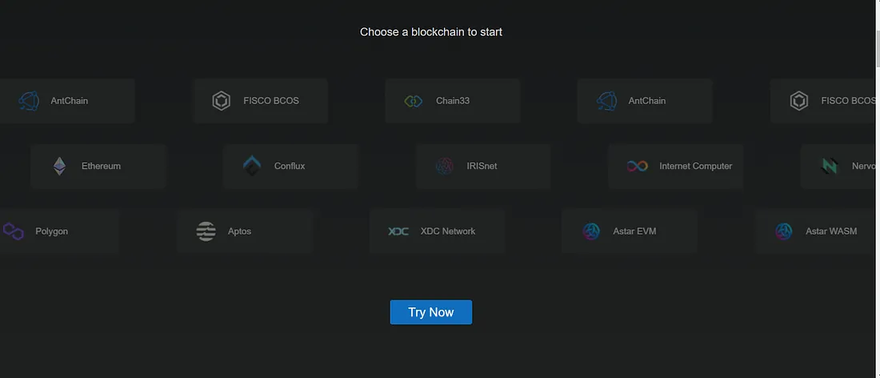
Visit the ChainIDE site and click on “Try Now”.
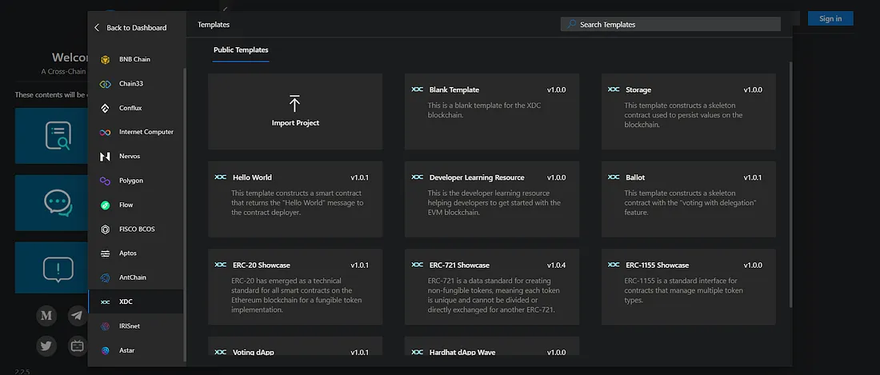
Then, click on “New Project” and select “XDC Network” and “Storage”.
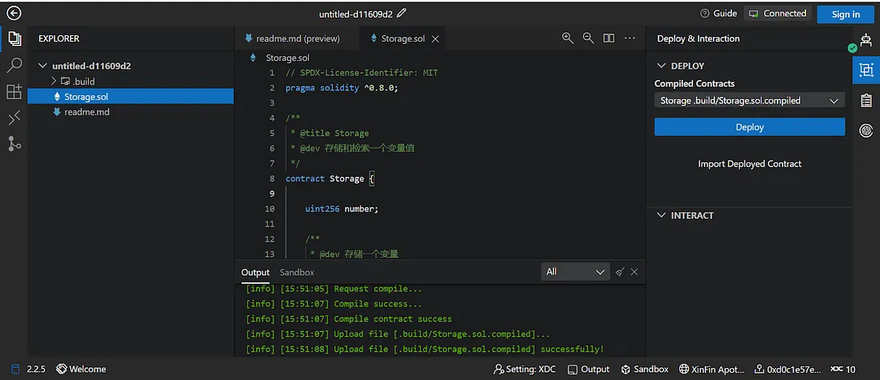
Compile a Storage Smart Contract
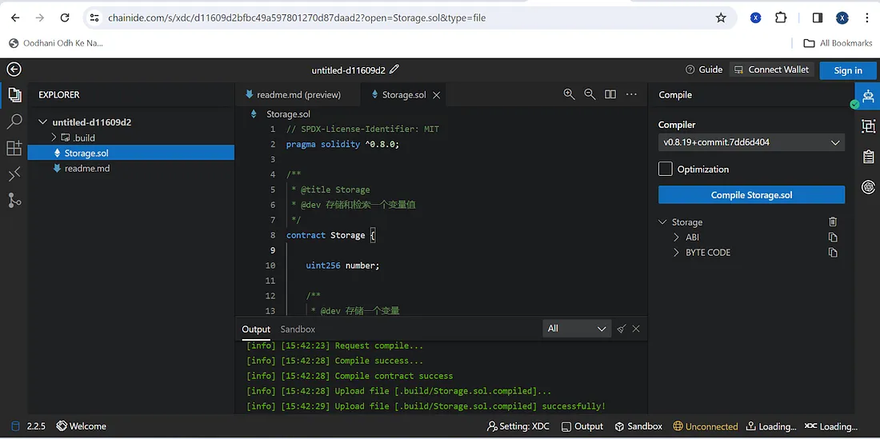
After you have completed your smart contract, it is time to compile it. To compile, navigate to the “Compile” module, choose an appropriate compiler version according to your source code, and press the “Compile” button. An ABI and bytecode for the source code are generated upon successful compilation. If there are some errors in your source code, they will be displayed under the output panel in the “Logger module”. You should carefully read the error, resolve it accordingly and recompile the contract Note down the compiler version as it would be needed when you verify your smart contract on the Apothem Test Network.
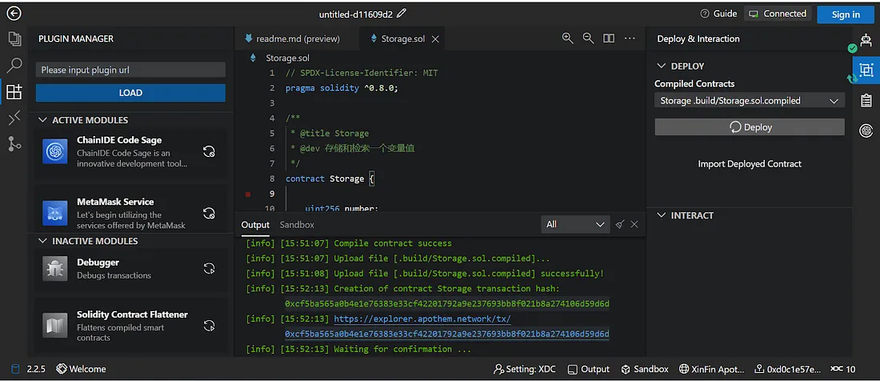
Deploy a Storage Smart Contract
After successful compilation, it’s time to deploy your compiled storage smart contract to the XDC Apothem Test Network. For that, you need to have a MetaMask installed, the XDC Apothem Test Network added to your wallet, and some testnet tokens to pay the transaction fee.
Navigate to the “Deploy & Interaction” module, choose the smart contract you want to deploy among the compiled smart contracts, and click the “deploy” button. For this tutorial, the Storage smart contract will be deployed. Here is the tx hash for the smart contract https://explorer.apothem.network/tx/0xcf5ba565a0b4e1e76383e33cf42201792a9e237693bb8f021b8a274106d59d6d#overview
Create a Flattened File using Flattener Library.
To verify a smart contract that imports other smart contracts, we need to create a flattened file, a flattened file including all the source codes of imported contracts in a single file. To create a flattened file, you need to add a “Flattener” plug-in.
Once the Flatterner plug-in is activated, you’ll be able to access it as a separate module, as shown in the figure below. Choose the compiled file, and click on the flatten button to create a flattened file. Once the flattened file is created, it will be automatically copied to the clipboard. You may paste it to a file and save it for later usage.
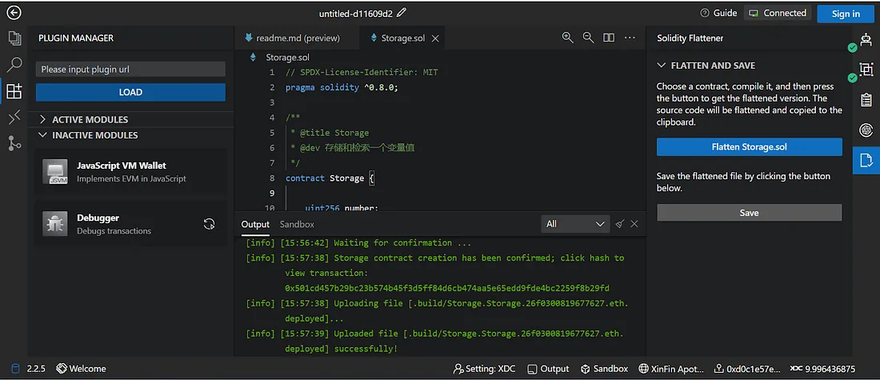
If you want to save the flattened file, click the save button, and a flattened file will be saved in the current repository.
The saved flattened file can be accessed under the explorer module.

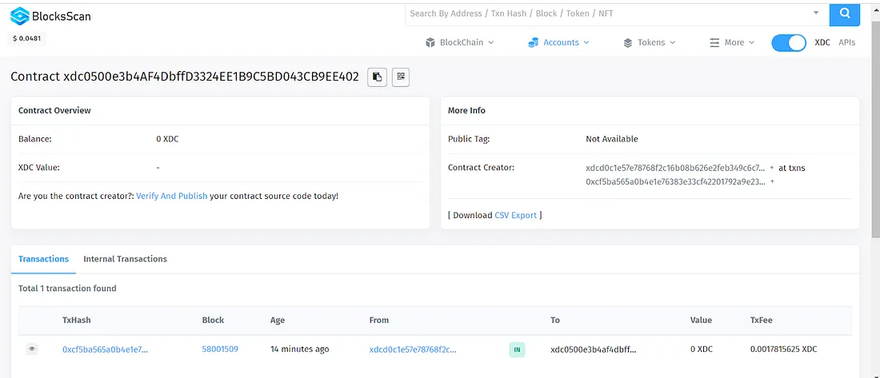
Verify a Smart Contract
To verify a smart contract, visit XDC Apothem Network Explorer and search for the deployed smart contract using the contract address.
Click on the “verify and publish” link in the contract overview.
Once you click the verify and publish link, select the compiler type and version.
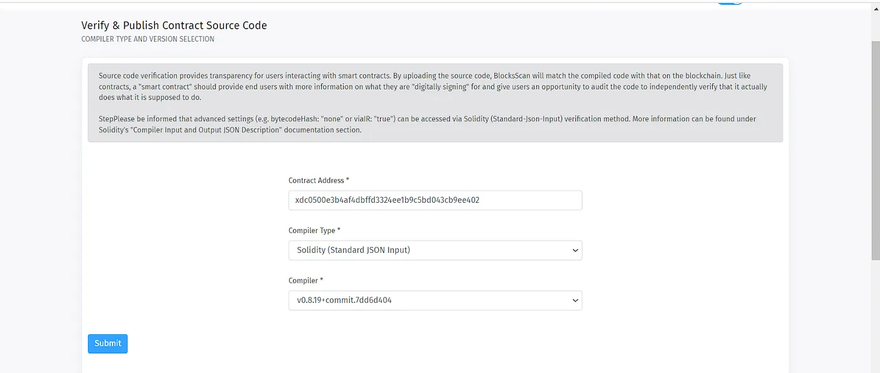
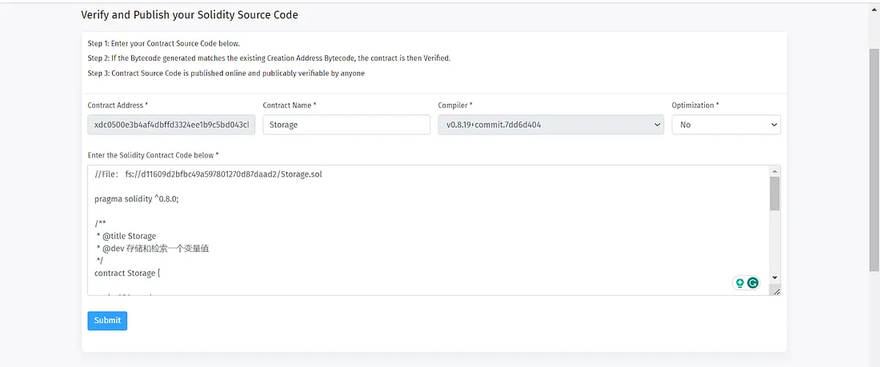
After entering the compiler version and selecting the compiler type, paste Storage_falt.sol and click submit.
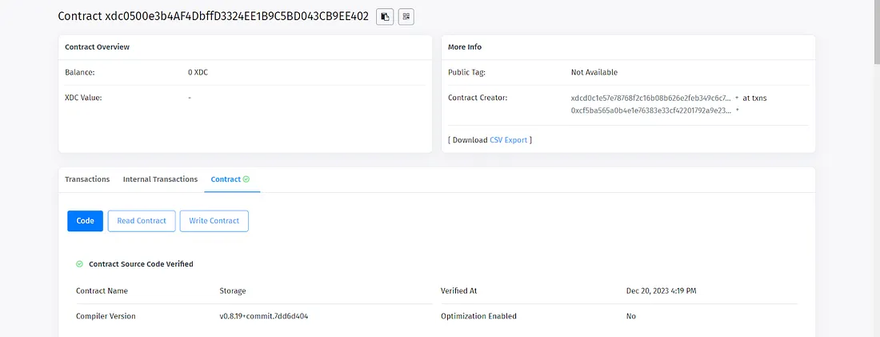
If there are no issues with your smart contract, it will be verified, and you’ll see an image similar to the one shown below.
Contract Interaction
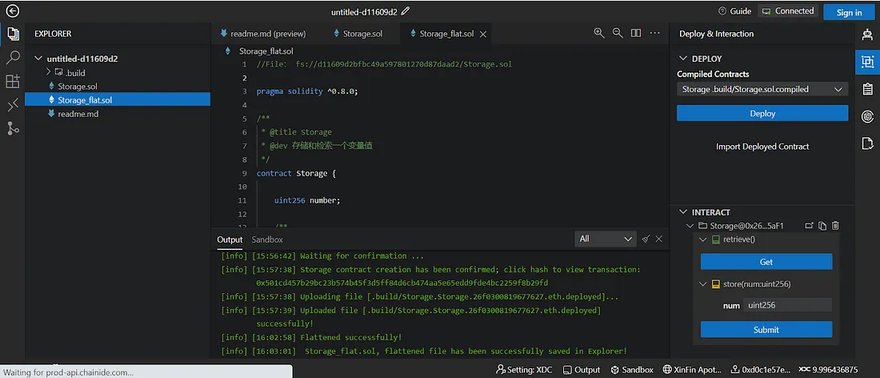
After successful deployment and verification, all the functions in the deployed smart contract can be seen in the “INTERACT” panel. In our scenario, we have two functions: Store() which is used to store the value of the blockchain, and Retrieve() to retrieve stored data from the blockchain.
“In conclusion, our journey through Chain IDE has empowered us to successfully deploy and verify our smart contract on the XDC Apothem Network. The seamless integration of Chain IDE, XDCPay 2.0 Wallet or MetaMask, and the robust functionalities of the XDC Network have opened doors to endless possibilities in decentralized application development.
As you embark on your smart contract ventures, remember that the XDC Network community is here to support you. If you have any questions, seek guidance, or want to engage in discussions, please join the conversation at https://xdc.dev.


Discussion (0)