![Cover image for [Informative] Navigating the Brave Wallet: A Step-by-Step Guide to XDC Network Integration](https://www.xdc.dev/images/Cqj4UvS-xClaJlX1Vin7EAWJ30ygRiQjSlMJduQpkLQ/s:1000:420/mb:500000/ar:1/aHR0cHM6Ly93d3cu/eGRjLmRldi91cGxv/YWRzL2FydGljbGVz/L3EycDJ4Mm1lODd5/bGoxbDloaXZoLnBu/Zw)
Cryptocurrencies and blockchain technology have changed the way we handle financial transactions. Among the numerous cryptocurrencies and blockchain networks available, XDC Network has gained prominence, and its integration with Brave Wallet offers a seamless experience for users. In this guide, we will walk you through what Brave Wallet and XDC Network are, and how to use XDC Network in the Brave Wallet.
What is Brave Wallet & XDC Network?
Brave Wallet: Brave Wallet is a cryptocurrency wallet integrated with the Brave browser, known for its privacy-centric features and secure browsing. This wallet allows users to manage, send, and receive cryptocurrencies seamlessly.
XDC Network: The XDC Network, powered by XinFin, is a blockchain ecosystem designed to provide fast, secure, and cost-effective asset transfers. It has gained recognition for its scalability, low transaction costs, and robust security features.
Why Use XDC Network?
There are several reasons to consider using XDC Network:
- Fast Transactions: XDC Network offers high-speed transactions, ensuring that your transfers are processed quickly.
- Low Transaction Costs: The network boasts low transaction fees, making it an economical choice for various use cases.
- Scalability: XDC Network is highly scalable, capable of handling a large volume of transactions without compromising efficiency.
- Interoperability: XDC Network is compatible with Ethereum's EVM (Ethereum Virtual Machine), allowing for a smooth transition for Ethereum developers and users.
Steps to Use XDC Network in Brave Wallet:
Step 1: Access the Brave Wallet by Unlocking It
Ensure you have the Brave browser installed and set up. Unlock the Brave Wallet by following the necessary authentication steps.

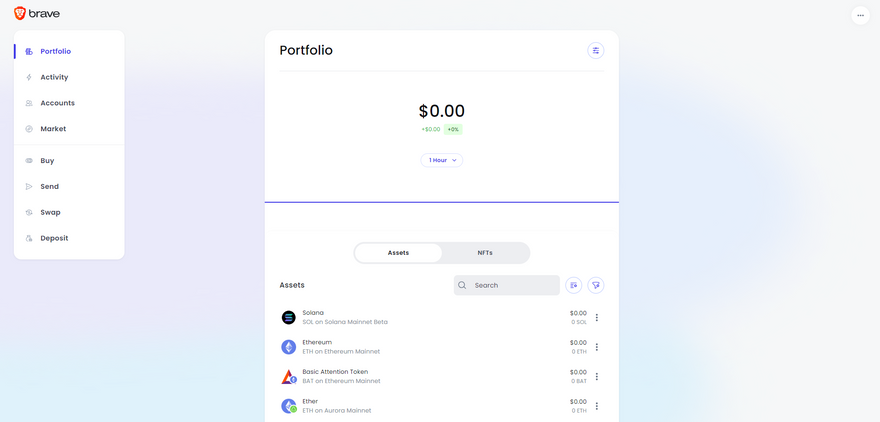
Step 2: Access the Portfolio Screen
Once you've accessed the wallet, you will see your portfolio screen, displaying your cryptocurrency balances.
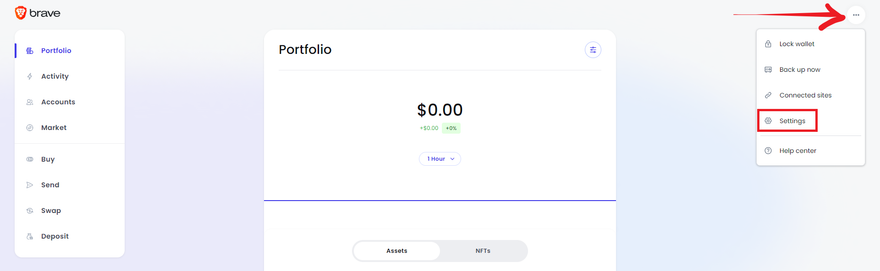
Step 3: Access the Settings Tab
To add XDC Network, go to the "Setting" tab. You can access this tab by typing "brave://settings/wallet" in the browser's address bar.
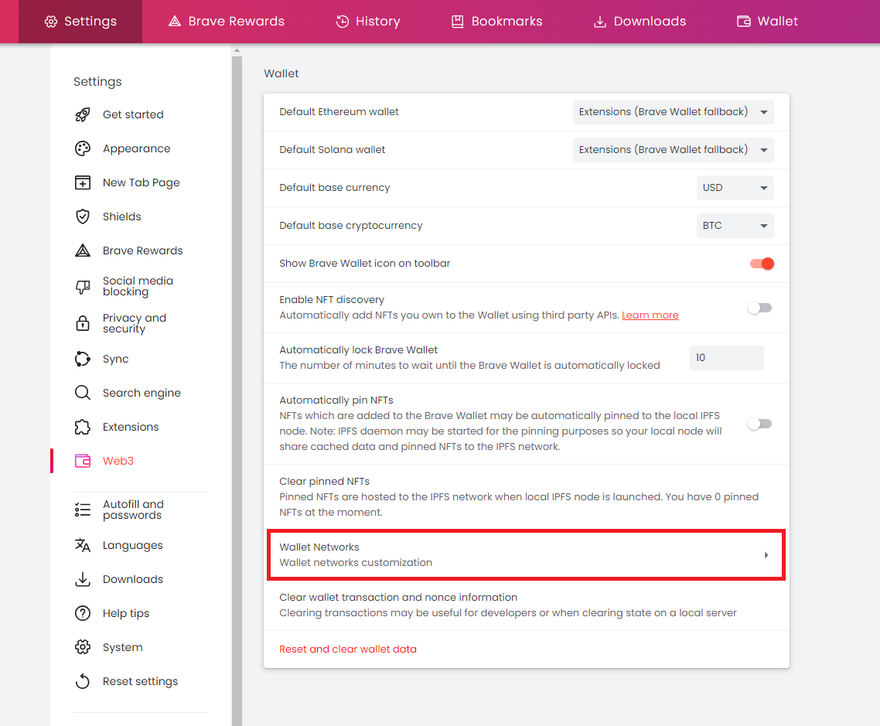
Step 4: Find Wallet Networks Customization:
In the "Setting" tab, look for the "Wallet Networks" customization section.
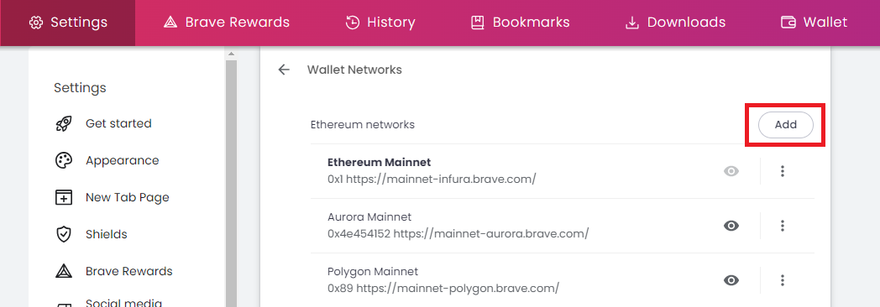
Step 5: Add the XDC Network
To add the XDC Network, click on the "Add" button.
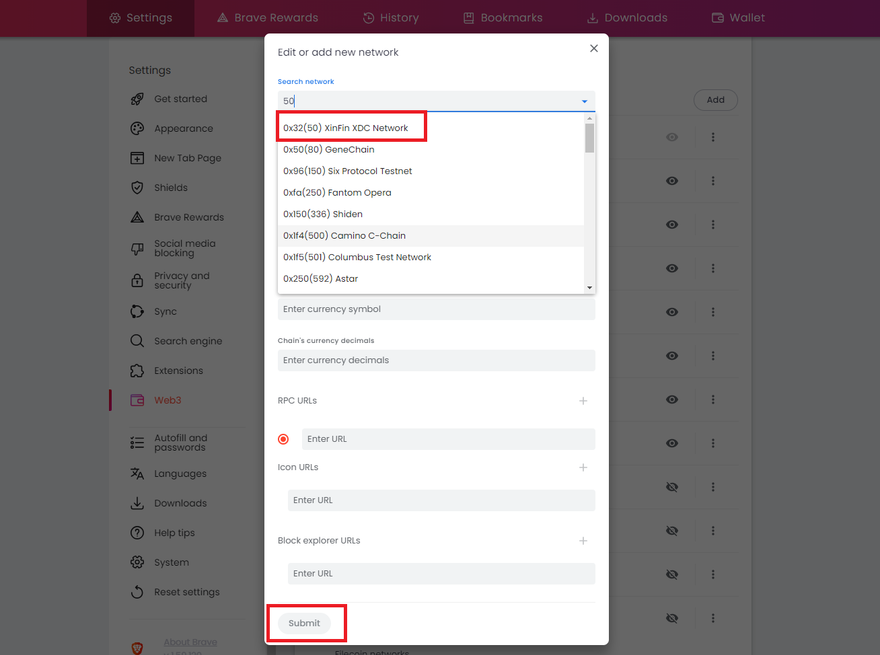
Step 6: Enter Network Details
You will be prompted to enter network details. Enter "50" for XDC Mainnet and "51" for XDC Apothem Network. Once you've selected the network, click on the "Submit" button.
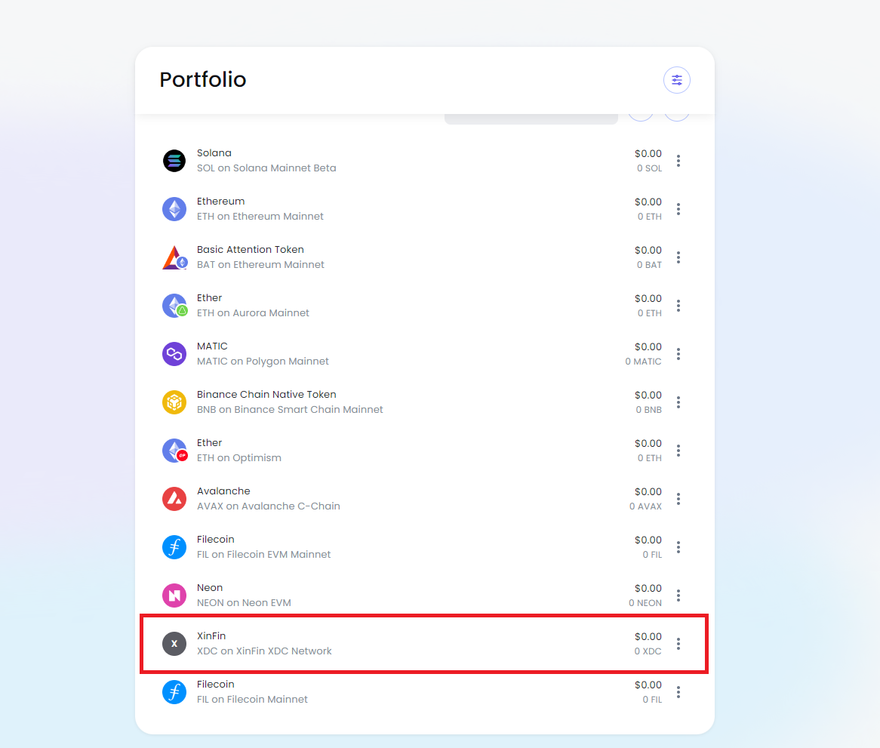
Step 7: XDC Mainnet Added
Following these steps, the "XDC Mainnet" will be successfully added to your Brave Wallet.
By following the steps outlined in this guide, you can easily access and utilize the XDC Network within the Brave Wallet, unlocking the potential for a wide range of financial and decentralized applications. Whether you're sending, receiving, or managing your XDC assets, the combination of Brave Wallet and XDC Network offers a user-friendly and powerful solution for your cryptocurrency needs.


Discussion (1)
This is a great addition to the Brave wallet!