What is Vyper?
Vyper is a programming language for writing smart contracts; Vyper targets Ethereum Virtual Machine (EVM). It was designed to be an alternative to Solidity, which is the most popular language for writing smart contracts. Vyper is a high-level language that is similar to Python in syntax and structure but with some important differences that make it better suited for writing secure and auditable smart contracts.
Why Vyper?
Vyper’s focus on security and simplicity makes it a popular choice for developers who want to build robust and reliable decentralized applications.
There are several reasons why someone might choose to use Vyper to deploy a smart contract:
- Security
- Easier to read and audit
- Lower gas costs
- Growing community
Vyper is a smart contract language designed to protect against vulnerabilities and attacks. It has a simpler syntax and fewer features than Solidity, making it easier to read and audit. It also requires less gas than the Solidity code, leading to lower transaction fees and more efficient use of resources. The Vyper community is growing, and many resources and tools are available to help developers learn and work with the language.
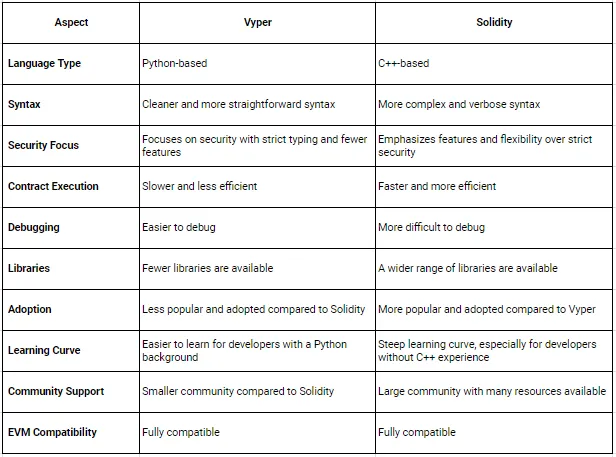
Let’s check out some comparison aspects of Vyper vs. Solidity:
The requirements to deploy a smart contract on XDC Network — EVM Compatible network:
Let’s start! We will use the “XDC Apothem network” to deploy a smart contract here.
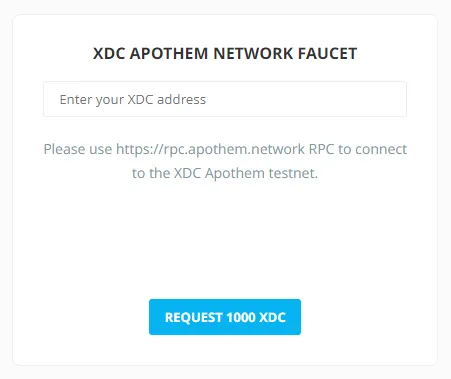
- To get some test funds, visit XDC Faucet, Enter your XDC wallet address, validate the Captcha, and click the “Request XDC” button.
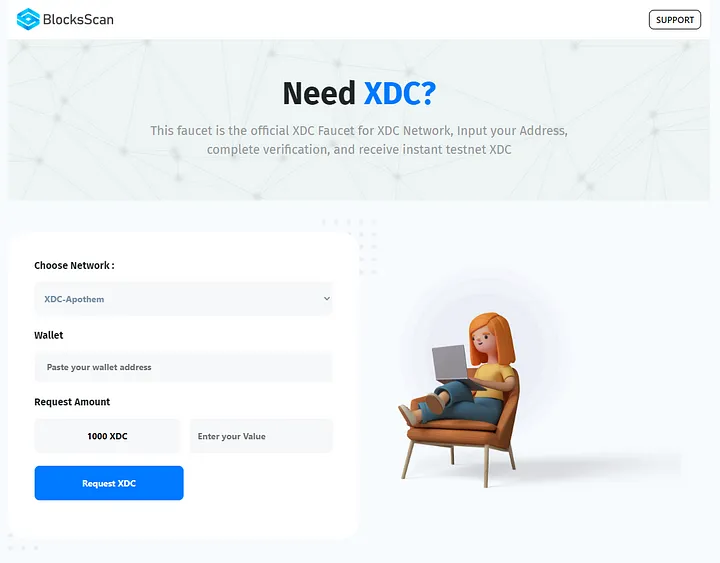
- To get more than 1000 XDC, you can visit XDC-BlocksScan Faucet.
Installation of Vyper
- Python's PIP package manager is the easiest way to install Vyper on your system. Vyper requires Python 3.6 or higher installed on your system; you can check if Python is installed on not by typing the following in your terminal/cmd:
$ python --version
Note:
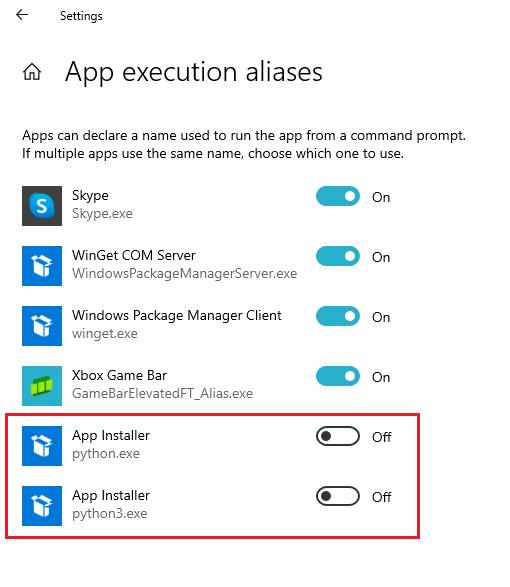
- After entering the “python --version” command, if below line appears:
_C:\Users\...\>python --version
Python was not found; run without arguments to install from the Microsoft Store, or disable this shortcut from Settings > Manage App Execution Aliases._
then Go to -> "start" and type "Manage App Execution Aliases". Go to it and turn off "Python" (Refer the screenshot).
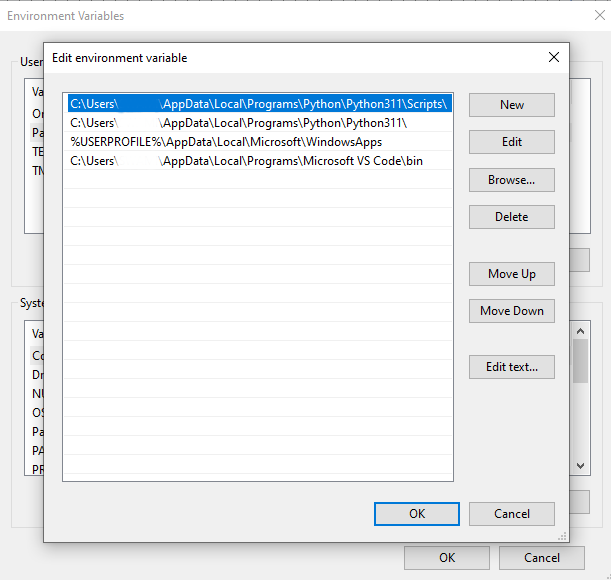
- Check the “System environment variable PATH”
- Now, let’s install Vyper using PIP. Type the following in your terminal/cmd:
$ pip install vyper
- To check if Vyper is installed completely or not by, typing the following in your terminal/cmd:
$ vyper --version
Let’s visit Remix and make a new Vyper file Hello.vy and paste the following vyper code:
Note: vy is the file extension for Vyper
# @version ^0.2.0
greet: public(String[100])
@external
def __init__():
self.greet = "Hello XDC Community!"
Explanation of the code above:
Line 1: Specifying that version of Vyper this contract.
Line 2: Declaring a public variable greet, which will be stored on the blockchain, the data type of greet is a string with a maximum length of the string to be 100.
Line 3–4: Marking our init function as @external means it can only be called via transactions or other contracts. Defining our init function, a pythonic constructor called upon object creation will initialize the greet variable.
Line 5: Passing a string “Hello XDC Community!” to our variable greet.
Now we will use Remix with Vyper
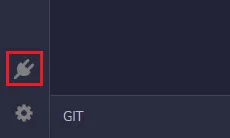
- To run the Vyper smart contract on Remix, Need to activate the Vyper plugin by visiting the Plugin icon.
- Search for vyper and click on the Activate button.
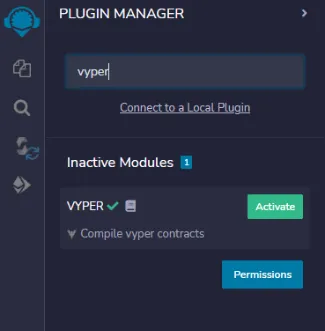
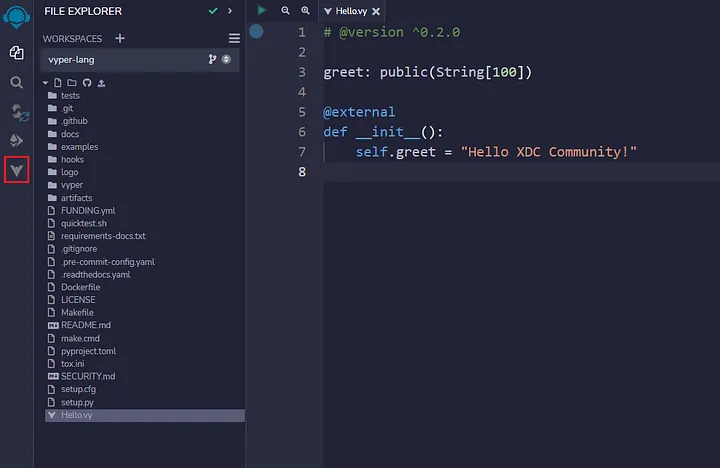
Once activated, users will be able to see the “V” shape icon added on the menu bar. Now, open the created file “Hello.vy”
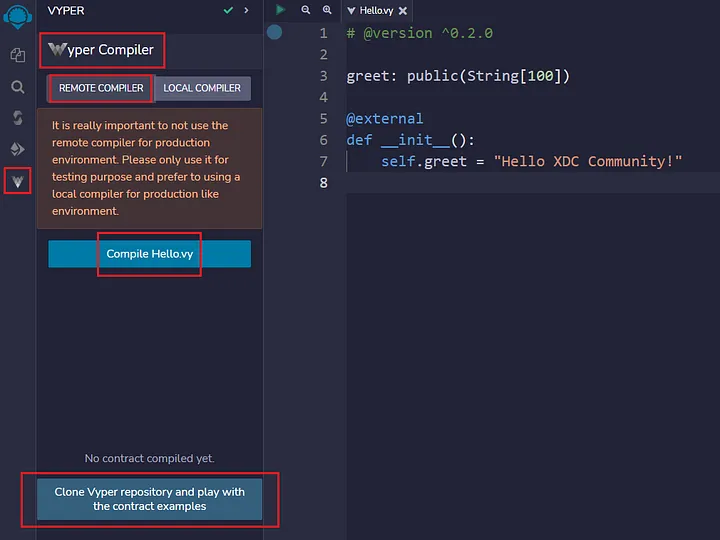
To compile this smart contract, visit the “Vyper Compiler” tab, select Remote Compiler, and click the Compile Hello.vy button.
Note: If you have not cloned the Vyper repository, click the “Clone Vyper repository…” button.
Once compiled successfully, users can see the green tick on the V shape icon. Let’s connect XDCPay to deploy the “Hello.vy” contract on XDC Apothem Network.
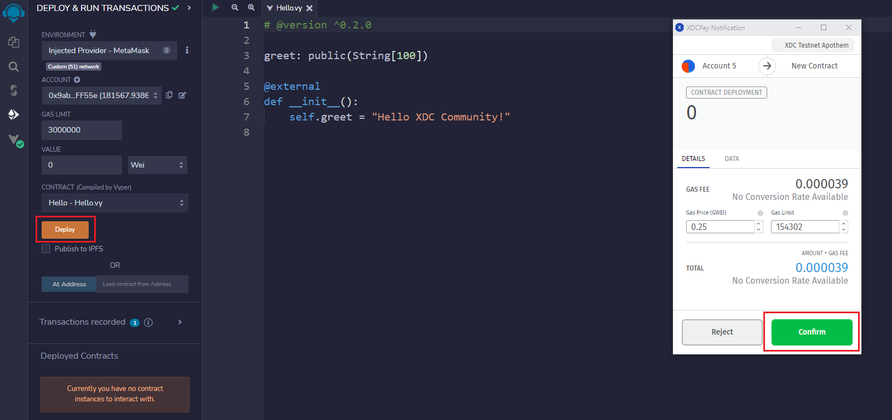
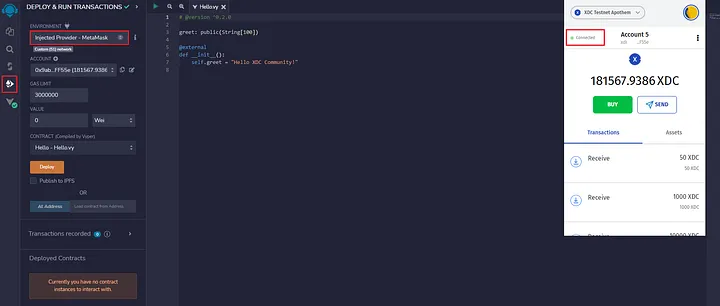
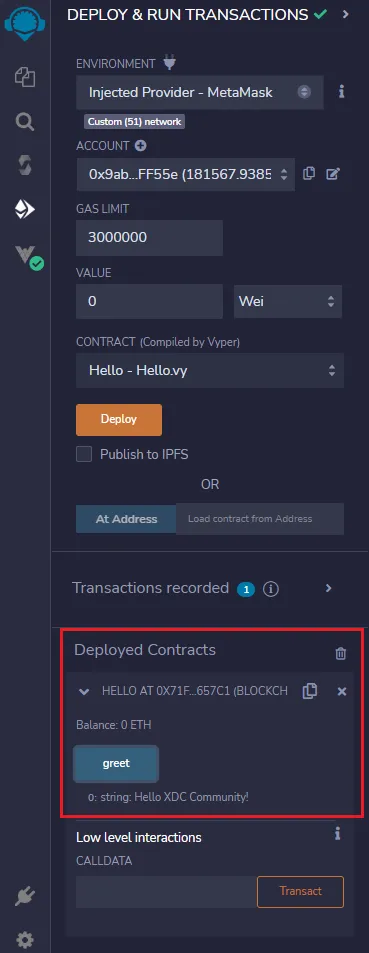
Visit the “Deploy & Run transaction” screen, select the Environment as “Injected Provider,” and connect your XDCPay to Remix.
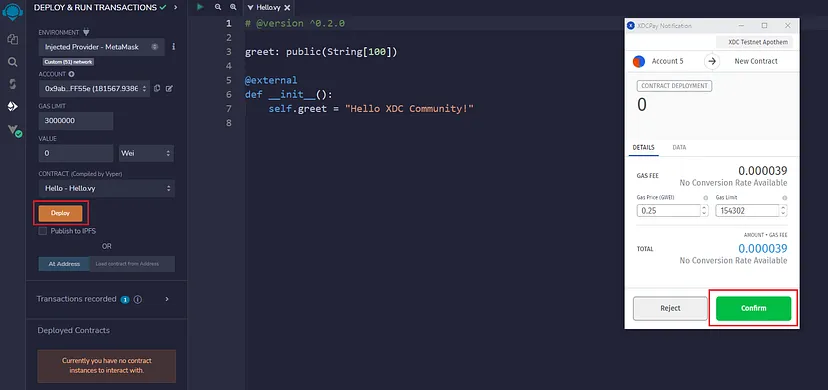
Click on the Deploy button and sign the transaction by clicking on the Confirm button of XDCPay.
Yes! We have successfully deployed a “Hello.vy” vyper contract.
By clicking on the greet function, users will get the greeting message.
Important Links related to XDC Network
Explorer links for Testnet:
Explorer links for Mainnet:
Refer to the Vyper Doc: https://docs.vyperlang.org/en/stable/index.html
For any developer support, post your queries here at XDC.Dev


Discussion (2)
Title is misleading, it should be how to deploy a hello world contract
But it has content for how to use vyper to write smartcontract on xdc network, so how does the headling is misleading?