Tutorial on how to use XinFin Remix, a Solidity IDE used to write compile, and debug Solidity code, to develop smart contracts for the XinFin Hybrid blockchain.
XinFin Remix is a Solidity IDE that’s used to write, compile, and debug Solidity code. Solidity is a high-level, contract-oriented programming language for writing smart contracts. It was influenced by popular languages such as C++, Python, and JavaScript.
IDE stands for Integrated Development Environment and is an application with a set of tools designed to help programmers execute different tasks related to software development such as writing, compiling, executing, and debugging code.
What’s a Smart Contract/Dapp?
A smart contract is a trust-less agreement between two parties that makes use of blockchain technology, to enforce the parties to adhere to the terms, rather than relying on the traditional ways such as trusting a middleman or using laws to handle disputes.
Dapp stands for decentralized application and is a web3 application that can have a front-end written in traditional languages such as JavaScript, HTML, CSS, and a smart contract (as back-end code) which runs on the blockchain. So you can simply think of a Dapp as the front end plus the associated blockchain smart contract(s).
Unlike the smart contract deployed on the blockchain itself, the front end of a Dapp can be either hosted on a centralized server like a CDN or on decentralized storage like Swarm.
Using the In-Browser XinFin Remix IDE
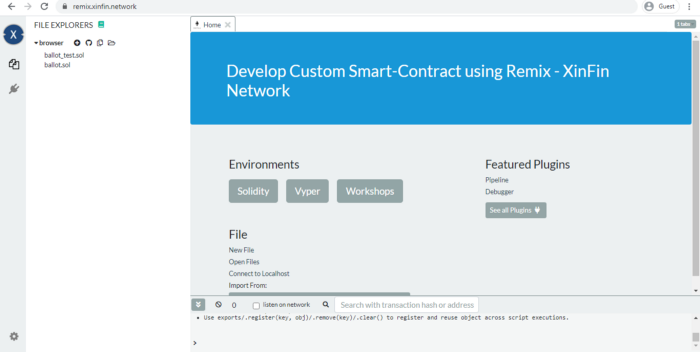
You can access the Remix IDE from your web browser without any special installation. Visit https://remix.xinfin.network/ and you’ll be presented with a complete IDE with a code editor and various panels for compiling, running, and debugging your smart contracts. You’ll have a default example Ballot contract that you can play with.
XinFin Remix Panels
After seeing how to open the XinFin Remix IDE, let’s now see the various panels composing the IDE.
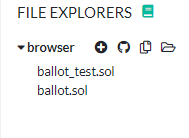
File Explorer
The file explorer provides a view with the created files stored in the browser’s storage. You can rename or delete any file by right-clicking on it, then choosing the right operation from the context menu.
Please note that the file explorer uses the browser’s local storage by default, which means you can lose all your files if you clear or the operating system automatically clears the storage.
Now let’s see the different actions that you can perform using the buttons at the top of the explorer.
Creating/Opening Files in XinFin Remix
You can create a new file in the browser local storage using the first button with the + icon on the top left. You can then provide a name in the opened dialog and press OK.
Using the second button from the top left, you can open an existing Solidity file from your computer file system into the XinFin Remix IDE. The file will also be stored in the browser’s local storage.
Publishing Explorer Files as GitHub
Using the third and fourth buttons from top left, you can publish files from the IDE as a public GitHub.
Copying Files to Another Instance of XinFin Remix IDE
Using the fifth button from the top left, you can copy files from the local storage to another instance of XinFin Remix by providing the URL of the instance.
Connecting to the Local File System
The last button can be used to connect the XinFin Remix IDE to your local file system.
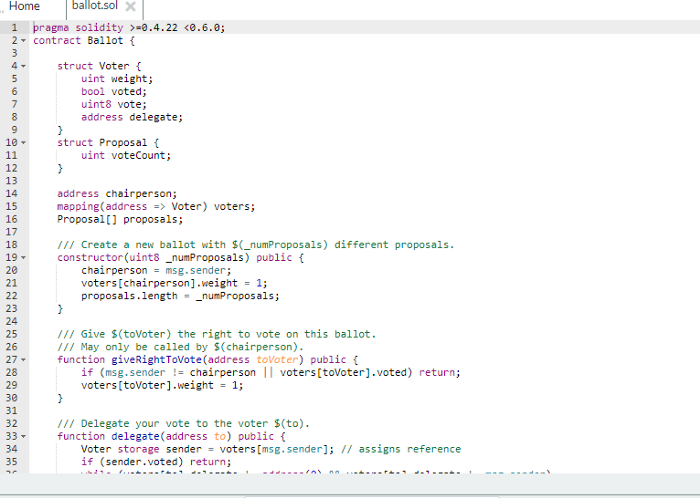
Solidity Code Editor
The Solidity code editor provides the interface where you can write your code with many features such as syntax highlighting, auto-recompiling, auto-saving, etc. You can open multiple tabs and also increase/decrease the font size using the +/- button in the top-left corner.
The Solidity code editor provides the interface where you can write your code with many features such as syntax highlighting, auto-recompiling, auto-saving, etc. You can open multiple tabs and also increase/decrease the font size using the +/- button in the top-left corner.
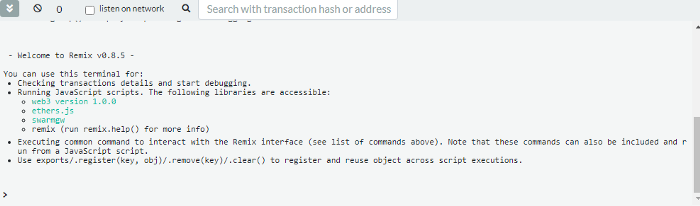
Terminal
The terminal window below the editor integrates a JavaScript interpreter and the web3 object. You can execute JavaScript code in the current context, visualize the actions performed from the IDE, visualize all network transactions or transactions created from the XinFin Remix IDE, etc. You can also search for data in the terminal and clear the logs.
Tabs Panel
The Tabs panel provides many tabs for working with the IDE:
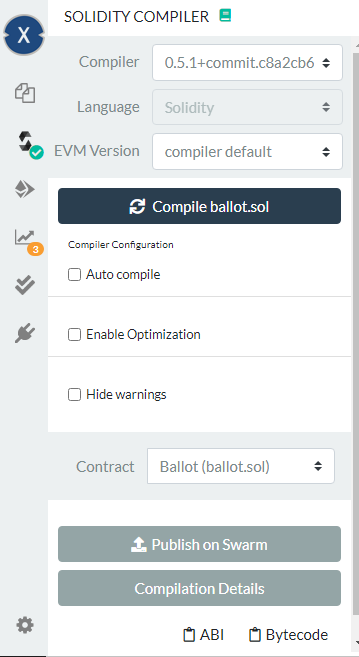
- The Compile tab: used for compiling a smart contract and publishing on Swarm
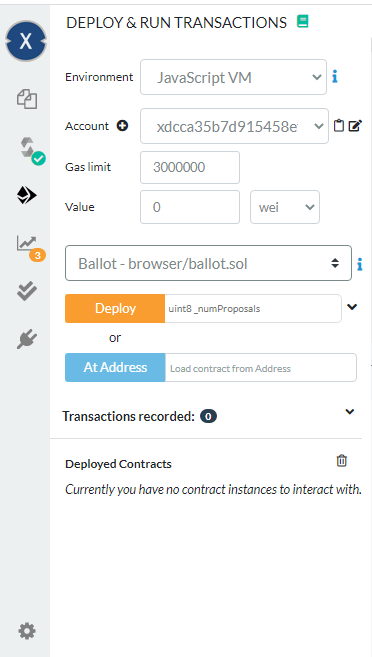
- The Run tab: used for sending transactions to the configured environment
- The Settings tab: used for updating settings like the compiler version and many general settings for the editor
- The Debugger tab: used for debugging transactions
- The Analysis tab: used for getting information about the latest compilation
- The Support tab: used for connecting with the XinFin Remix community.
XinFin Remix Execution Environments
The XinFin Remix IDE provides many environments for executing the transactions:
- JavaScript VM: a sandbox blockchain implemented with JavaScript in the browser to emulate a real blockchain.
- Injected Web3: a provider that injects web3 such as XinPay
- Web3 Provider: a remote node which can be used to connect to the real network, or to your private blockchain directly without XinPay in the middle.
Using XinFin Remix IDE to Compile and Deploy a Smart Contract
For the sake of demonstrating what we can achieve using XinFin Remix IDE, we’ll use an example contract and we’ll see how we can:
- compile the contract in Remix IDE
- See some warnings emitted by the compiler when best practices aren’t followed
- Deploy the contract on the JavaScript EVM (Ethereum Virtual Machine)
- Make transactions on the deployed contract
- See example reads and writes in the terminal IDE.
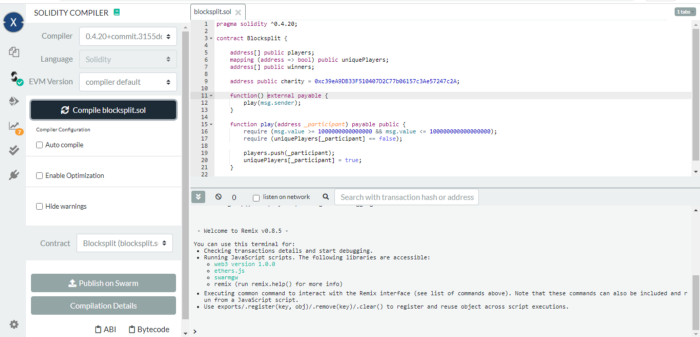
We’ll use the following example contract from this tutorial which implements a blockchain raffle:
pragma solidity ^0.4.20;

contract Blocksplit {

address[] public players;

mapping (address => bool)public uniquePlayers;

address[] public winners;

address public charity = 0xc39eA9DB33F510407D2C77b06157c3Ae57247c2A;

function() external payable {

play(msg.sender);

}

function play(address _participant) payable public {

require (msg.value >= 1000000000000000 && msg.value <= 100000000000000000);

require (uniquePlayers[_participant] == false);

players.push(_participant);

uniquePlayers[_participant] = true;

}

}
The contract declares some variables, such as:
- The player’s array variable, which holds the addresses of the raffle participants.
- The unique players mapping, which is used to save unique players
- so players don’t participate multiple times from the same address. (An address will be mapped to a boolean, true or false, value indicating if the participant has already participated or not.)
- The winner’s array variable, which will hold the addresses of the winners.
- The charity variable, which holds a hardcoded address of a charity where profits will go.
It also declares:
- A fallback function marked as payable, which enables the smart contract to accept payments.
- A play() function that enables participants to enter the raffle by providing an address.
Now, go ahead and open the XinFin Remix IDE from remix.xinfin.network
Next, create a new file by clicking on the button with the + icon.
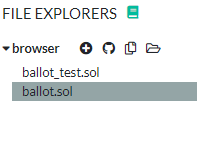
A new dialog will pop up Enter a name for your file (blocksplit.sol), then press OK:

A new tab will be opened in the code editor where you can start writing your contract. So just copy and paste the previous contract code in there.
First, start by compiling the contract. From the Compile tab click Start to compile button.
Next, let’s deploy the contract with our JavaScript VM. Switch to the Run tab, and select JavaScript VM from the dropdown menu.
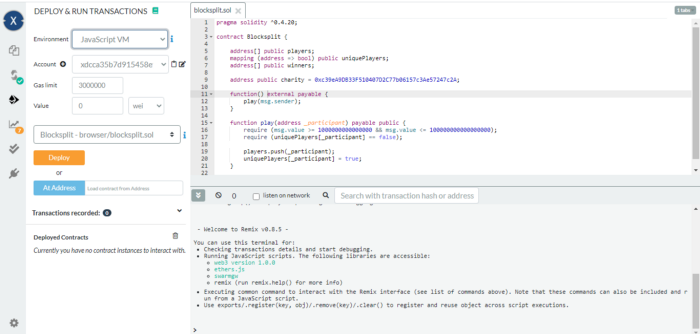
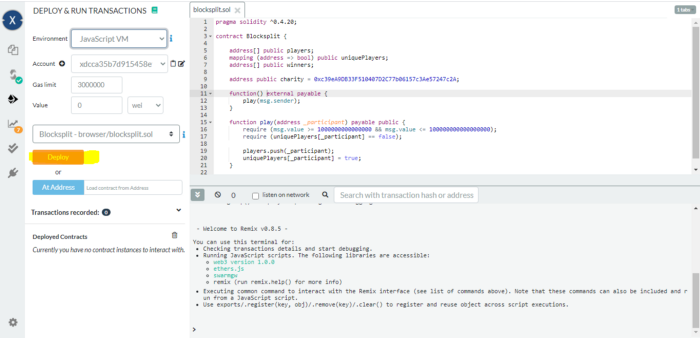
Next, click the Deploy button below the contract name.
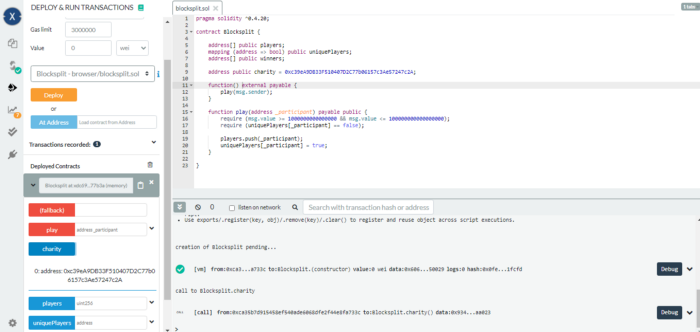
Once the contract is deployed successfully on the JavaScript VM, a box will be opened on the bottom of the Run tab.
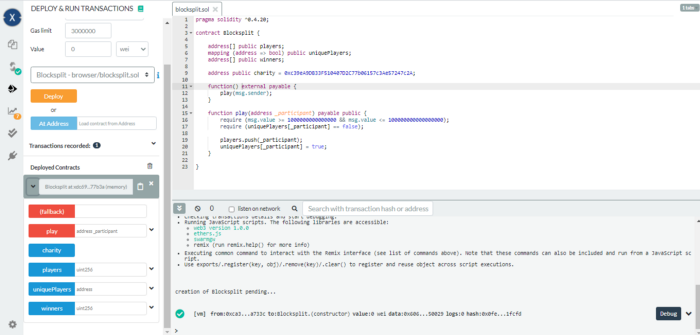
Under the name and address of the deployed contract, we have some buttons with red and blue colors. Red buttons refer to actions that cause a write to the blockchain (in our case the fallback and play functions) and need a transaction, where blue buttons refer to reading from the blockchain (charity, players, unique players and winners public variables we defined in the contract’s code).
You’ll also see a similar message to the following screenshot in the IDE terminal.
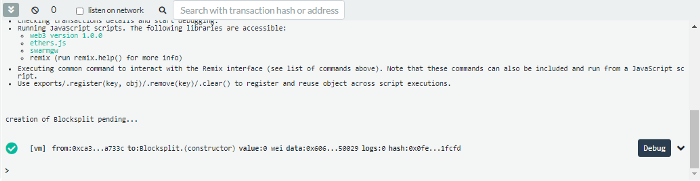
For now, the only variable that holds value is the charity variable, because the address is hardcoded in the code so if you click on the corresponding button you’ll get the value of that address.
Conclusion
We’ve introduced you to the Remix IDE for developing smart contracts for the XinFin Hybrid blockchain.
With a basic introduction behind you, feel free to dive in deeper and experiment with changing the code and exploring the different functions and tabs the editor offers.
About XinFin Hybrid Blockchain
XinFin Hybrid Blockchain is an open-source enterprise-ready Hybrid Blockchain for Global Trade and Finance. It combines the power of public and private Blockchains with interoperable smart contracts. XinFin is fully EVM compatible. For more information on XinFin, please visit www.xinfin.org or learn more about XinFin in this video.


Discussion (0)