The MetaMask is a wallet that supports EVM blockchains and is utilised on numerous DApp websites. The MetaMask includes a QR-based mechanism for connecting with accounts in hardware wallets in addition to its own account.
The D’CENT App offers a feature that uses the QR-based protocol to connect D’CENT accounts (EVM) with Metamask. Users can create Solidity smart contracts using XinFin Remix, a web browser-based Integrated Development Environment (IDE), and then compile, deploy, and execute those smart contracts on the XinFin Blockchain Network.
The steps to deploy a smart contract with the XinFin Remix IDE by connecting Metamask via the DCENT wallet software app will now be covered.
Let’s start with Metamask.
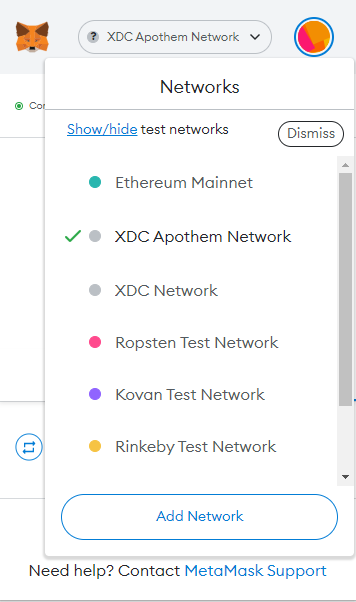
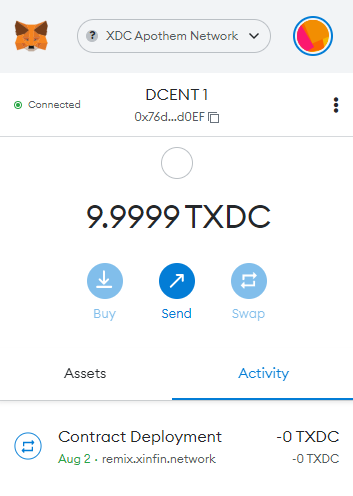
Once you have unlocked your Metamask wallet, click on the Network button and select XDC Apothem Network.
Note: If you have not added the Apothem Network, you can add it through the ‘Add Network’ button below the network list.
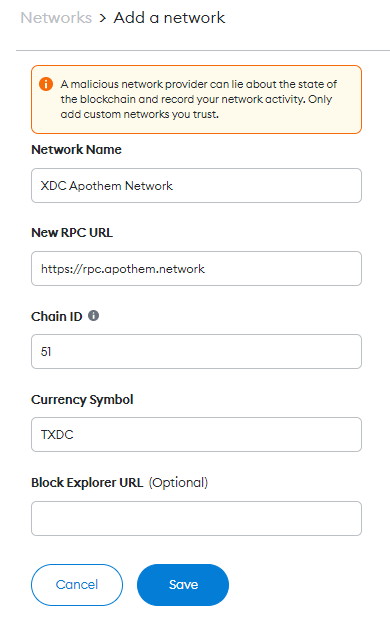
Here are the details that need to be entered while adding the network:
Network Name: XDC Apothem Network
New RPC URL: https://rpc.apothem.network
Chain ID: 51
Currency Symbol: TXDC
Block Explorer URL: https://apothem.blocksscan.io/
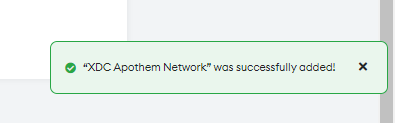
After adding the network, you will be notified that “XDC Apothem Network” was successfully added.
How to connect D’CENT Wallet with MetaMask
Note:
- This function is supported only in Biometric Wallet and App Wallet(Software) mode. Minimum supported version.
- Biometric Wallet firmware version: 2.19.7 or higher
D’CENT App version: Android (5.16.1 or higher) / iOS (5.16.2 or higher)
The QR-based protocol supported by the MetaMask can only be used when a camera is installed on the computer.
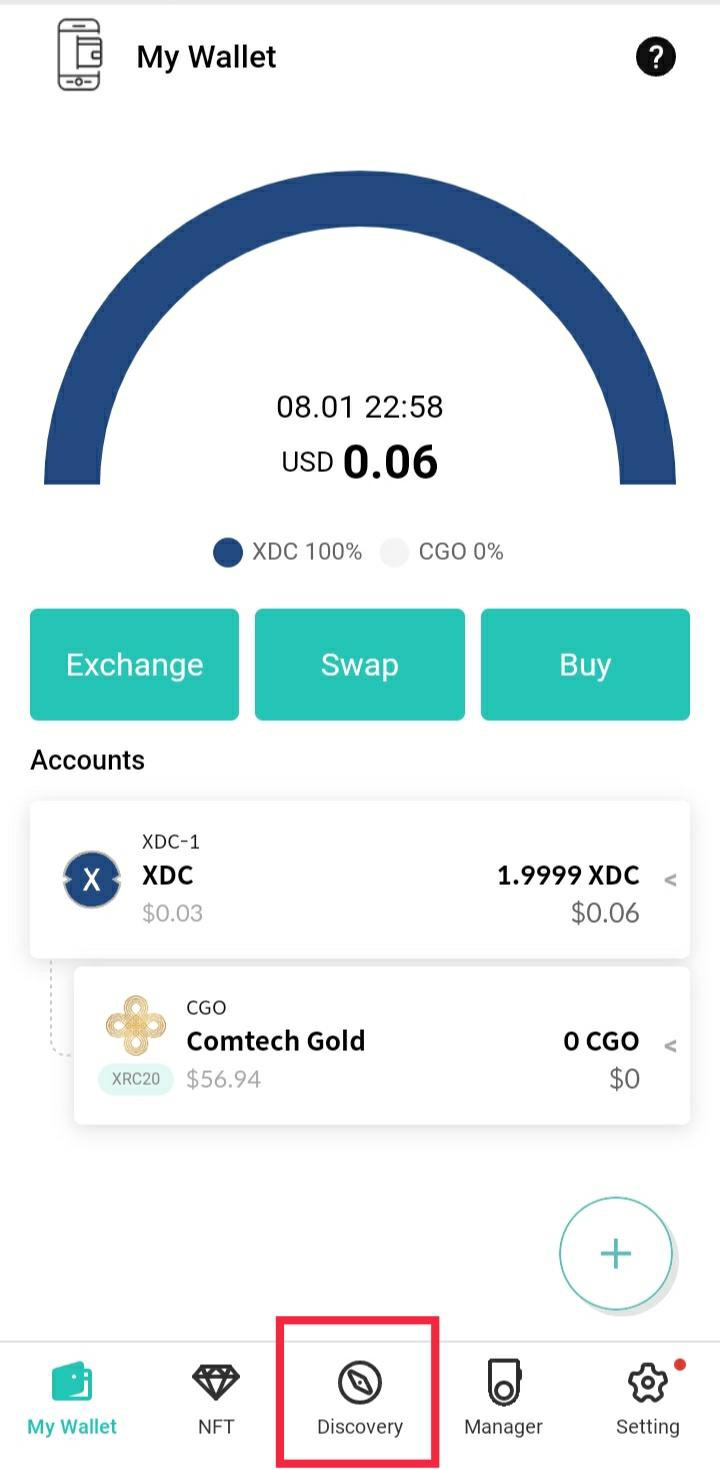
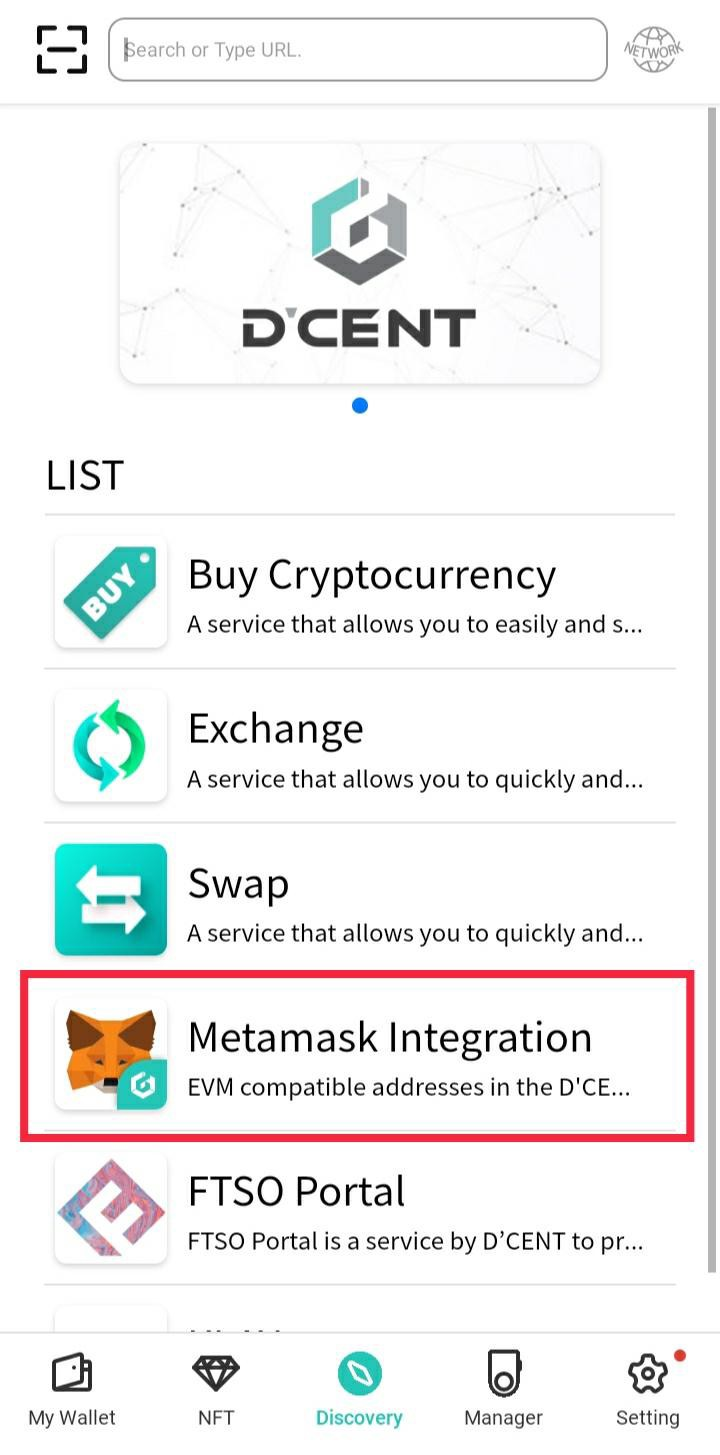
After running the D’CENT App, enter the Discovery tab and Select MetaMask Integration from the list or type.
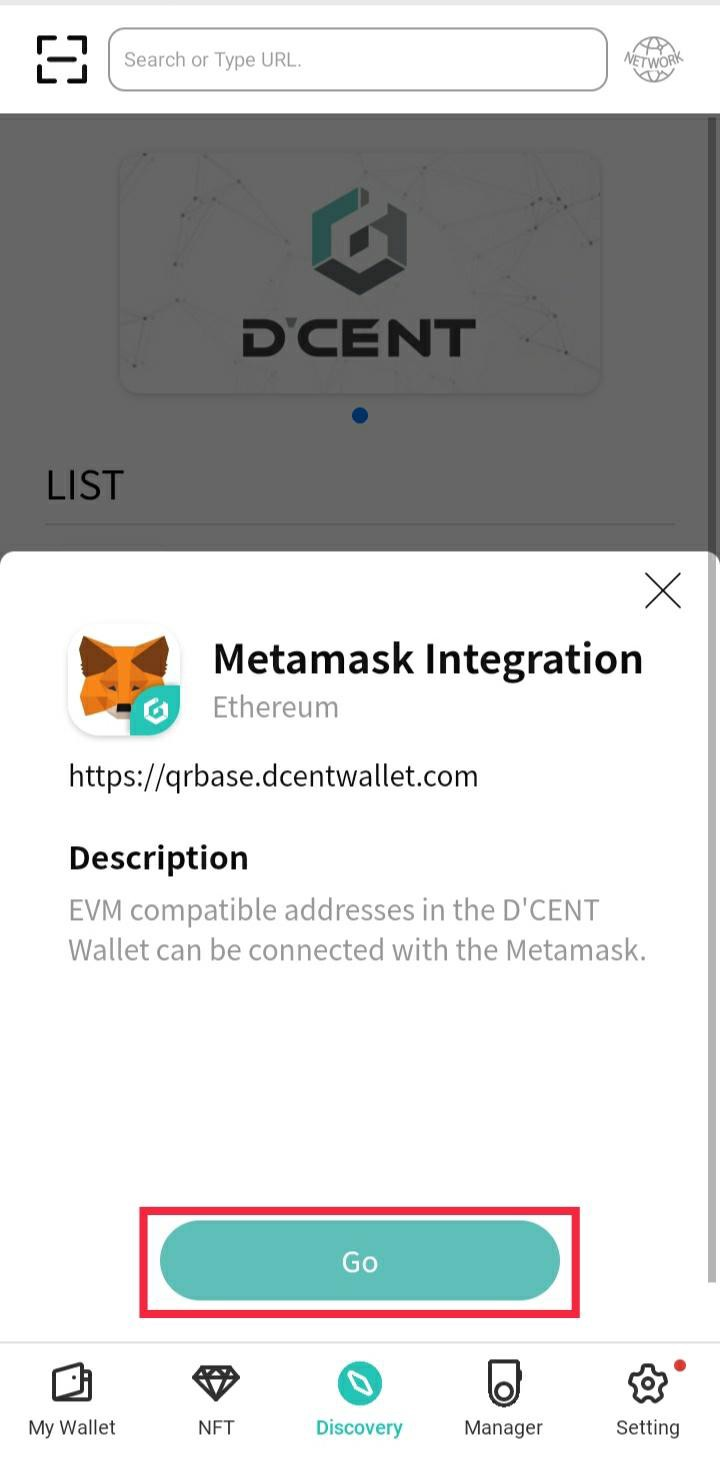
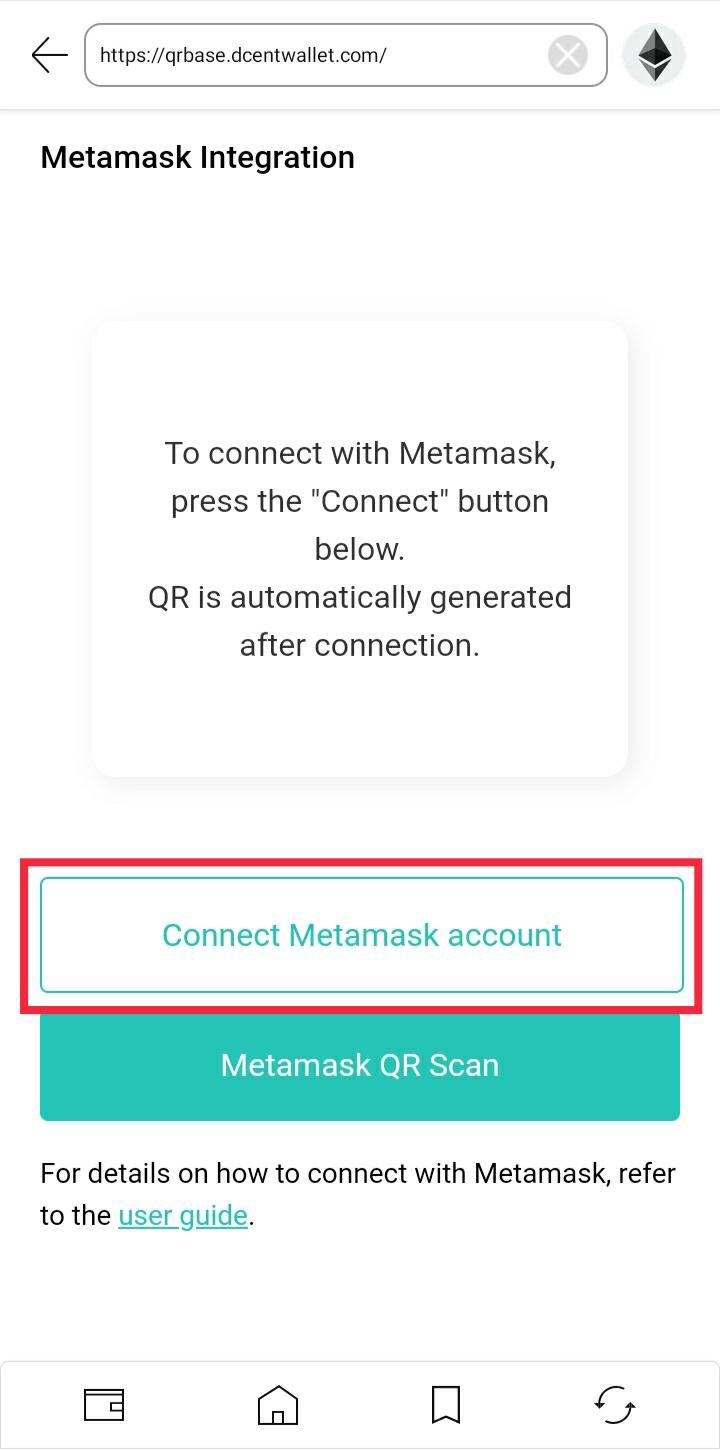
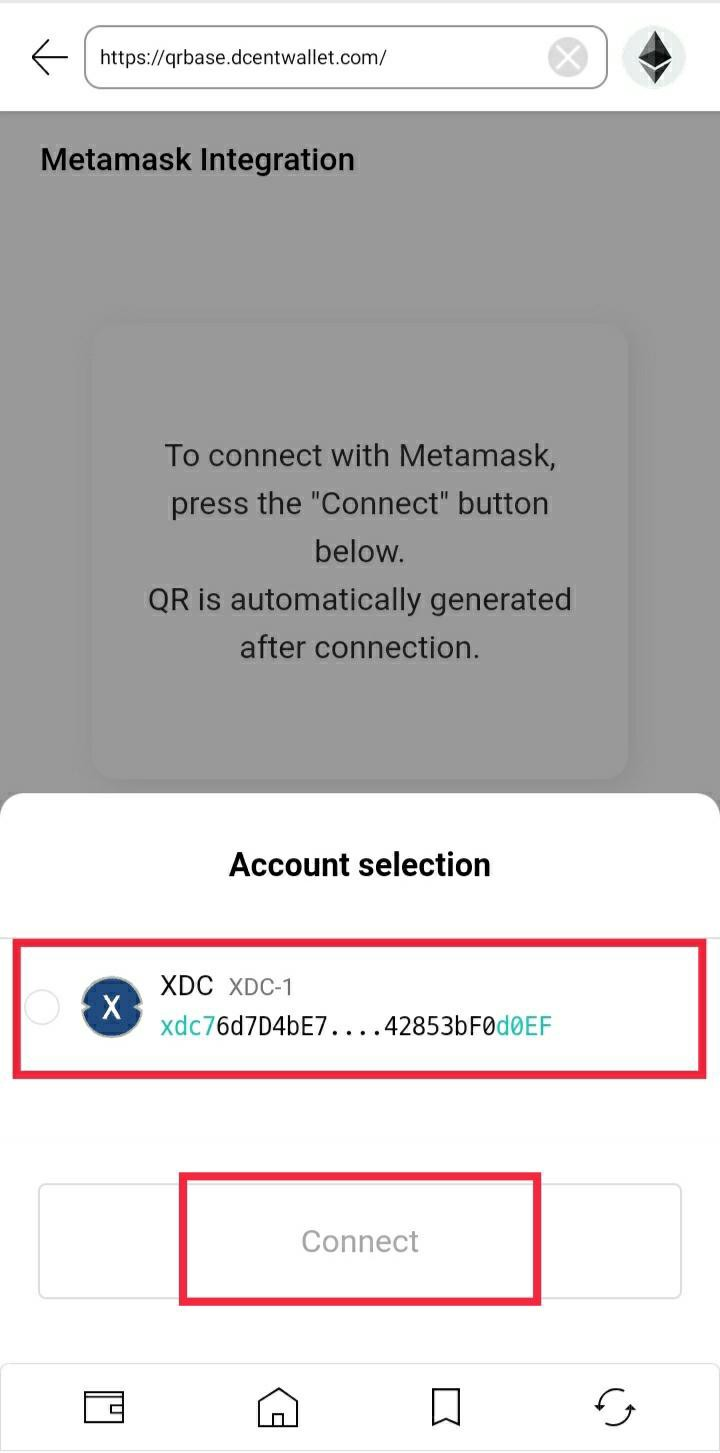
Click on the Go button. On the MetaMask integration screen, click on Connect Metamask account button.
Select the account to be linked from the account selection list and click on Connect button. Once the QR code gets generated, Proceed to further steps.

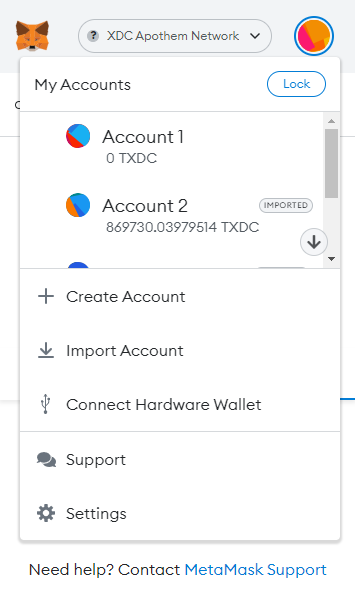
Click on the Account icon at the top right of the MetaMask main page. Now, Click on Connect Hardware Wallet button.
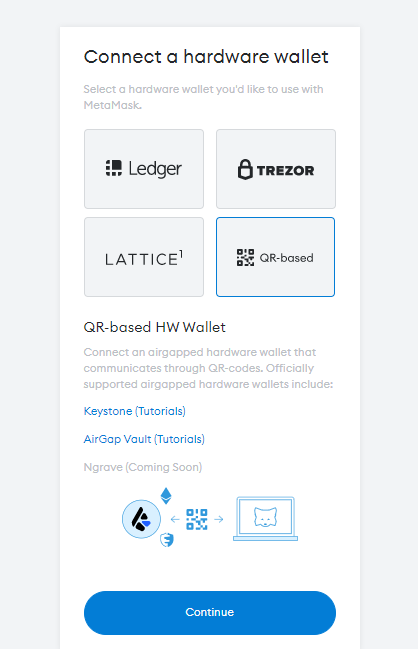
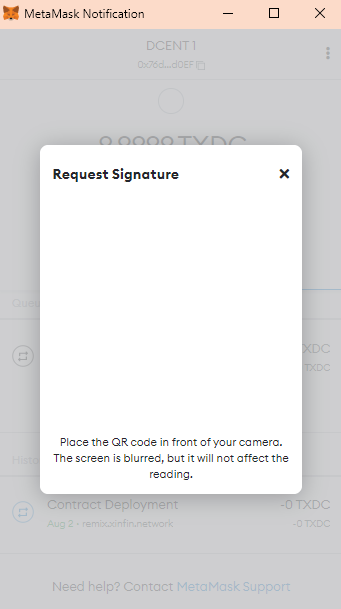
After selecting QR-based, click the Continue button at the bottom. It switches to the QR code scanning page. (Place the QR code in front of your Camera, The screen will be blurred, but it will not affect the reading.)
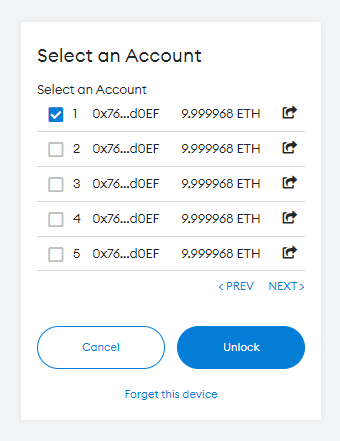
When the QR code scan is completed normally, it will be converted to the account selection page, Now, select the First account and click Unlock.
You can check the page where the account of the D’CENT wallet and the MetaMask are linked.
Let’s deploy a smart contract using XinFin Remix:
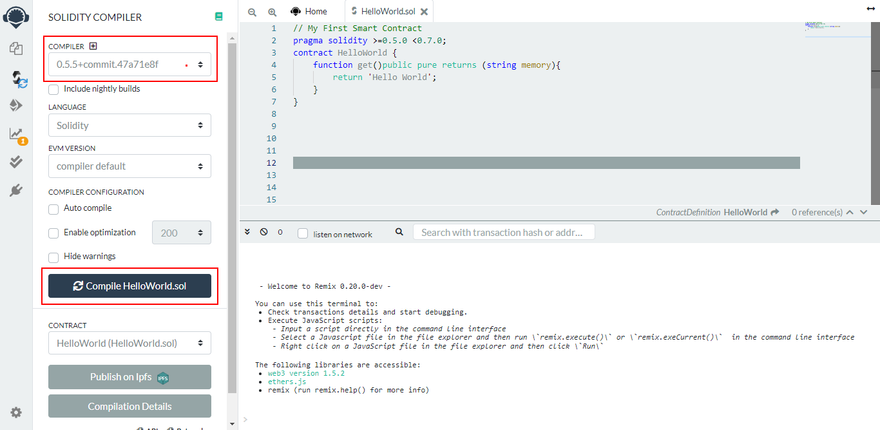
Step 1: Access the XinFin Remix and enter the smart contract to compile it.
Used Contract code:
// My First Smart Contract

pragma solidity >=0.5.0 <0.7.0;

contract HelloWorld {

function get()public pure returns (string memory){

return ‘Hello World’;

}

}
Step 2: Select the respective compiler version and Compile it.
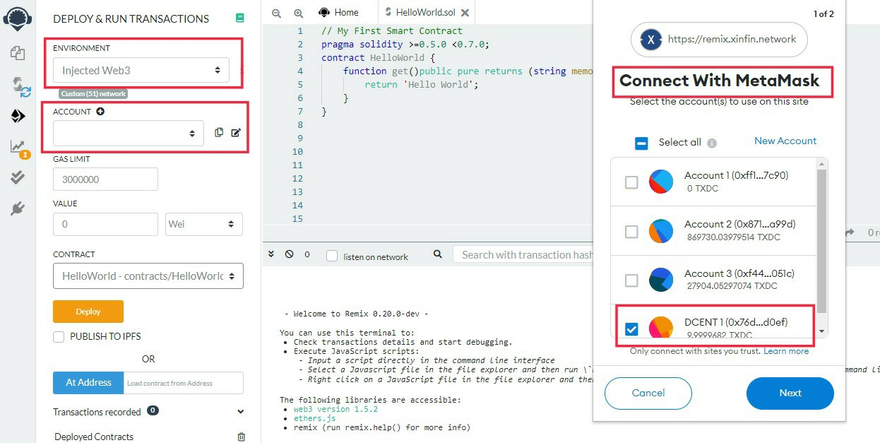
Step 3: After successful compilation, Go to the Deploy & Run Transaction screen.
Now, Select the environment as ‘Injected Web3’ to connect with Metamask.
On the Metamask screen, select ‘Connected DCENT wallet’ account and click on the Next button.
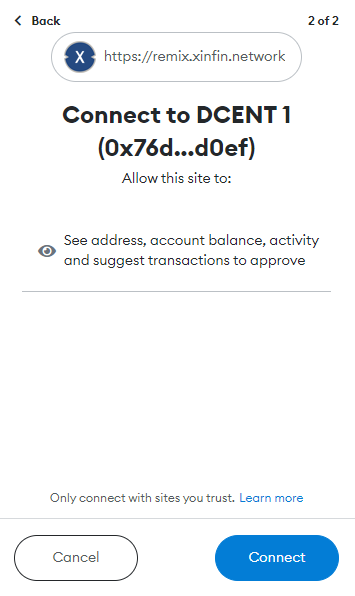
Step 4: Confirm the address and account balance, and Click on the Connect button.
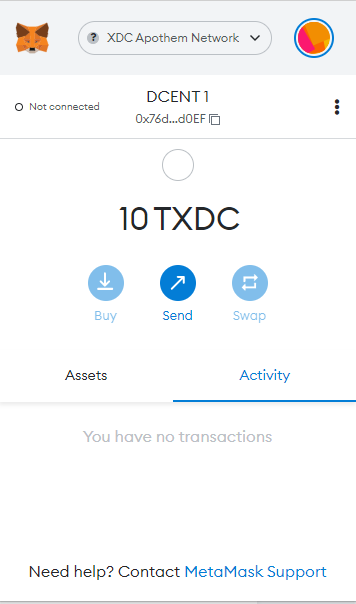
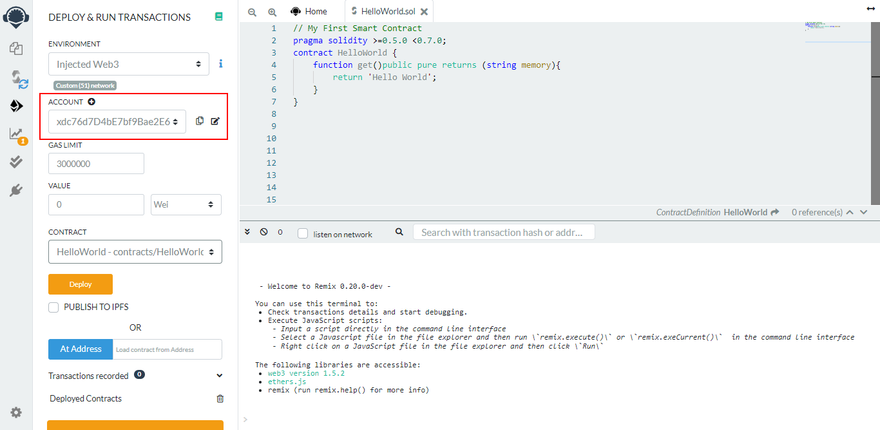
Once the connected DCENT wallet is connected to the Remix successfully then, it will fetch the address of the DCENT wallet through Metamask like this:
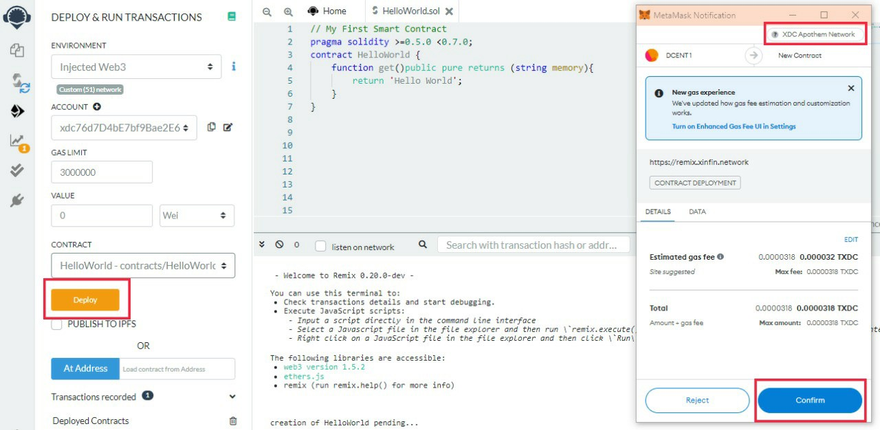
Step 5: Now click on the Deploy button; Metamask will ask to Confirm the transaction. Click on Confirm button to complete the transaction.
Step 6: After checking the transaction details, click the Confirm button. It switches to the signature request page in QR code format.

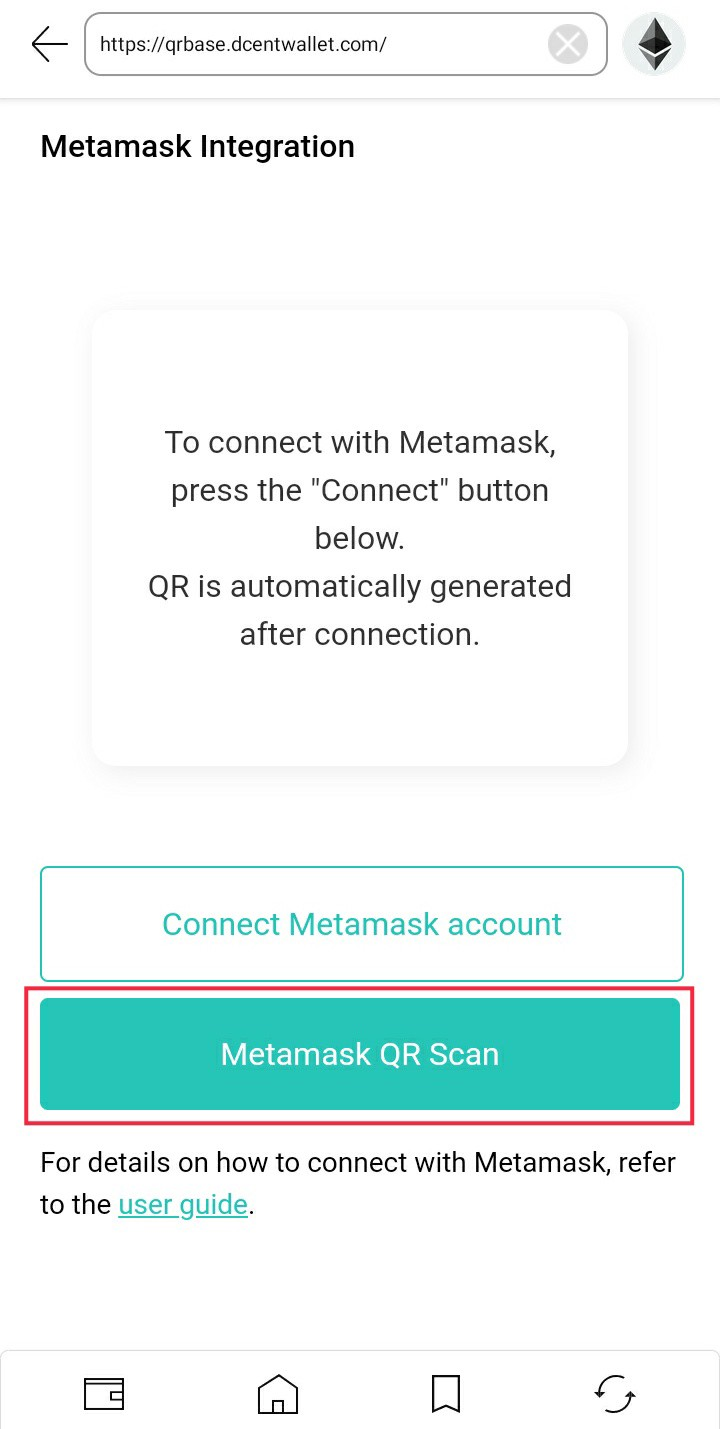
Step 7: Now, open the DCENT wallet and access the Metamask link (https://qrbase.dcentwallet.com).
Scan the Metamask QR code through DCENT App.
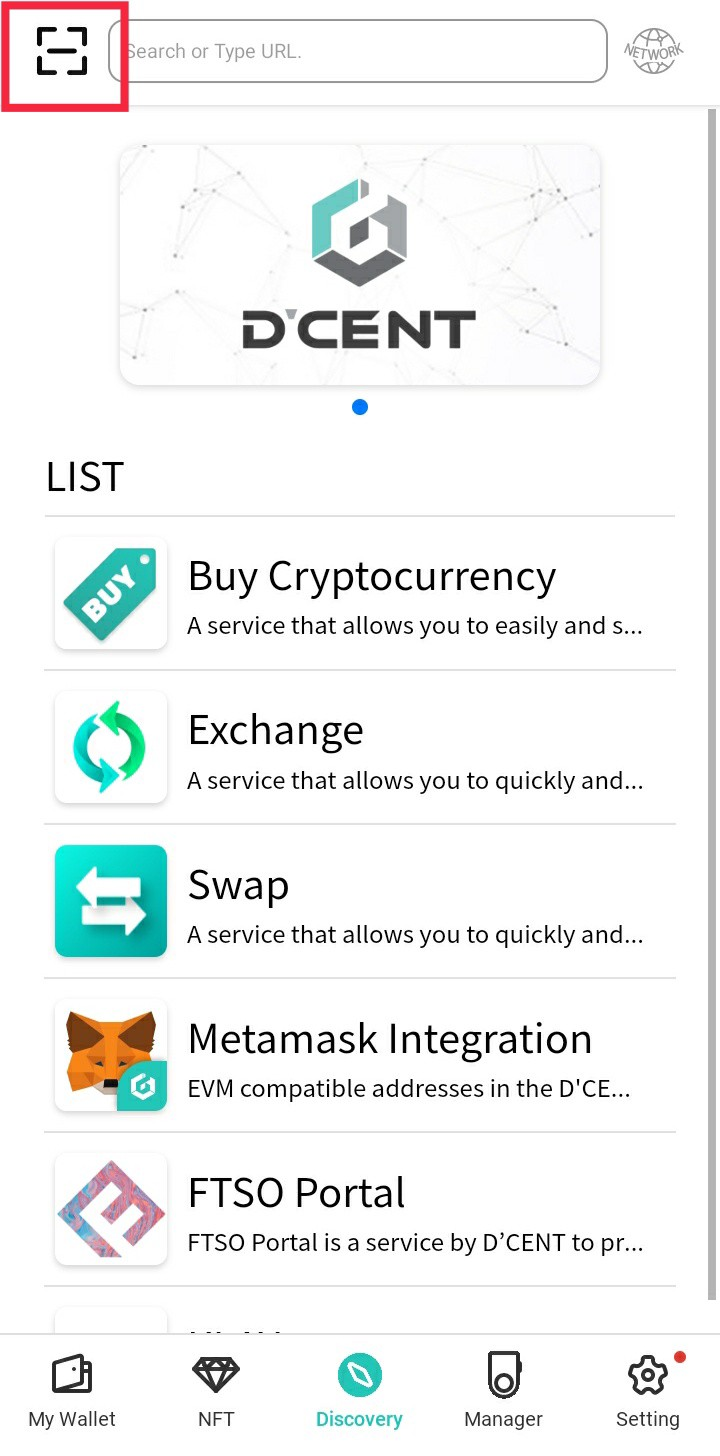
(There are two ways to scan the signature request QR.)
i. From D’CENT App, go to the Discovery tab and Click on the Metamask QR Scan button.
ii. Or, click the QR Scan button at the top left of the Discovery tab.
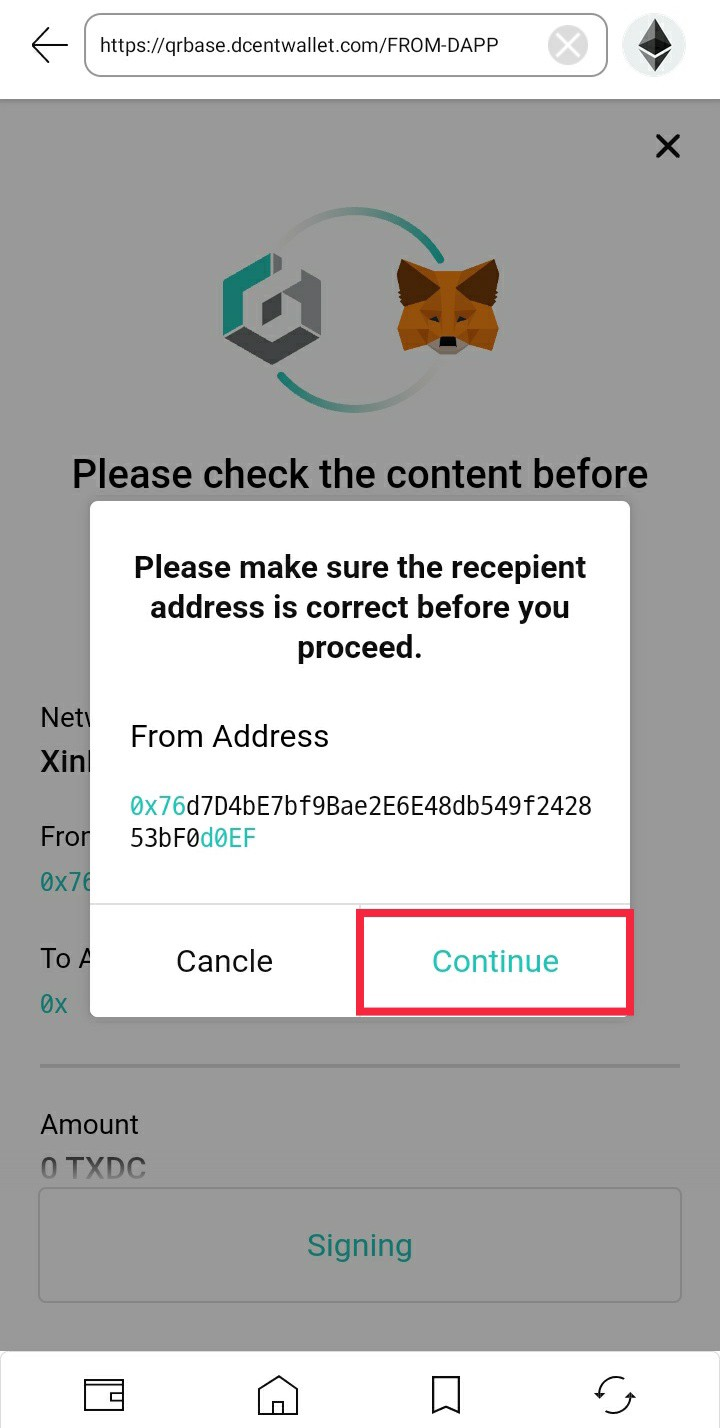
Step 8: Scan the signature request QR code generated in Step 6. After scanning, check the from address and click on the Continue button.
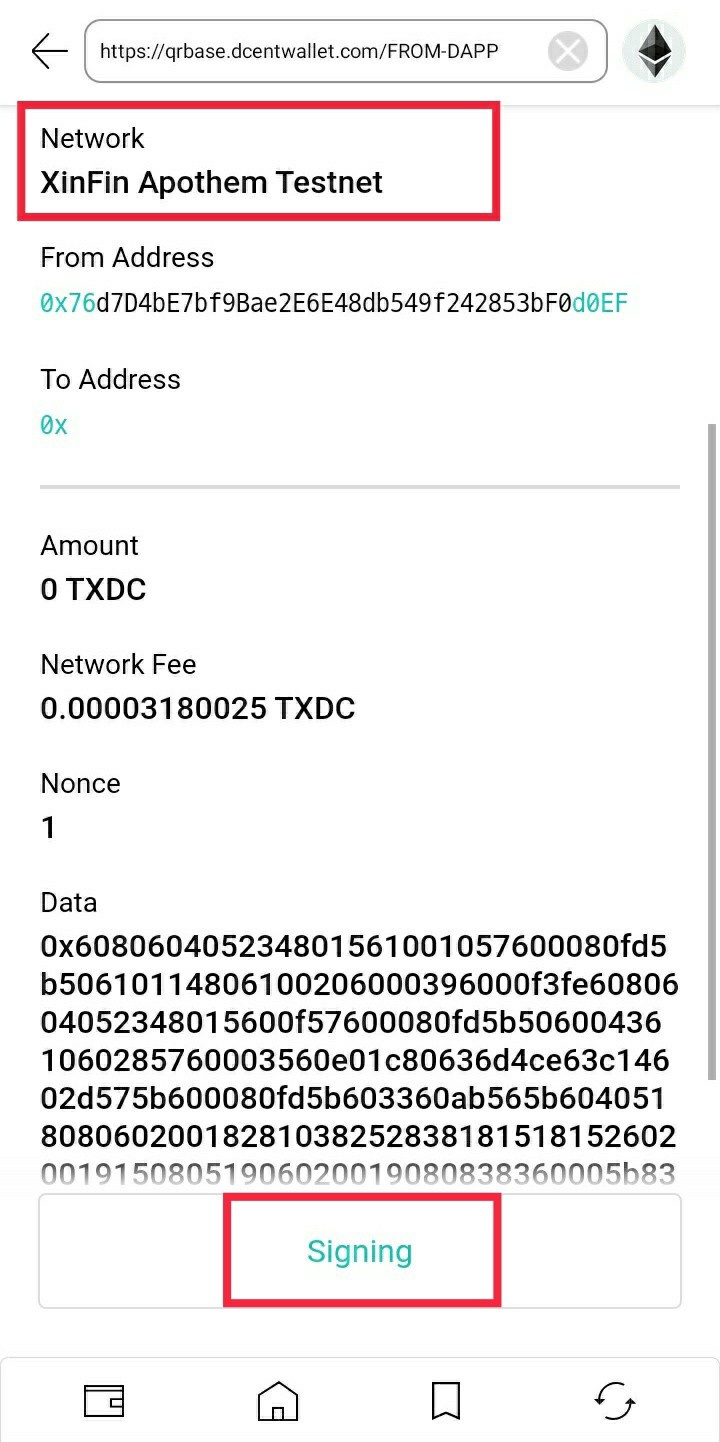
Step 9: Now, check the Network and other details and click on the Signing button to complete the transaction.
After signing, you can check the signature in QR code format.
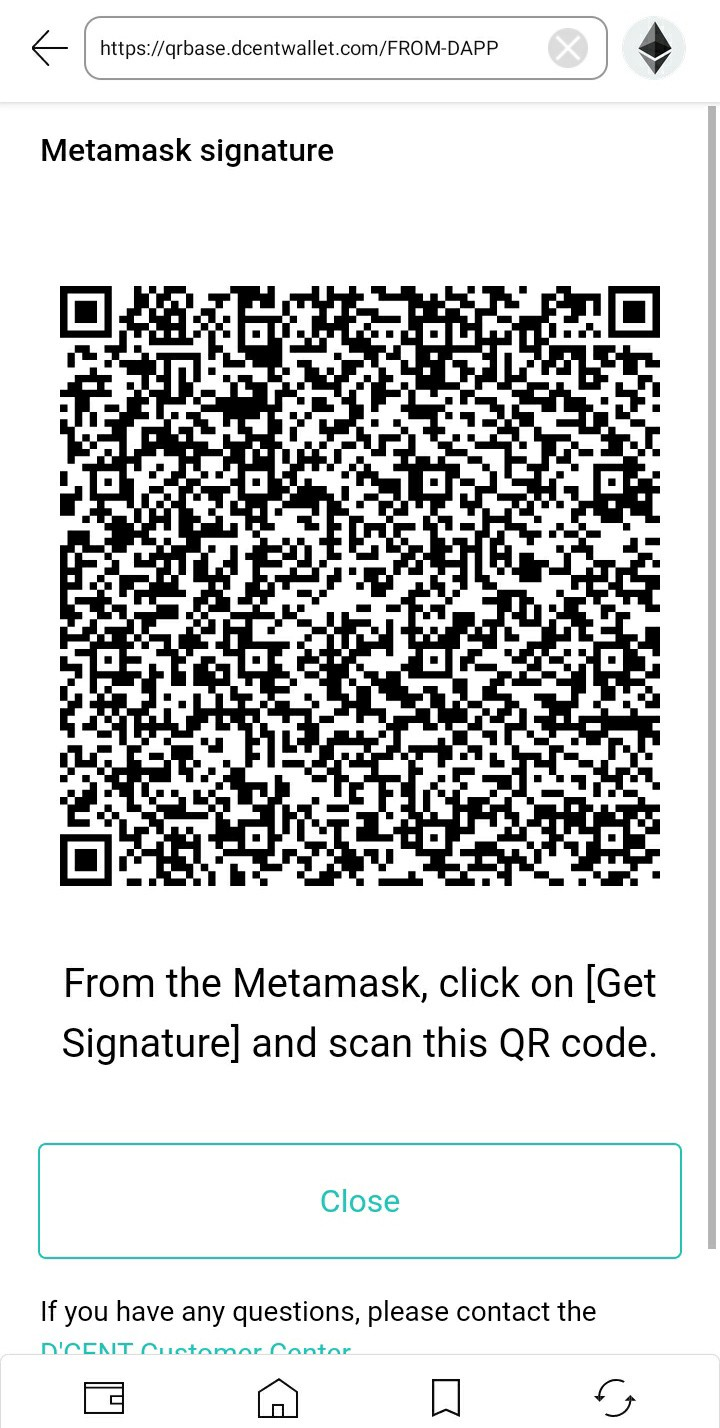
Step 10: Now you need to send signed data to MetaMask, for that Click the Get Signature button on the signature request page completed in Step 6.
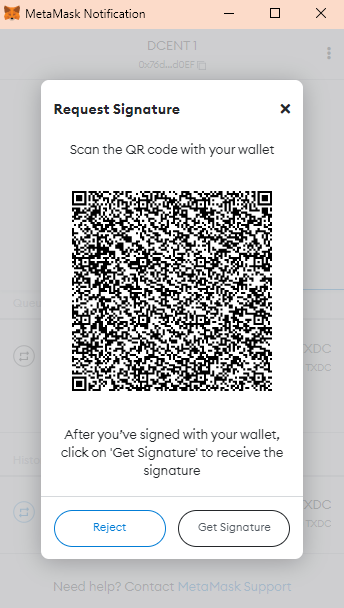
Step 11: Once you click the Get Signatures button, you must scan the QR code prepared in Step 9.
This is how you can Deploy your smart contract with XinFin Remix IDE by connecting Metamask through DCENT Software App
Deploy your smart contract using DCENT Wallet with XinFin Remix and Metamask, and share your feedback.
Relatable links:


Discussion (0)