In this guide, we will walk you through the process of creating and deploying a simple smart contract on the XinFin Apothem Testnet. The contract, named Pizza.sol, will simulate a pizza with slices that can be consumed and refilled.
Creating the Pizza Contract
Let's start by creating the Pizza.sol file. You can do this by clicking on the "New File" button in the center or left navigation pane within the contracts folder. Paste the following code into Pizza.sol:
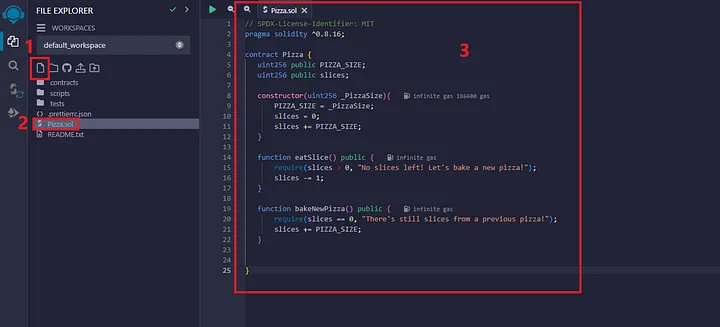
And write the following code to Pizza.sol:
// SPDX-License-Identifier: MIT
pragma solidity ^0.8.18;

contract Pizza {
   uint256 public PIZZA_SIZE;
   uint256 public slices;

   constructor(uint256 _PizzaSize){
       PIZZA_SIZE = _PizzaSize;
       slices = 0;
       slices += PIZZA_SIZE;
   }

   function eatSlice() public {
       require(slices > 0, "No slices left! Let's bake a new pizza!");
       slices -= 1;
   }

   function bakeNewPizza() public {
       require(slices == 0, "There's still slices from a previous pizza!");
       slices += PIZZA_SIZE;
   }


}
Code Explanation
- constructor where the deployer can define the pizza size
- eatSlice method to consume slices available,
- bakeNewPizza method to refill all slices only if the previous pizza have been entirely eaten!
Compilation
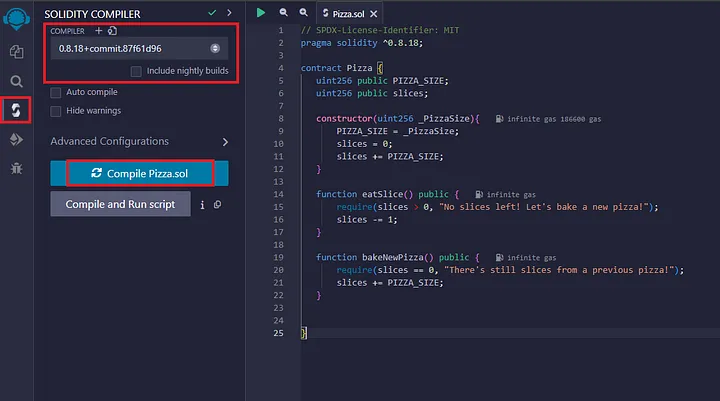
Compile the Pizza.sol contract by opening the Solidity Compiler and following these steps:
- Navigate to Compile Screen.
- Choose compiler version v0.8.18
- Click on the “Compile Pizza.sol.”
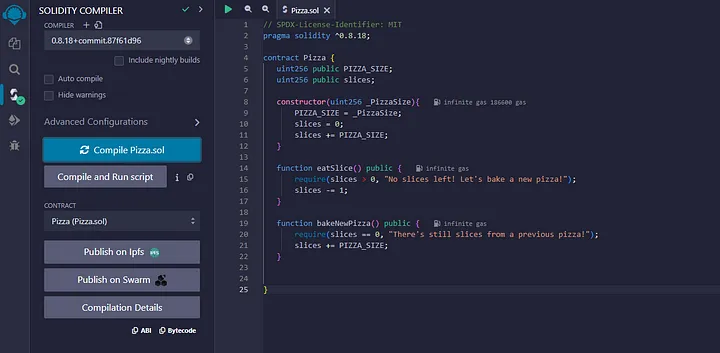
Once you compiled the Contract:
Deployment
To deploy on the XDC Apothem Testnet, ensure you have enough funds for gas fees. If you don't have enough XDC, get it from XDC Faucet.
Follow these steps:
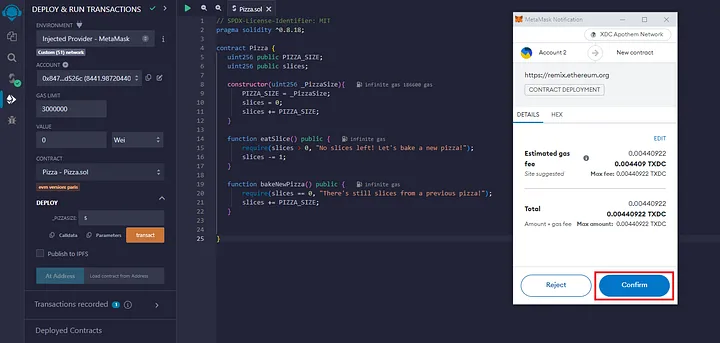
- Navigate to Deploy and Transactions.
- Choose Injected Web3 as the Environment.
- Choose the account for deployment, select the contract(Pizza — Pizza.sol), add pizza slices (_PIZZASIZE), and click on the Deploy button.

- Confirm the deployment transaction.
Once deployed successfully, you will get the Contract address and you can interact with the Contract.
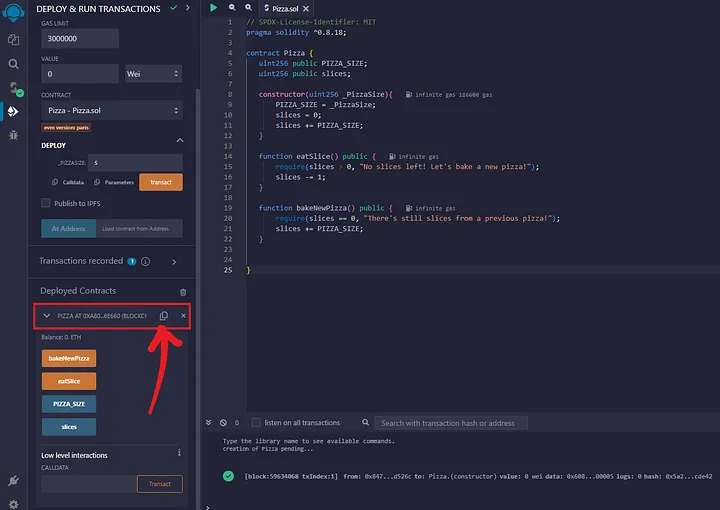
Interacting with Your Contract using Remix IDE
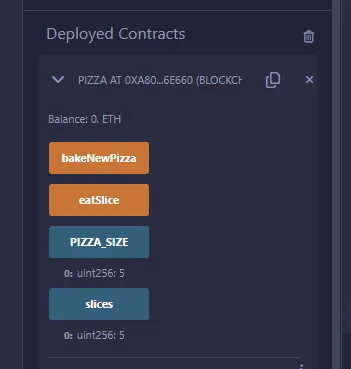
Test your contract using Remix IDE:
Explore the functions and variables available for interaction.
Verifying Contracts on the Block Explorer
Verify your contract on the XDC Explorer by following these steps:
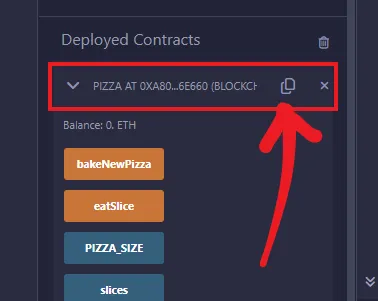
Copy the contract address from Remix IDE.
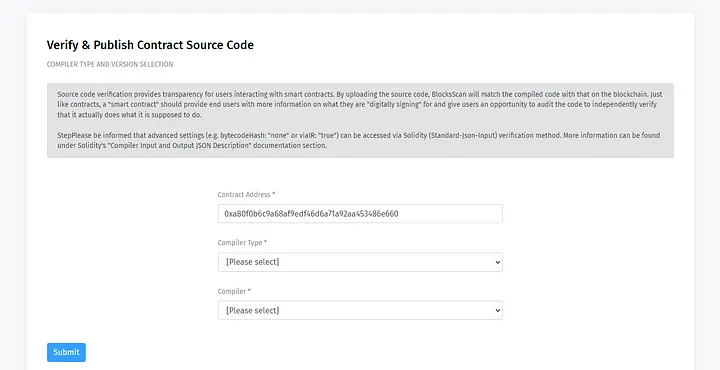
- Go to the XDC Block Explorer, paste the contract address and Click on the “Verify And Publish” and fill out the required information.
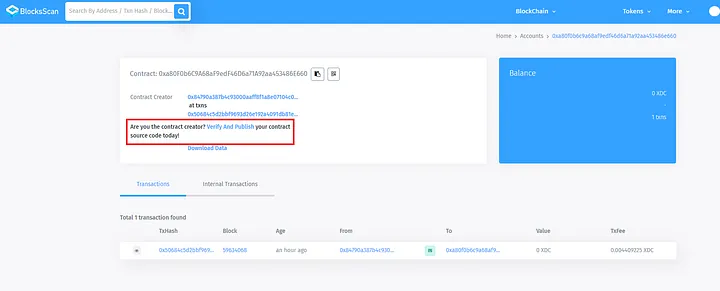
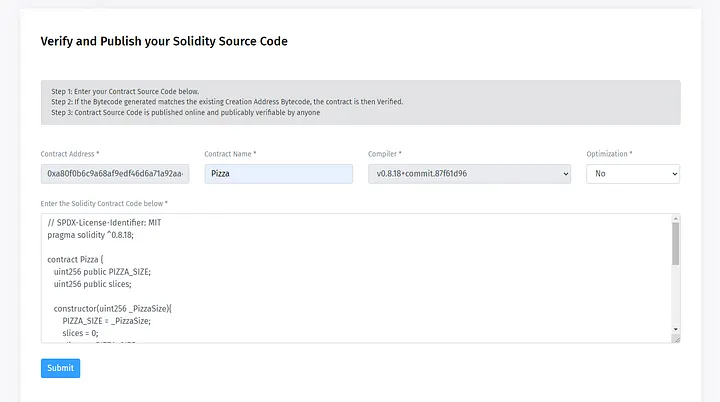
- Submit the details; Select Compiler Type & Compiler Version
- Enter Contract Name and Contract Code.
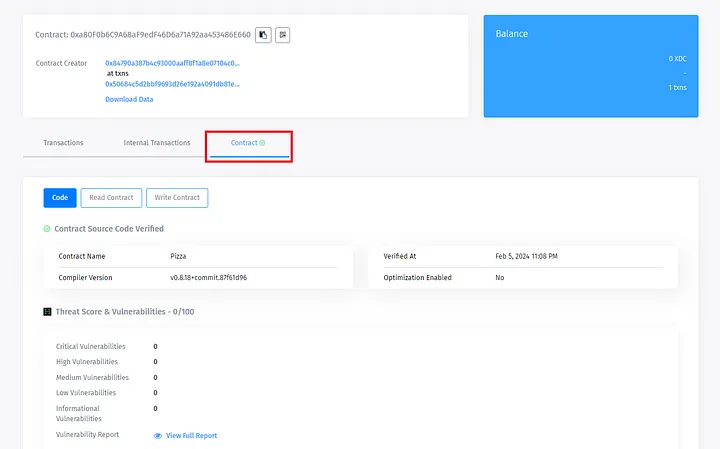
- If correct, your contract page on the block explorer will display a new tab called “Contract.”
Congratulations! You’ve successfully created, deployed, and verified a Pizza smart contract on the XDC Apothem Testnet. Feel free to interact with your contract using Remix IDE.For any developer support, post your queries here at XDC.Dev
Important Links related to XDC Network
- Official Website: https://xinfin.org/
- XDCDev Forum: https://www.xdc.dev/
- XDC Mainnet Explorer: https://xdc.network/
- XDC Testnet(Apothem)Explorer: https://explorer.apothem.network/
- Setup XDC Masternode: https://xinfin.org/setup-masternode
- XinFin (XDC) Remix: https://remix.xinfin.network/
- XDC Faucet: https://faucet.apothem.network/
- XDC Beta Web Wallet: https://betawallet.xinfin.network/


Discussion (0)