Running a full node on XDCNetwork is crucial for decentralization, data verification, and direct interaction with the XDC Network. However, syncing a full node from scratch can be a time-consuming and resource-intensive process, potentially taking days or even weeks for archive nodes. This is where snapshots come in as a game-changer, offering a fast and efficient way to get your XDC Network node up and running.
This article will delve into what snapshots are, why they are essential for syncing, and provide a step-by-step guide on how to download and utilize them to set up a full node or archive node on the XDC Network.
What are Blockchain Snapshots?
In the context of blockchain, a *snapshot * is essentially a complete "photograph" of the blockchain's state at a specific block height. This snapshot captures all current account balances, smart contract states, and other relevant data, but crucially, it doesn't include the entire historical transaction data that led to that state. Think of it as having the finished painting without needing to re-watch every brushstroke.
Why are Snapshots Crucial for Syncing a Full Node or Archive Node on XDC Network?
The traditional method of syncing a full node or archive node on XDC Network involves downloading and verifying every single block from the genesis block (the very first block) up to the current one. This process requires significant computational resources and bandwidth. Snapshots offer several key advantages:
Faster Synchronization: By downloading a recent snapshot, your node can start from a pre-verified state, drastically reducing the sync time from days or weeks to hours. This allows new participants to join the network quickly and helps existing nodes recover faster from any disruptions.
Reduced Resource Consumption: Since you're not processing the entire blockchain history, snapshots minimize the CPU, memory, and bandwidth required for initial synchronization, making it more efficient to run nodes.
Improved Efficiency and Scalability: Faster node participation leads to a more distributed and robust network, contributing to overall network efficiency and scalability.
Enhanced Reliability: Snapshots provide a stable and verified starting point, reducing the potential for errors that can occur during a full blockchain download.
Essentially, snapshots provide a "shortcut" for nodes to quickly acquire the latest XDC Network state, enabling them to catch up and participate in the network much faster and with fewer resources.
Setting Up a Full Node on XDC Network with Snapshots: A Step-by-Step Guide
Prerequisites
A server or cloud instance (minimum 16 GB RAM, 1.5 TB storage)
Ubuntuoperating system
Basic Linux command-line knowledge
Setting up the Node Environment using Bootstrap
Its the primary options for setting up your XDC Network node environment: using the bootstrap.sh script for a quick setup
Using the Bootstrap Command for Quick Setup
This command automates the installation of necessary dependencies and sets up the basic node environment.
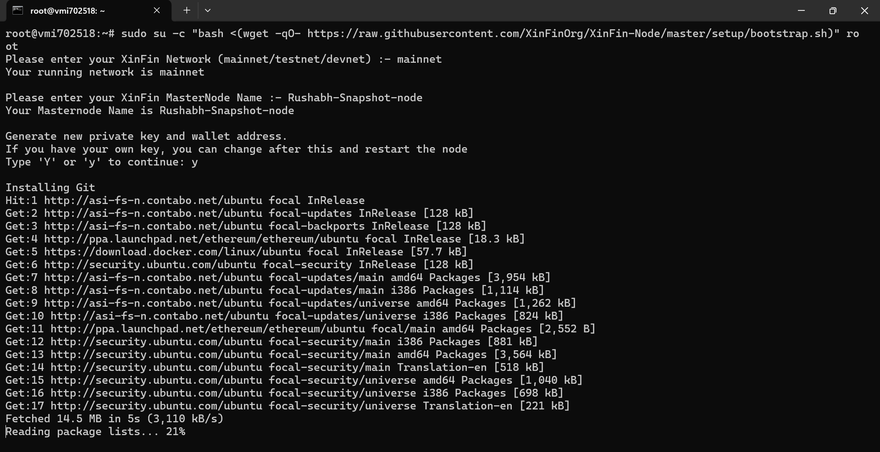
sudo su -c "bash <(wget -qO- https://raw.githubusercontent.com/XinFinOrg/XinFin-Node/master/setup/bootstrap.sh)" root
You will be prompted to enter:
XinFin Network (mainnet/testnet/devnet): Type mainnet for the main XDC Network.
XinFin MasterNode Name: Provide a name for your node (e.g.,Rushabh-Snapshot-Node).
Generate new private key and wallet address. If you have your own key, you can change after this and restart the node: Enter y or Y and continue
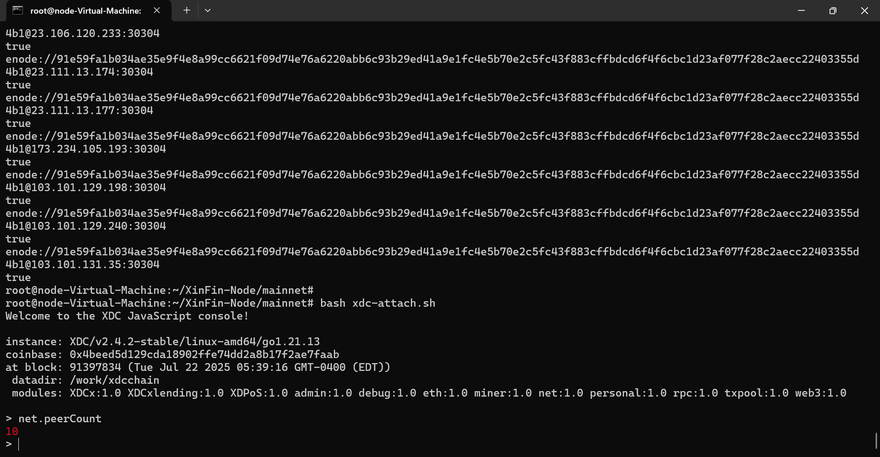
Once the installation on your Ubuntu server is complete, attach to the node using the following command to verify that the blockchain synchronization has begun
bash xdc-attach.sh

You can monitor the status of your node using the above command or by visiting the official stats page at https://xinfin.network/#stats Once you've confirmed that the node has begun syncing from the genesis block, stop the node by running:
bash docker-down.sh

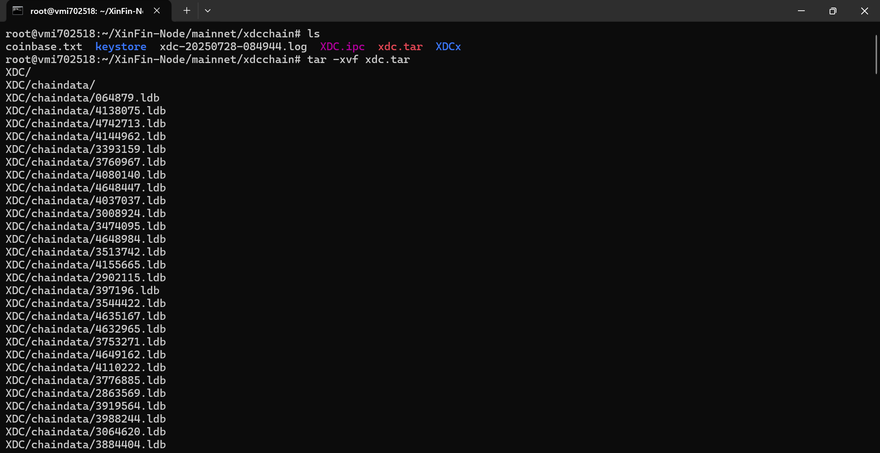
After stopping your node, proceed to delete the existing XDC directory to prepare for the snapshot data

After deleting the XDC folder, you can now proceed to download and apply the latest snapshot.
To download the XDC Network Mainnet snapshot, use the appropriate command based on the type of node you’re setting up:
For a Full Node (latest state only): https://download.xinfin.network/xdcchain.tar
For an Archive Node (complete history): http://downloads.xinfin.network/xdcchain_archive.tar
Note: Snapshots are updated approximately every 20 days.

Once the xdc.tar file has been downloaded, extract the snapshot by running the following command:
tar -xvzf xdc.tar
This will unpack the archive and create the XDC directory containing the necessary blockchain data.
Once the XDC folder has been extracted, navigate into it and perform the following cleanup steps:
Delete the nodekey file:
rm -rf nodekey
Delete the transactions.rlp file:
rm -rf transactions.rlp

After removing these files, return to the mainnet directory and open the .env file.
In the configuration, locate the ENABLE_RPC variable and set it to true to enable RPC access:
ENABLE_RPC=true
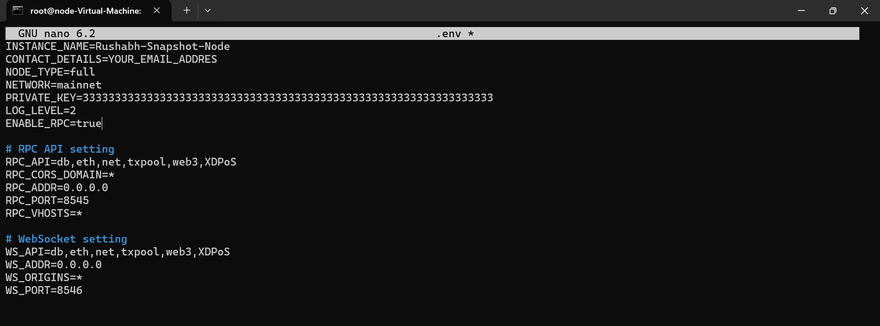
In the .env file, you’ll find the ENABLE_RPC parameter set to false by default. Update it to enable RPC access by changing it to: ENABLE_RPC=true
If you are setting up a full node, you can now start your node without any additional changes.
However, if you are configuring an archive node, you must modify the start-node.sh script by adding the following flag: --
gcmode=archive
Note: This flag is only required for archive nodes to retain full blockchain history.
Once you've made the necessary changes, start your node with:
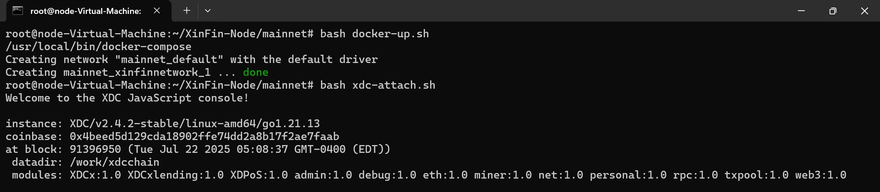
bash docker-up.sh

You can monitor your node’s status by attaching to the console using the following command:
bash xdc-attach.sh
Alternatively, you can view real-time sync progress and network activity on the official stats page:https://xinfin.network/#stats
If your node is not connecting to peers or you're experiencing issues with peer discovery, run the following command to manually connect to the network:
bash peer.sh
This will help your node establish connections with other active nodes on the XDC Network.
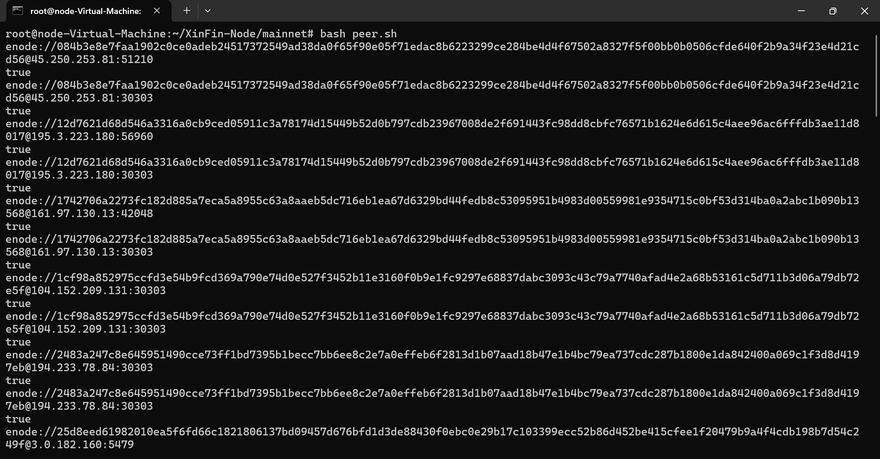
After executing the command, your node will begin establishing connections with peers on the XDC Network, allowing it to sync and participate in the network more effectively.
Accessing the RPC Endpoint: Once your node is fully synced, you can use its dedicated RPC endpoint.
The RPC port used is 8989.
The WebSocket port used is 8888.
If you've configured your server's firewall to allow external access to these ports (which is necessary for dApps to connect from outside your server), you would replace localhost with your server's public IP address or domain name.
Conclusion
Setting up a dedicated RPC node on the XDC Network, especially for DApps requiring high performance and reliability, is greatly simplified by leveraging snapshots. By following this comprehensive guide, you can efficiently set up and synchronize your XDC full node, providing a robust and responsive gateway for your decentralized applications to interact with the XDC blockchain. Snapshots are an invaluable tool for maintaining a healthy and efficient decentralized ecosystem, ensuring seamless communication and robust data management for developers and network operators alike.


Discussion (0)