
In this article, we will explore the process of integrating WalletConnect into your JavaScript application.
WHAT IS WALLET CONNECT?
WalletConnect is an open-source protocol that facilitates secure and convenient communication between decentralized applications (DApps) and mobile cryptocurrency wallets. With WalletConnect, users can connect their wallets to DApps by scanning a QR code, establishing a secure connection between the wallet and the DApp.
The protocol incorporates end-to-end encryption, guaranteeing the secure transmission of sensitive data like private keys and transaction details between the wallet and the DApp. This ensures that user information remains protected throughout the interaction.
By leveraging WalletConnect, DApps can offer a seamless and secure wallet integration experience to users, enhancing the usability and accessibility of decentralized applications.
WHAT IS JavaScript?
JS is an abbreviation commonly used to refer to JavaScript. JavaScript is a high-level, interpreted programming language that allows developers to add interactive elements and dynamic behavior to websites. It is primarily used for client-side web development, meaning it runs in a user’s web browser, but it can also be used on the server-side with the help of technologies like Node.js.
How to connect the wallet and do a transaction.
Step 1: To setup the code, clone the repository (https://github.com/Mitali-88/wallet-connect)
Once repo gets added to your system, Open the respective folder and start the HTML file.
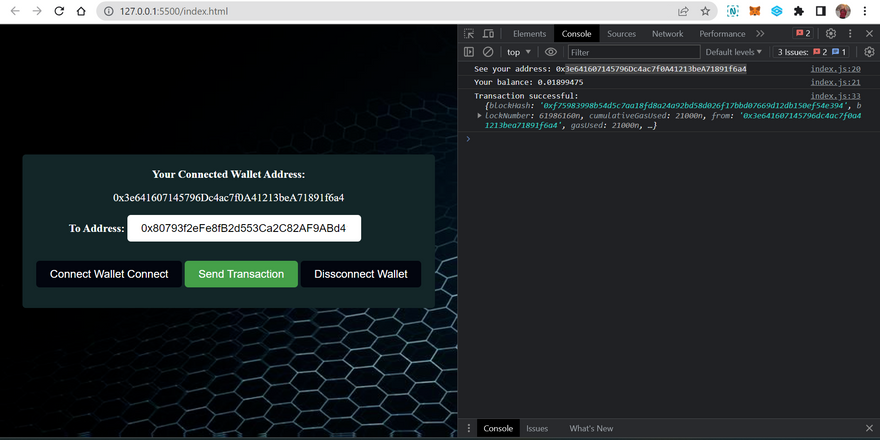
Here, you will be able to see a screen with 3 buttons and one input field.
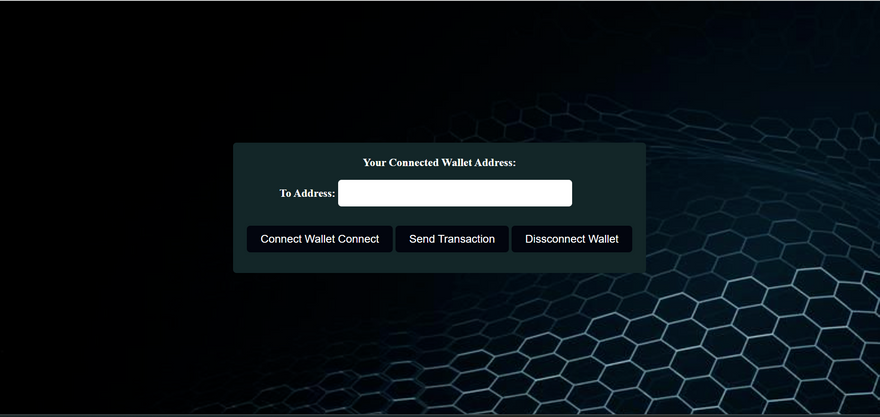
Step 2: Click on the “Connect Wallet” button, it will pop up the QR code to scan.
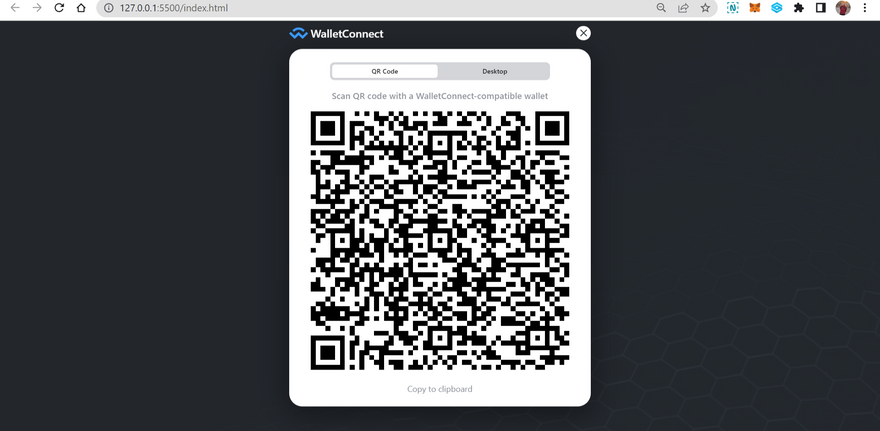
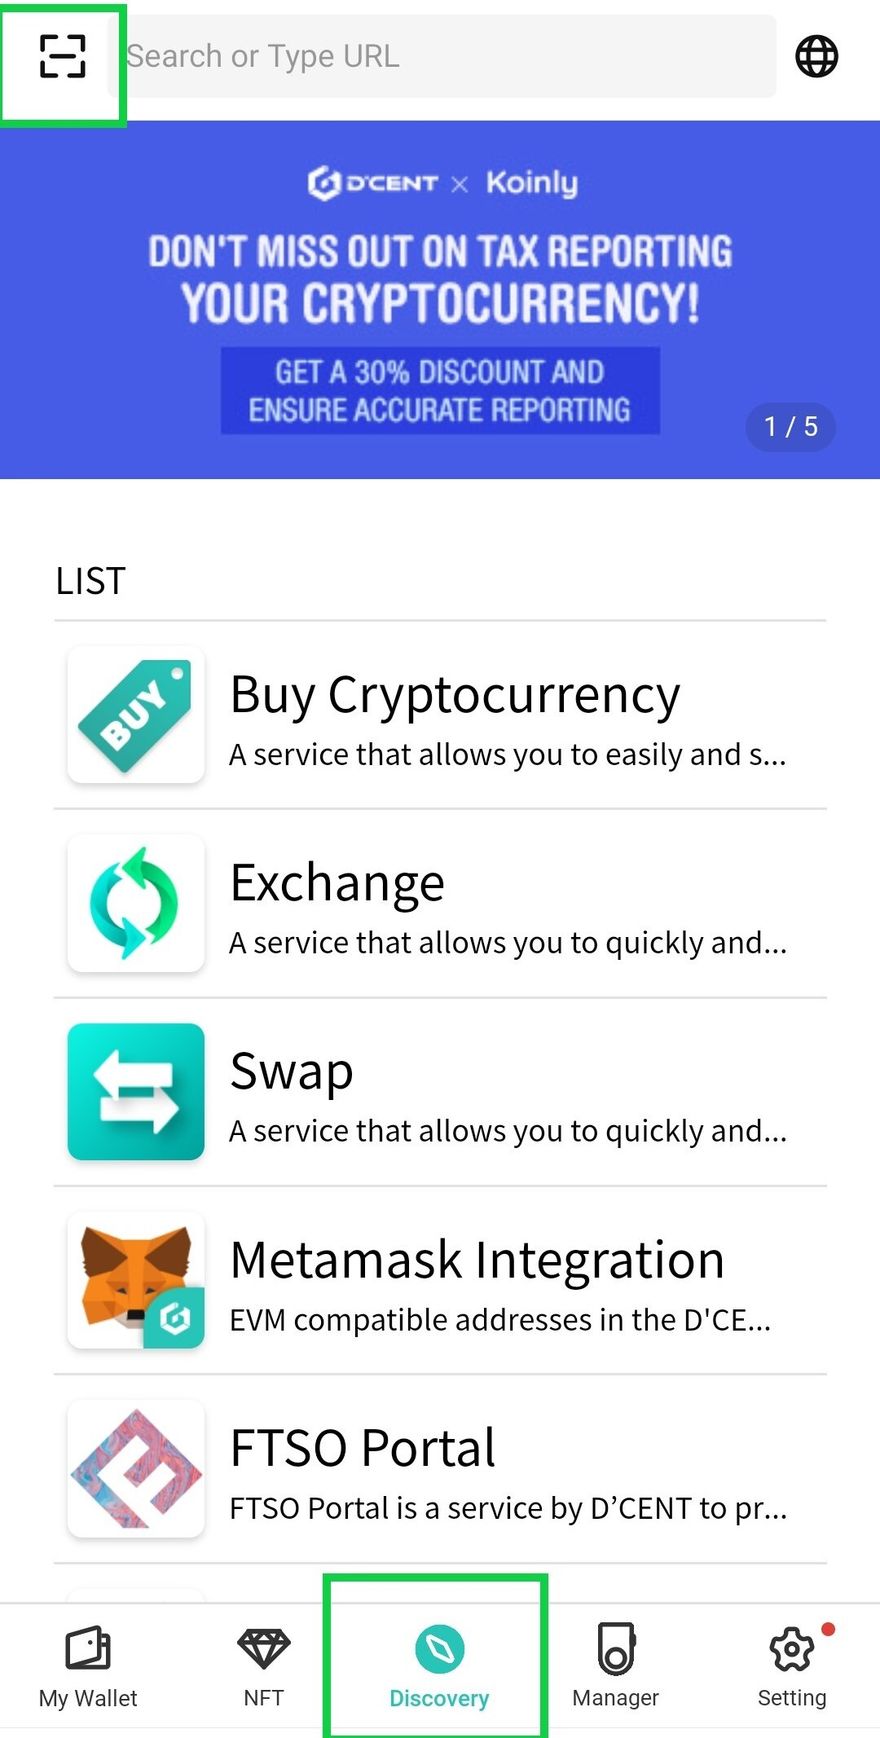
Step 3: Now, open your preferred Android wallet, such as D’cent Wallet, and navigate to the “Discovery” tab. Tap the scanner button at the top left corner to scan the QR code displayed on your app’s interface. Here, you will see the scanner option at the top-left corner, click on that icon and scan the OR code of the D’cent app.
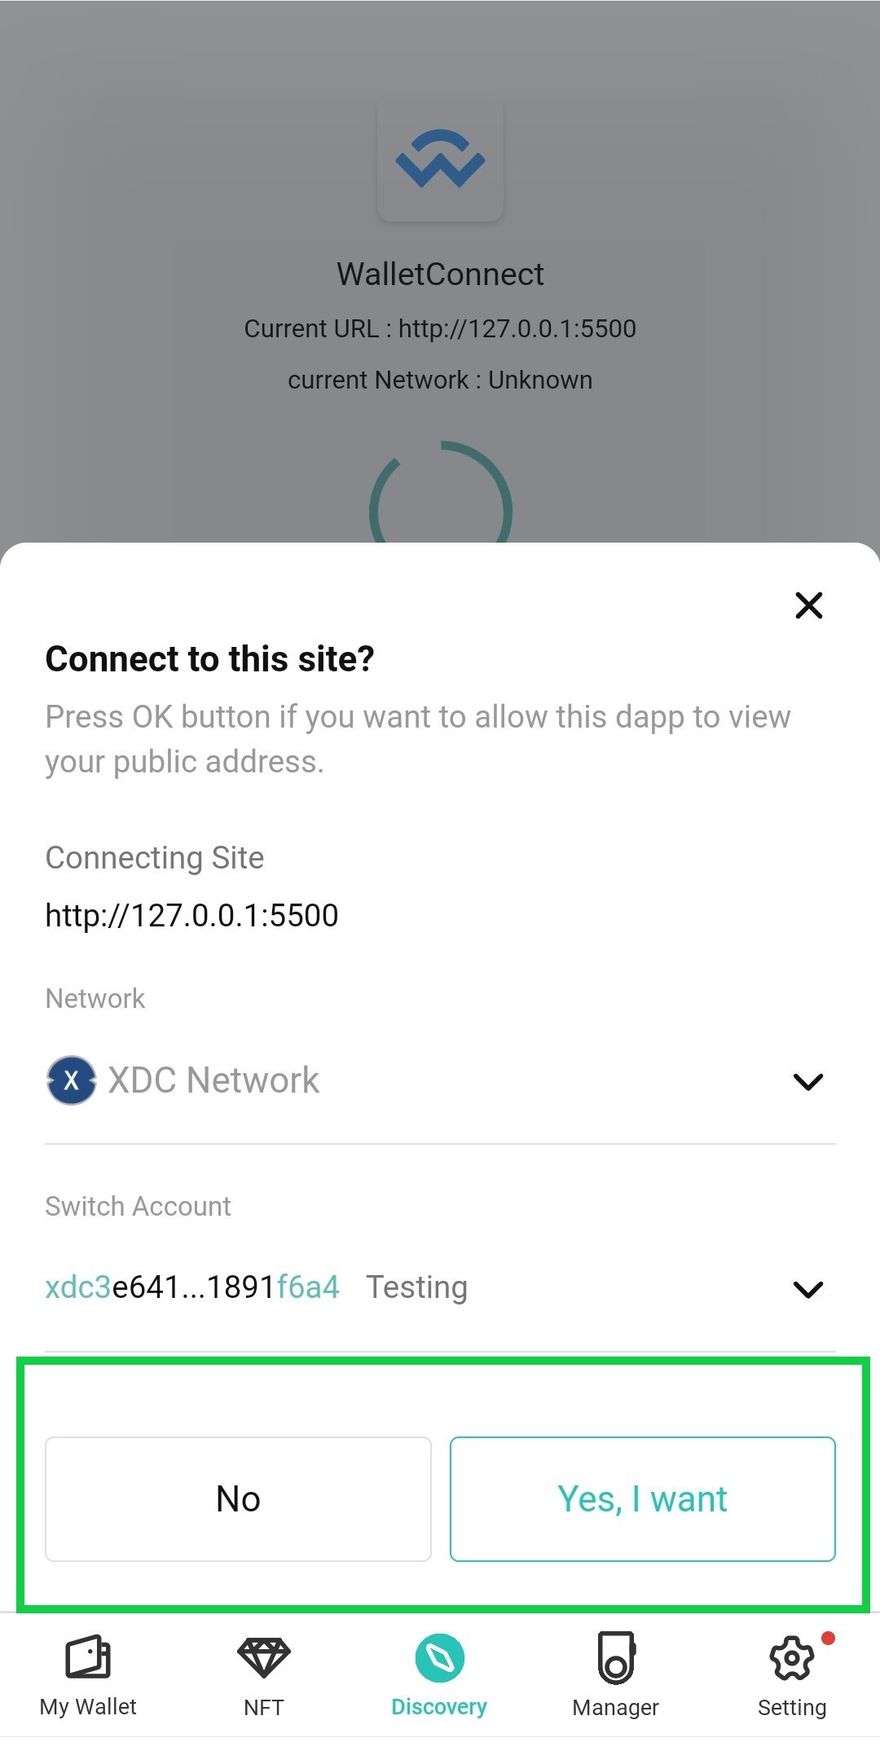
Step 4: Now, you can select the network as XDC Network and address which you want to connect to the app. Your wallet will be successfully connected to the app.
Side by side you can open the network tab to see, if your wallet is connected or not (I have set debug options in the code ).
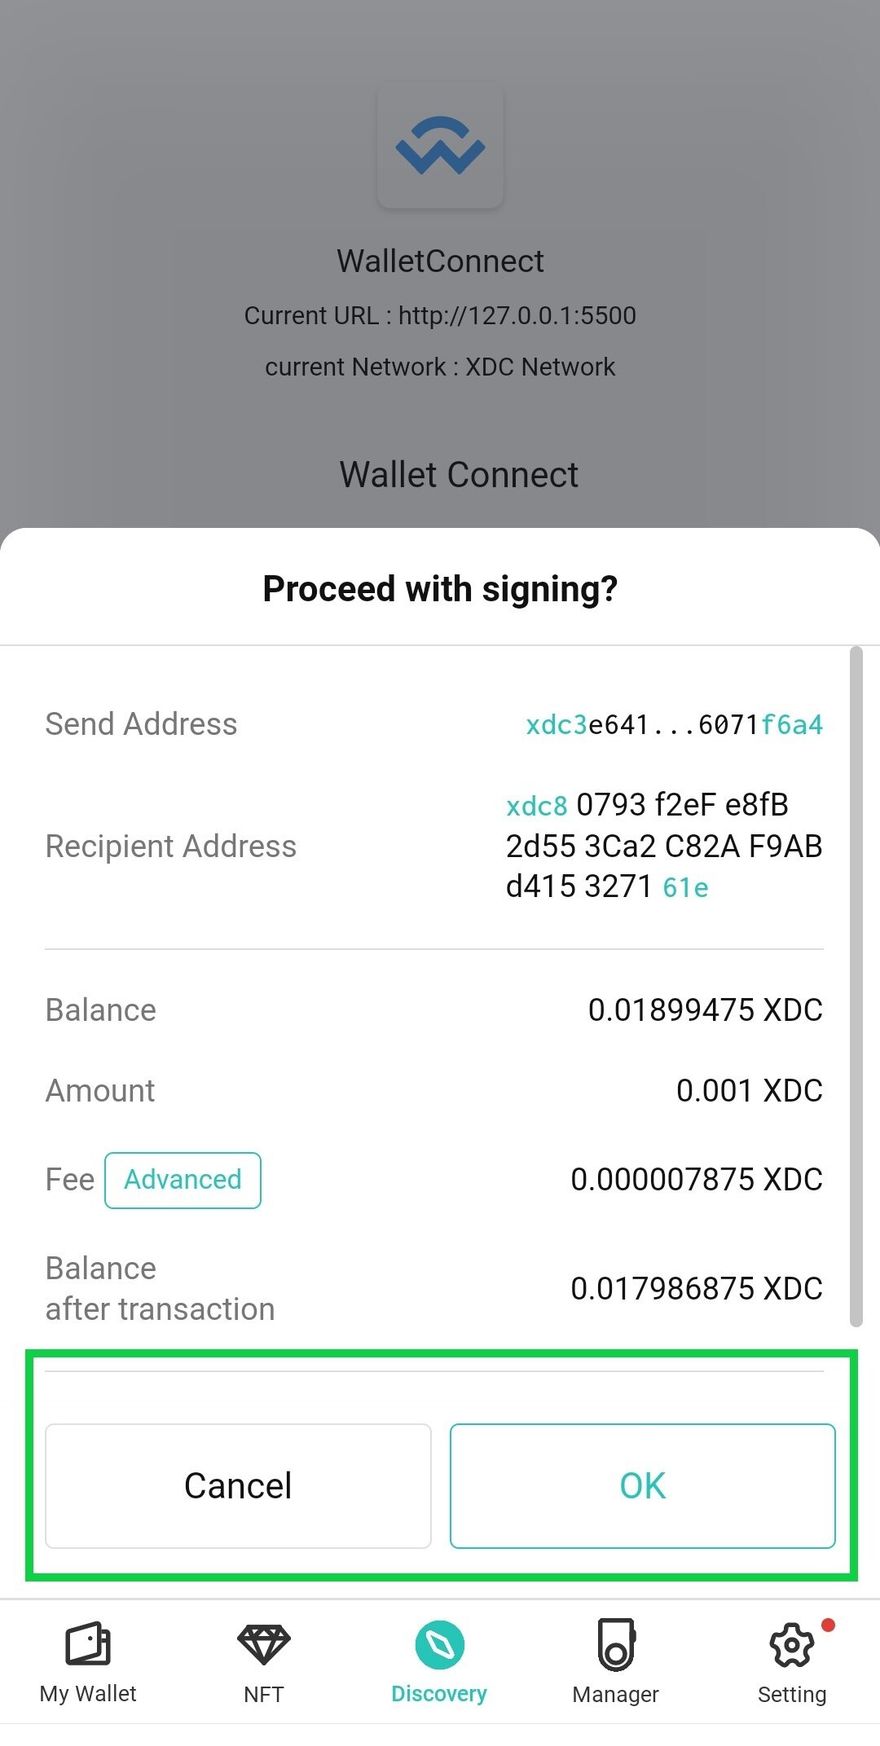
Step 5: Now coming back to the website, Paste the address in the “To address” field where you want to send XDC. Now click on the “Send Transaction” button .
In this code I have hardcoded the value of amount which is “0.001” XDC, you can change it according to your preferences or you can make it dynamic by adding another input for amount and can handle it, in the backend as I have handled “receiver’s address”.
After clicking on the send transaction button you will get a confirmation-notification on your Android wallet like this.(Refer below Screenshot)
You can see the transaction receipt at the network tab, refer to the below screenshot .
Step 6: To disconnect wallet, click on the “Disconnect wallet” button to close the connection between D’cent wallet and our app.
This is just a base code; you can optimise it according to your need. Let us know your feedback on this article in the comments and do share.
Follow👇


Discussion (0)