Today, more enterprises seek to set up private networks based on the XDC Network codebase. Whilst the process may seem daunting, knowing the steps to follow simplifies the process.
As such, we’ve decided to give you a helping hand. Through this step-by-step guide, you’ll learn how to set up a private network on the XDC Network codebase.
Note: This article walks you through the step-by-step setup of a XinFin private network with three masternodes (or network nodes). However, you can set up a private network with up to 5000 Nodes.
Setting Up Private Blockchain Network Using XDC Network Codebase.
1. Install Golang
Download and install Golang via these steps:
i) Download the Go installer for Windows, Linux, or Mac.
ii) Install Go on your computer system by following the specified steps, and you’re set up.
For more information, refer to the GO installation page.
2. Set Environment Variables
i) set GOROOT=$HOME/usr/local/go
ii) set GOPATH=$HOME/go
3. Prepare XinFin Network Client Software
Download the source code and build here.
Run the commands:
i) git clone https://github.com/XinFinOrg/XDPoSChain
ii) git checkout v1.4.4
iii) make all
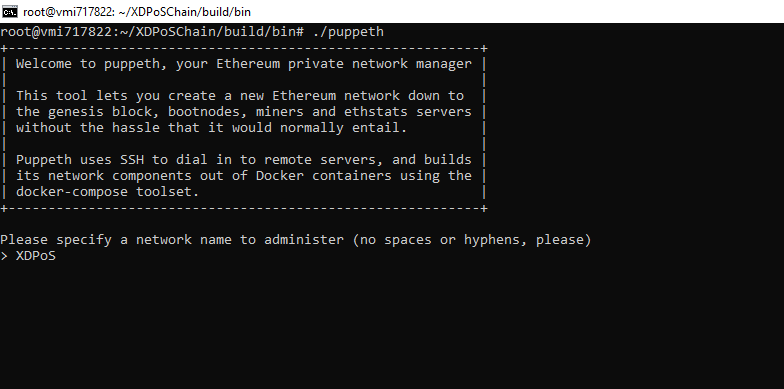
Customize Genesis Block Using the Puppeth Tool
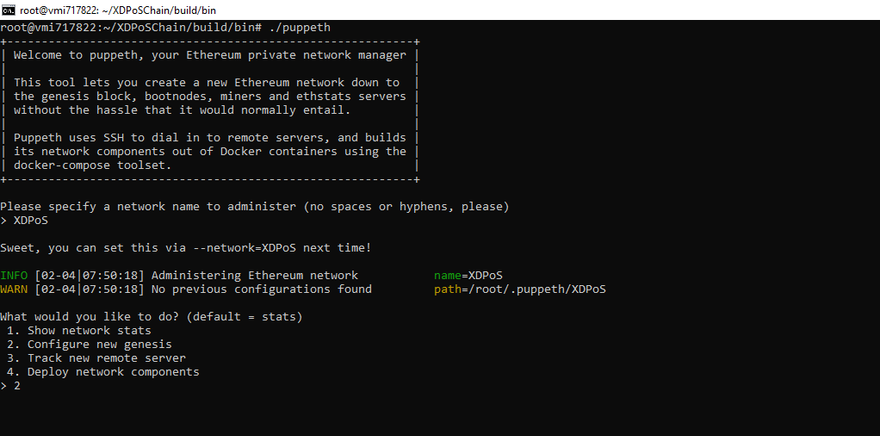
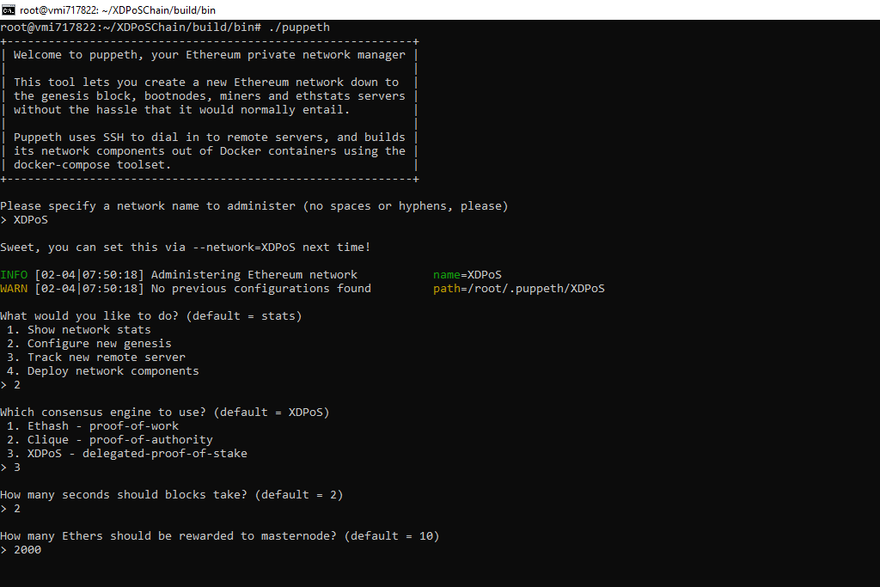
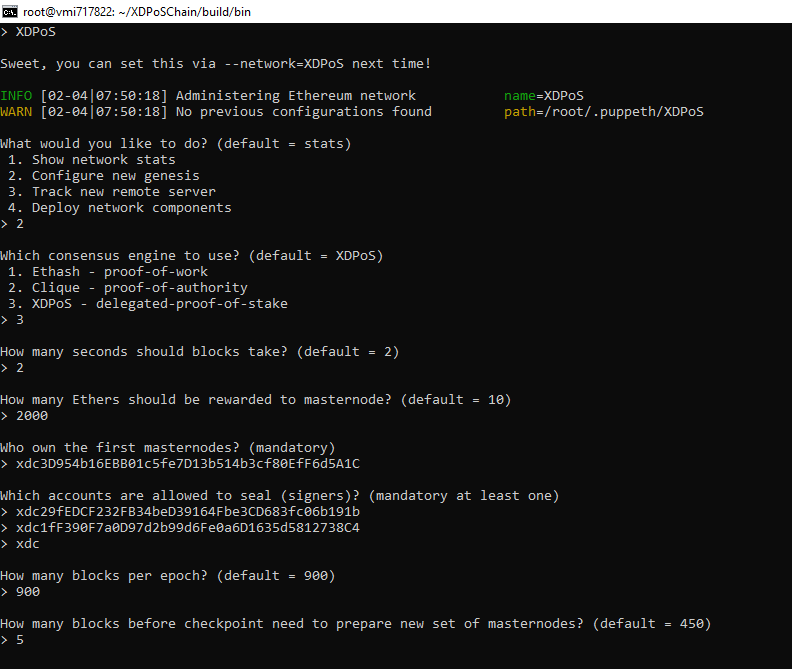
Run Puppeth command and answer questions about your private chain as follows:
./Puppeth
i) Set chain name as XDPoS
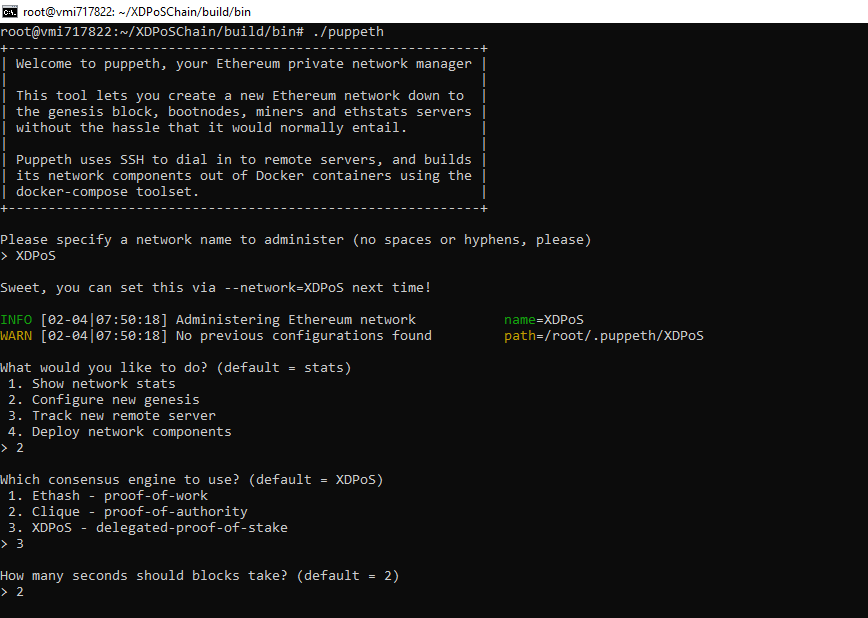
ii) Enter 2 to configure new genesis
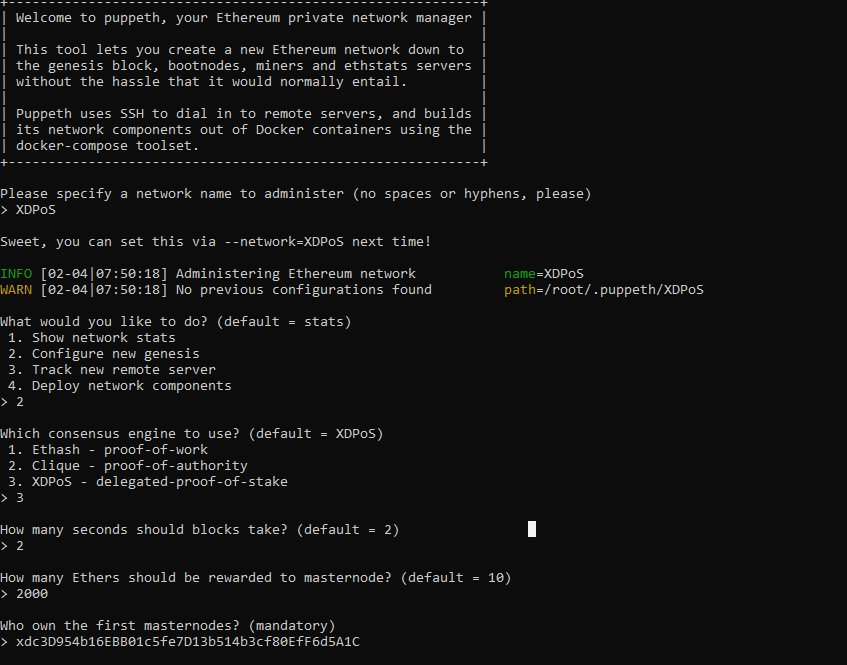
iii) Enter 3 to select XDPoS — delegated-proof-of-stake consensus

iv) Set blocktime (default 2 seconds)
v) Set a reward for each epoch
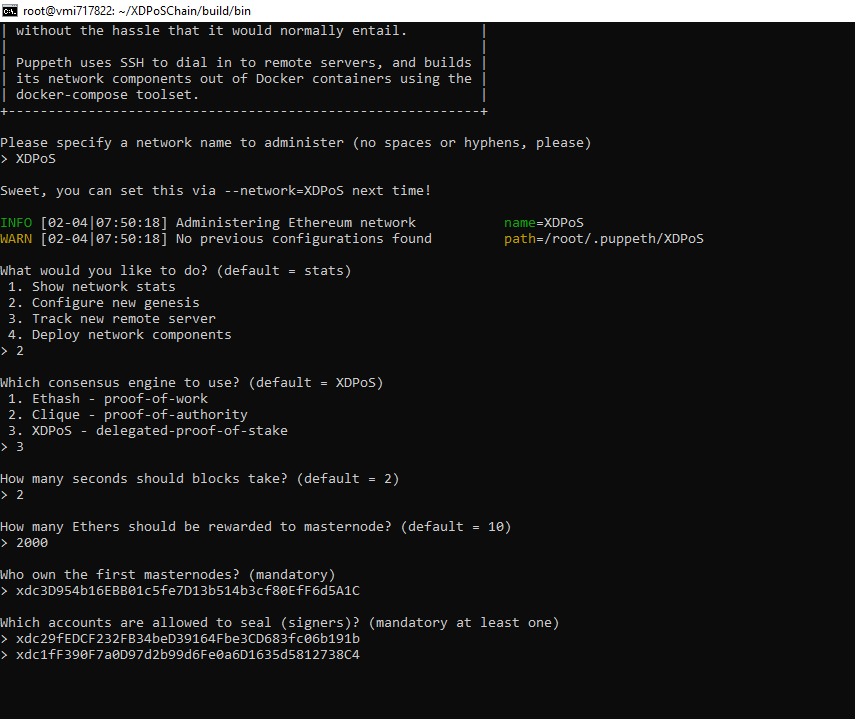
vi) Set addresses to be initial masternodes
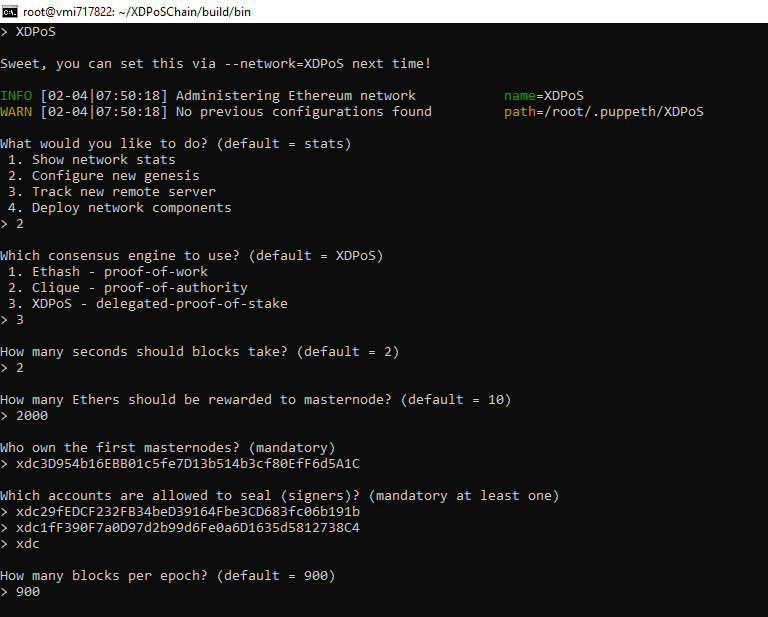
vii) Enter the signers address.
viii) Set the number of blocks of each epoch (default 900).
(Note: If you would like to customize the epoch number, update the code here: common/constants.go:14 EpocBlockRandomize = 900)
ix) Set gap
(That is: How many blocks are needed to prepare a new masternodes set before checkpoint?)
The suggested gap = 5
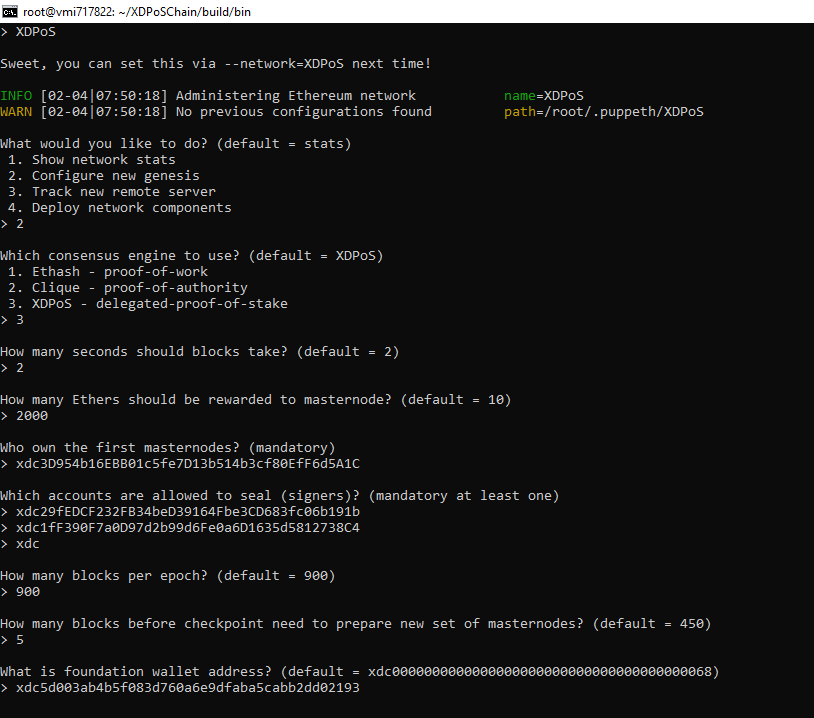
x) Enter the foundation address in which you hold the private key
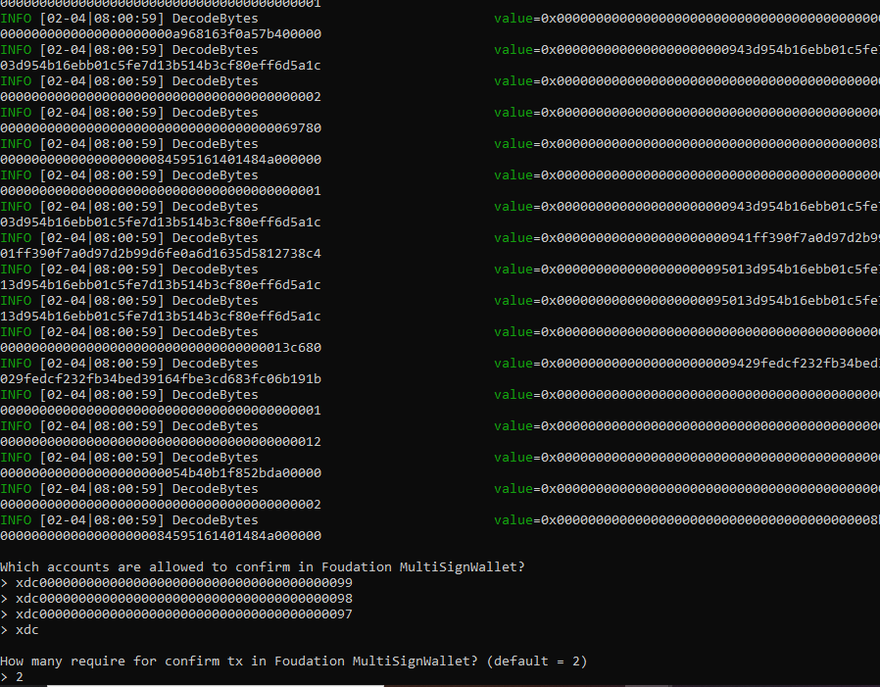
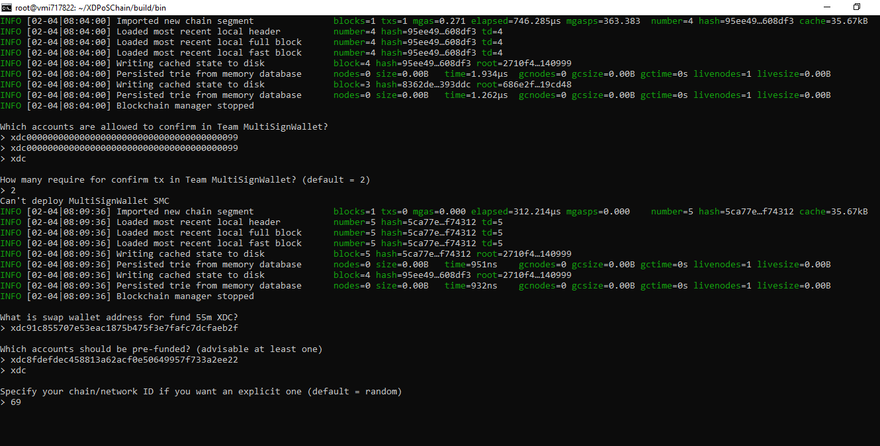
xi) Enter accounts with which you control private keys to unlock the MultiSig wallet
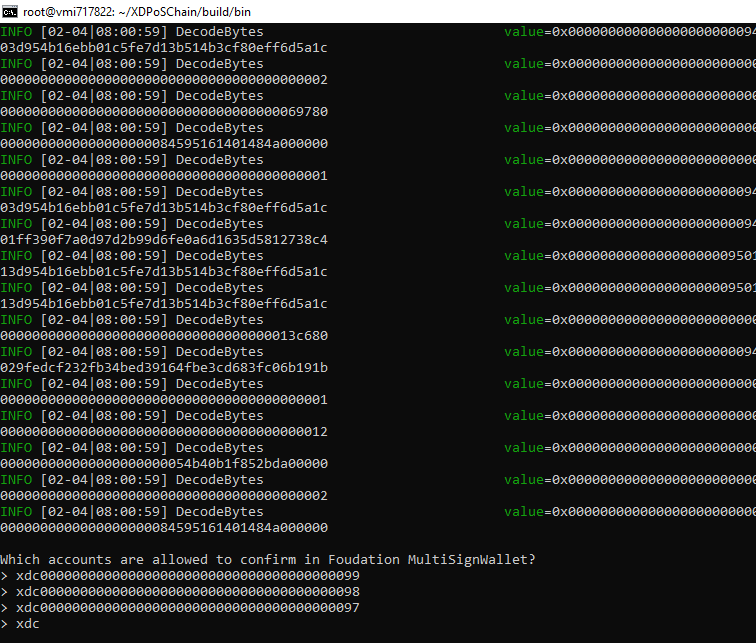
xii) Enter how many Foundation MultiSignWallet require to confirm tx default=2
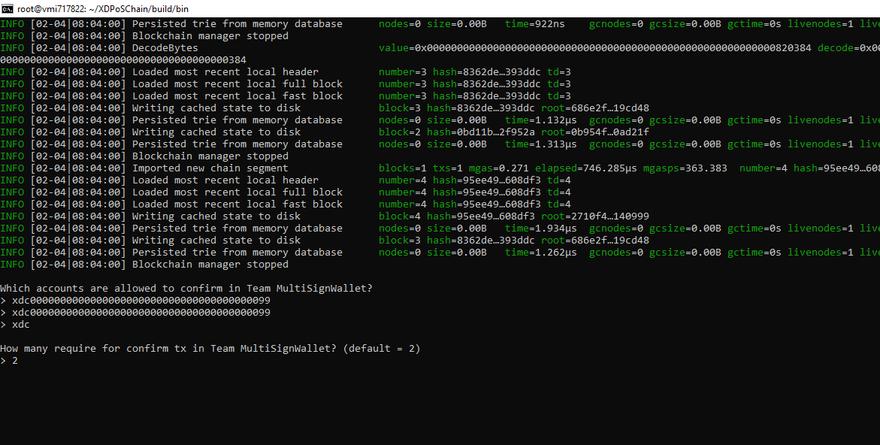
xiii) Enter the accounts that are allowed to confirm in Team MultiSignWallet
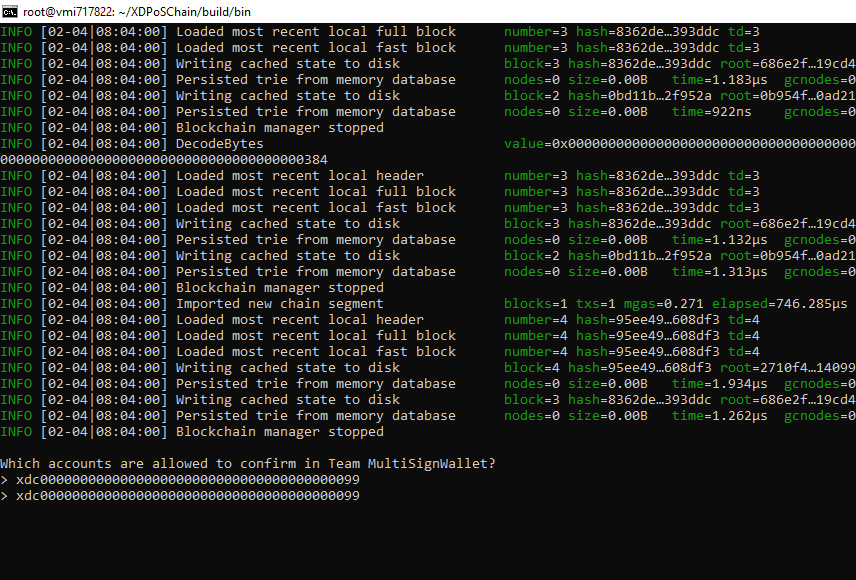
xv) Enter the number of Team MultiSignWallet that are required for confirming tx in MultisignWallet (default=2)
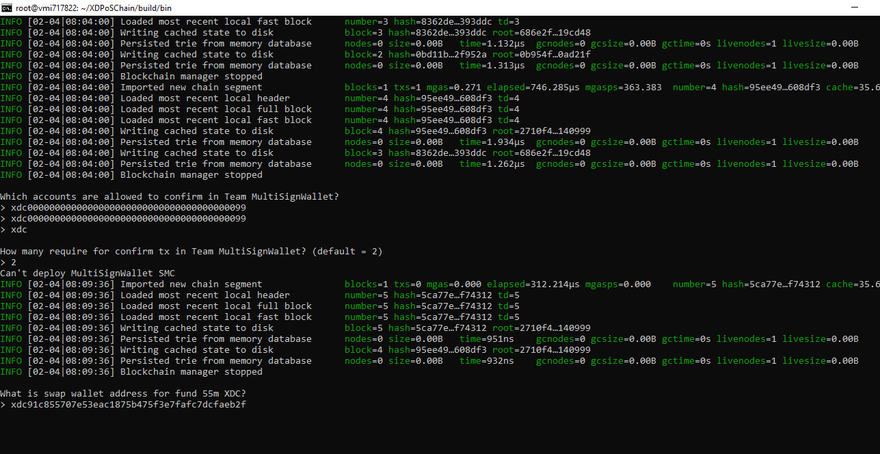
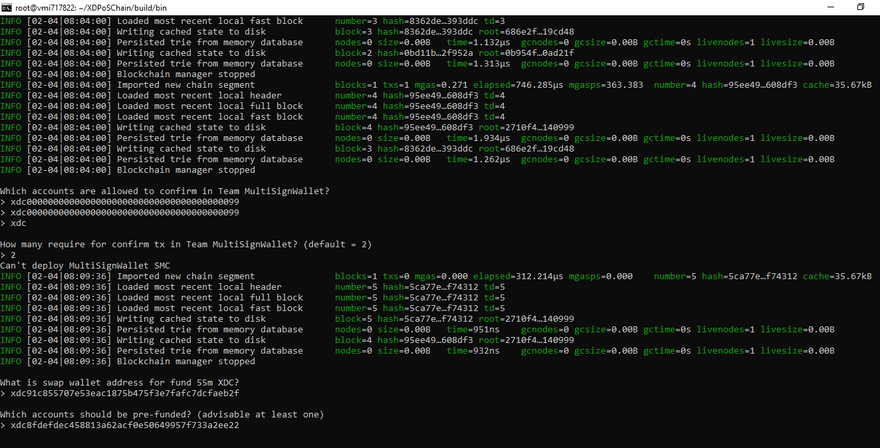
xvi) Enter swap wallet address for fund 55 million XDC
xvii) Enter the address which needs to be prefunded
xviii) Enter the network ID
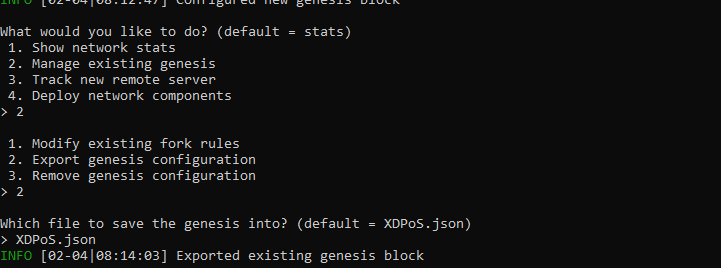
xix) Export the genesis file by:
- Selecting 2 to manage existing genesis.
- Selecting 2 to export genesis configuration
- Enter genesis filename — -XDPOS.json
xx) Press Control(CtrL) + C to exit.
5. Setup Bootnode
i) Initialize bootnode key by entering the command:
./bootnode -genkey bootnode.key
ii) Then start bootnode with the command:
./bootnode -nodekey ./bootnode.key
iii) Copy bootnode information shown:
self=enode://c1a13b173d61097ba03c68346c0c761f75095efabe170a55cec427bca83af3c81529b5e6d599c3d594761ea1fac96d291471c805045db385c4c734bc979f63bd@[::]:30301

6. Start the Masternode
Follow the following steps to start the masternode:
i). Clone the Local DPoS Setup repository from:
https://github.com/XinFinOrg/Local_DPoS_Setup
ii). Replace the genesis file with yours.
iii). Enter the bootnode key.
iv). Edit the run.sh file by changing the network id and replacing the enode which was generated earlier.
v). Enter the private key of the 3 masternode in the .env file, the masternode, and signers private key which was mentioned in the genesis file.
vi). Start your masternode with the command :
./bash run.sh
To help you understand flags in the run.sh file, here are several explanations.
i). Verbosity — — The log level ranges from 1 to 5. And, in this case, we’re using 4 for debug messages
ii). Datadir — -That’s the path to your data directory created above.
iii). Keystore — -That’s the path to your account’s Keystore created above.
iv). Identity — -That’s your full node’s name.
v). Password — -That’s your account’s password.
vi). Networkid — -This is XinFin’s testnet network ID.
vii) Port — -Your enterprise’s full node’s listening port (default to 30303)
viii). rpc, — rpccorsdomain, — rpcaddr, — rpcport, — rpcvhosts — -Your full-node will accept RPC requests at 8545 TCP.
ix). ws, — wsaddr, — wsport, — wsorigins — -Your full-node will accept Websocket requests at 8546 TCP.
x). Mine — — It implies that your full-node wants to register to be a candidate for masternode selection.
xi). Gasprice — -That’s the minimal gas price to accept for mining a transaction.
xii). Targetgaslimit — — Target gas limit sets the artificial target gas floor for the blocks to mine (default: 4712388)
xiii). Bootnode — — Bootnode information helps in the discovery of other nodes in the network
xv). Gcmode — — That’s blockchain’s garbage collection mode (“full”, “archive”)
And, to see all flags usages, use the command: XDC — — help
7. Check Your Private Chain
To check whether your chain passes the first checkpoint, follow the following steps.
i). Connect rpc
eth.getBlock(0)
eth.getBlock(1)
ii) Verify Checkpoints.
iii) Wait for 30 minutes to see if your chain passes the first checkpoint.
Useful Tools to adopt:
Some tools you can use to run different functions of the private blockchain network include:
i). XDCPay
This extension helps access XDC’s XDPoS enabled distributed applications or “Dapps” within your browser. With the extension, you inject XDC’s XDPoS web3 API into every website’s javascript context, helping Dapps read from the blockchain.
ii) XDC Remix
With the web browser-based integrated development environment, you can write, compile, deploy, and run Solidity-based smart contracts on the XDC network.
For technical support, let’s connect via XDC’s Social media communities on Slack, Twitter, and Discord and XDC Forum.
Originally published on Hackernoon…


Discussion (0)