The XDC Network is a hybrid blockchain platform that combines the power of delegated Proof-of-Stake (DPoS) consensus with the Ethereum Virtual Machine (EVM). This allows developers to easily deploy and run smart contracts on the XDC Network, leveraging the security and scalability of the network.
Prerequisites
Before you can deploy a smart contract on the XDC Network, you’ll need the following:
XDC Wallet: You’ll need an XDC wallet to hold your XDC tokens and interact with the network. You can use the official XDC Wallet, MetaMask, or any other EVM-compatible wallet.
XDC Tokens: You’ll need a small amount of Native XDC tokens to pay for the gas fees required to deploy and interact with your smart contract.
Development Environment: You’ll need a development environment set up with a code editor, Node.js, and the necessary libraries for compiling and deploying your smart contract. Popular choices include Visual Studio Code, Remix IDE, Truffle, and Hardhat.
Step 1: Write Your Smart Contract
The first step is to write your smart contract code. Smart contracts are typically written in a language like Solidity, which is the most popular language for writing Ethereum-based smart contracts.
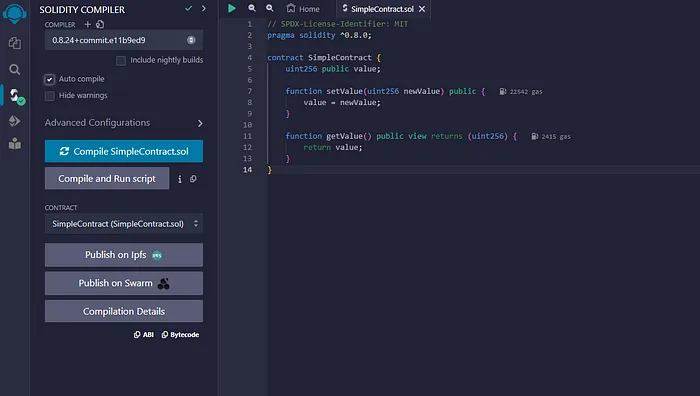
Here’s a simple example of a smart contract written in Solidity:
// SPDX-License-Identifier: MIT
pragma solidity ^0.8.0;

contract SimpleContract {
    uint256 public value;

    function setValue(uint256 newValue) public {
        value = newValue;
    }

    function getValue() public view returns (uint256) {
        return value;
    }
}
This contract has a single state variable value and two functions: setValue to update the value, and getValue to retrieve the current value.
Step 2: Compile Your Smart Contract
Once you’ve written your smart contract code, you’ll need to compile it. Compiling converts the high-level Solidity code into low-level bytecode that can be executed by the Ethereum Virtual Machine (EVM) on the XDC Network.
The process of compiling your smart contract will depend on the development environment you’re using. If you’re using Remix IDE, you can simply copy and paste your code into the editor and click the “Compile” button. If you’re using a command-line tool like Truffle or Hardhat, you’ll need to follow the instructions specific to those tools.
Step 3: Connect to the XDC Network
Before you can deploy your smart contract, you’ll need to connect your development environment to the XDC Network. The XDC Network has several different networks, including the main network (mainnet) and various test networks (testnet).
For development and testing purposes, it’s recommended to use one of the test networks, such as the XDC Apothem Testnet. To connect to a testnet, you’ll need to configure your development environment with the appropriate network settings, including the RPC endpoint and chain ID.
Here’s an example of how to configure MetaMask to connect to the XDC Apothem Testnet:
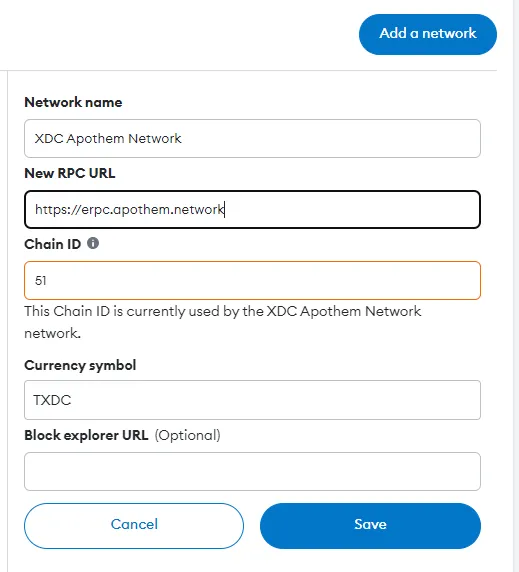
- Open MetaMask and click on the network dropdown.
- Select “Custom RPC.”
- Enter the following details:
- Network Name: XDC Apothem Testnet
- New RPC URL: https://erpc.apothem.network
- Chain ID: 51
- Currency Symbol: TXDC
- Click “Save” to connect to the XDC Apothem Testnet.
Step 4: Deploy Your Smart Contract
With your smart contract compiled and your development environment connected to the XDC Network, you’re ready to deploy your contract.
The process of deploying your smart contract will depend on the development environment you’re using. In general, you’ll need to provide the compiled bytecode and the constructor arguments (if any) for your contract.
Here’s an example of how to deploy the SimpleContract using the Remix IDE:
Step 1: In Remix IDE, switch to the “Deploy & Run Transactions” environment.
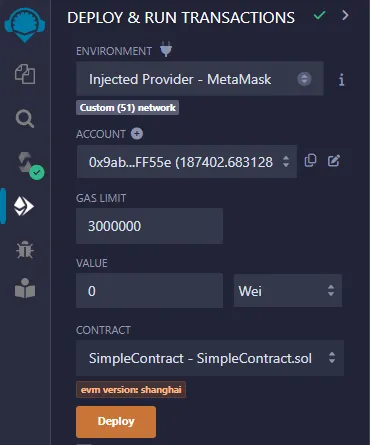
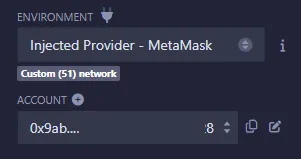
Step 2: Select the appropriate environment (e.g., “Injected Web3” for MetaMask).
Step 3: Ensure that your MetaMask wallet is connected to the XDC Apothem Testnet.
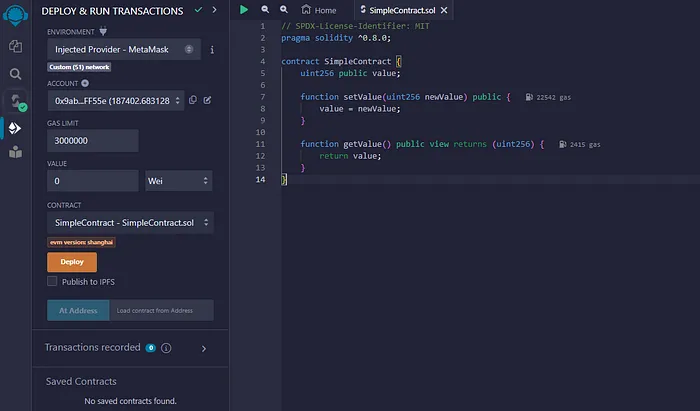
Step 4: Scroll down to the “Deploy” section and select the SimpleContract from the contract dropdown.
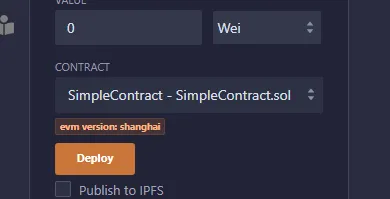
Step 5: Click the “Deploy” button to deploy your contract to the XDC Apothem Testnet.
After the deployment is complete, you’ll receive the contract address, which is a unique identifier for your deployed contract on the XDC Network.
Step 5: Interact with Your Smart Contract
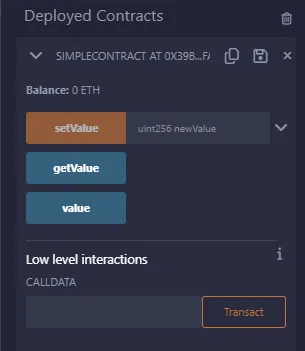
With your smart contract deployed, you can now interact with it by calling its functions. In the Remix IDE, you can interact with your contract directly from the “Deployed Contracts” section.
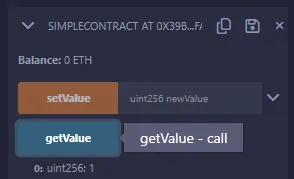
Here’s an example of how to call the setValue and getValue functions on the SimpleContract:
- In the “Deployed Contracts” section, expand the SimpleContract contract.
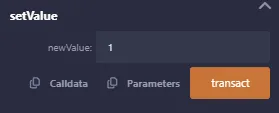
To set a new value, enter a value in the newValue field of the setValue function and click the setValue button.
To retrieve the current value, click the getValue button. The current value will be displayed in the output below.
Congratulations! You’ve successfully deployed a smart contract on the XDC Network and interacted with it. This is just a simple example, but you can build more complex and sophisticated smart contracts to handle a wide range of decentralized applications and use cases on the XDC Network.
Facing any issues while building any contract on XDC Network, submit your queries here: XDC.Dev
XDC Network Official Website: https://xinfin.org/
XDC Network Social Channels:


Discussion (0)