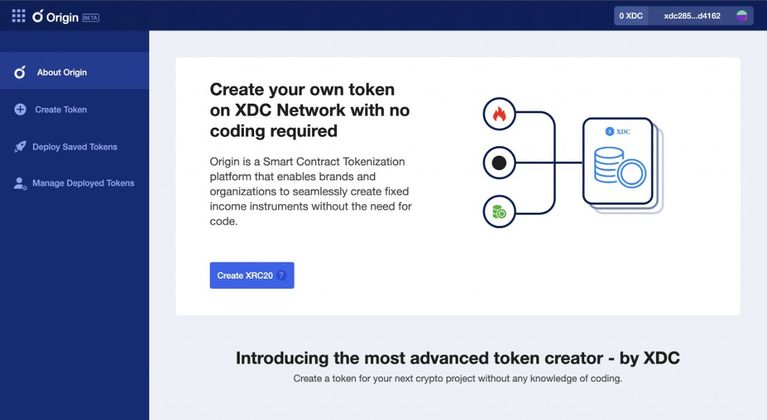
XDC Origin is a decentralized application (dApp) to create smart contracts and enable asset tokenization without custom programming expertise.
The purpose of XDC Origin is to simplify the process of token creation. Because this application automates smart contract creation and token generation, users do not need to be well-versed with the code construction.
A Complete Guide to create and deploy XRC20 token
With a comprehensive dashboard and user-friendly UI, XDC Origin serves as an advanced token generation dApp for XDC blockchain users. To create an XRC20 token on XDC Origin, complete the following steps:
Step 1: Basic Information
1.Visit XDC Origin.
2.Connect your XDCPay wallet to create a token. Click on Connect
Wallet if you already have an XDCPay wallet account. If you are
a new user, visit the chrome web store and install the wallet
extension. Create an XDCPay account and connect to XDC Origin.
3.Once you have connected your wallet, click on Create XRC20. A
form will appear asking for the basic information for the token.
4.Enter the required details and click on Continue.
Step 2: Tokenomics
Enter the initial supply limit for your token. For example, you can set the initial supply limit to 100,000.
Click on Continue to proceed to the next step.
Step 3: Add Features
XDC Origin offers you a choice of functionality for your smart contract. It applies Burnable and Mintable functionality by default; however, you can choose Pausable based on your requirements.
Step 4: Contract Deployment
Once you are ready with the feature selection, you can either save it as a draft or deploy it instantly.
If you save the draft, your token will be moved to the Deploy Saved draft section. This section is designed to allow users to manage the draft tokens using any of the three options: Deploy, Delete, and Edit.
However, if you continue to Deploy, your token will be deployed and you will receive a message for successful deployment with the contract details, including the contract address, transaction hash, minted tokens, and gas fee used in the process of deployment.
For the final step, import the total minted token to your XDCPay wallet.
- Copy the contract address.
- Go to your wallet.
- Go to tokens and click on Add Tokens.
This action will open a form in which you can add the token contract address, token symbol, and decimal of the minted tokens. After you add the required details, click on Add. Now, the balance (total minted tokens) will be reflected in your wallet. Check the balance in your XDCPay wallet to ensure the tokens are accurately imported.


Discussion (7)
In step 1 problems loading token image png 256x256.
It seems to be loading but it never stops.
Anyone else having the same problem?
Thank you for reporting the issue. I would suggest you to share the screenshot of the issue that you are facing.
It has been in this state for more than 24 hours.
sites.google.com/view/projectnxt/h...
I forgot, even in "Edit Contract Profile" the actions are not updated.
Okay Noted. I am also facing the same issue while uploading the Token Image.
@xdc_foundation Team, Post API for upload is not working, Please look into this and fix it ASAP.
Post API Name: upload-xrc20-file-to-s3
Thank you for reporting this issue. We will pursue a resolution and follow up as soon as possible.
Hello@xdc_foundation
Any update on the "Upload issue"?
Can you please let us know how can we connect with your team.
We have some other queries too, Kindly provide your email id or telegram id for further communication.
Image upload problems continue unabated, image is trapped in infinite upload.