Running a Masternode on the XDC Network requires staking 10,000,000 XDC, completing KYC, and securely managing validator funds.
For institutions and enterprises, using Fireblocks via WalletConnect v2 provides institutional-grade custody, governance automation, and transaction policy control.
This guide walks through the complete process using your referenced application flow and screenshots.
Why Use Fireblocks for XDC Masternode Hosting?
Fireblocks is an institutional digital asset custody and operations platform used by exchanges, fintechs, funds, and enterprises.
Multi-Layer Security
1️⃣ MPC-CMP Wallet Technology
- Private keys are split into encrypted shares.
- No single entity ever holds the full private key.
- Eliminates single-point key compromise risk.
2️⃣ Secure Hardware (Intel SGX)
- Signing operations occur inside secure enclaves.
- Protects against malware and insider threats.
3️⃣ Policy Engine – Automated Governance Controls
The Policy Engine automates governance policies for transaction rules and admin approvals.
It allows you to configure rules that dictate how transactions are handled and approved.
You can define rules to:
- Automatically approve transactions
- Block transactions
- Require additional signers
Rules can be applied using filters such as:
- Transaction amount thresholds
- Smart contract interaction
- Specific destination addresses
Policy Engine rules can be configured for:
- Internal wallets
- Network connections
- Exchanges
- Fiat providers
- Whitelisted addresses
- Smart contract wallets
This is extremely valuable for Masternode staking because:
- Large 10M XDC deposits can require multi-admin approval
- Only approved validator contracts can be interacted with
- Unstaking can require additional governance checks
4️⃣ Admin Quorum & MFA
- Multi-admin approval workflows
- Role-based access control
- Multi-factor authentication enforcement
- This makes Fireblocks ideal for institutional masternode operators.
Prerequisites Before Starting
Before beginning:
- Fireblocks workspace with Web3 Wallet enabled
- Minimum 10,000,000 XDC in your Fireblocks vault
- Masternode server deployed and coinbase address generated
- KYC document in PDF format
Masternode Application URLs:
- Mainnet: https://mn.xinfin.network
- Testnet: https://mn.apothem.network
Step-by-Step: Host XDC Masternode via Fireblocks
STEP 1: Open Masternode Application & Select WalletConnect v2
- Visit the Masternode App.
- Click Login (top right corner).
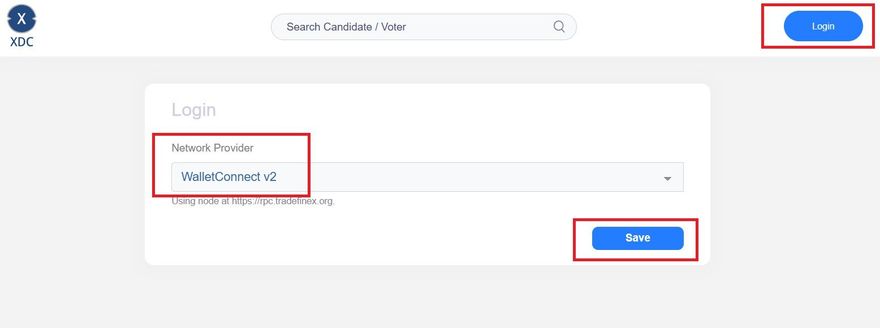
On the login page:
- Under Network Provider, select: WalletConnect v2
- Click Save
This initiates a WalletConnect session.
STEP 2: Scan QR Code with Fireblocks
After selecting WalletConnect:
- A QR code window appears labeled Fireblocks
- You will see:
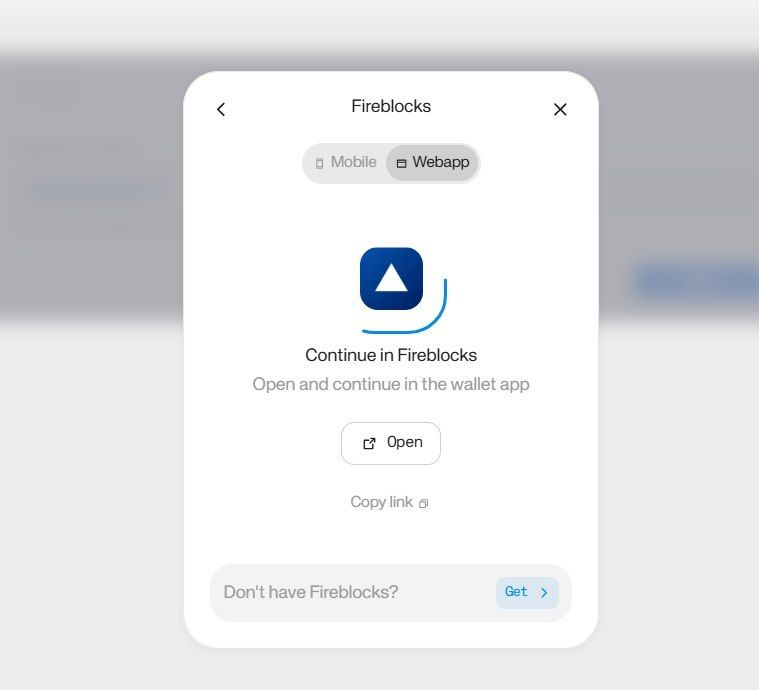
- Mobile / WebApp toggle
- QR Code
- “Scan this QR Code with your phone”
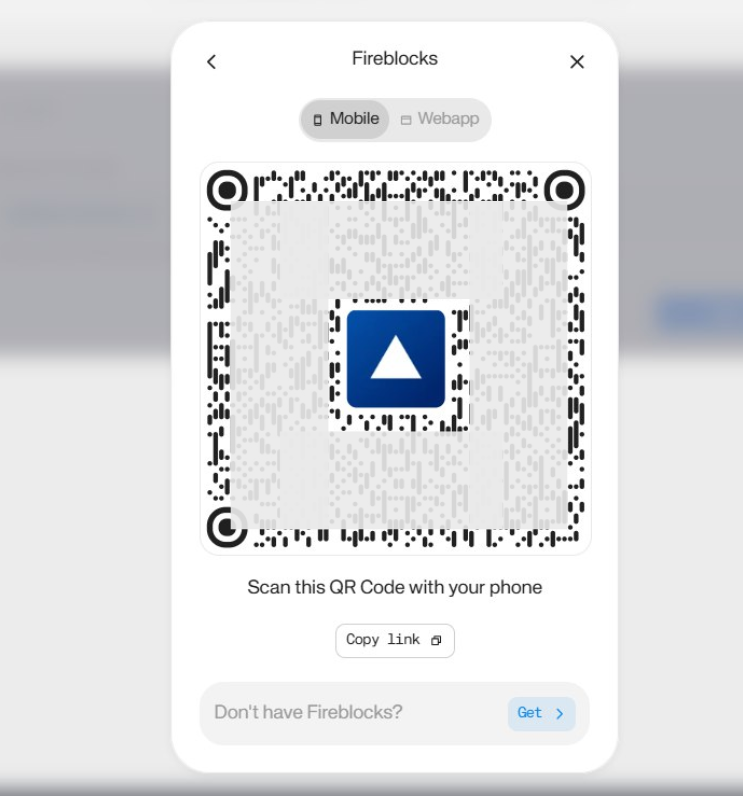
Action:
- Open Fireblocks Web3 Wallet (Mobile App or Web UI)
- Scan the QR code
- Approve session request
This connects your Fireblocks vault to the XDC Masternode dApp.
STEP 3: Connect Vault to dApp
After scanning:
A popup appears: Connect vault to dApp
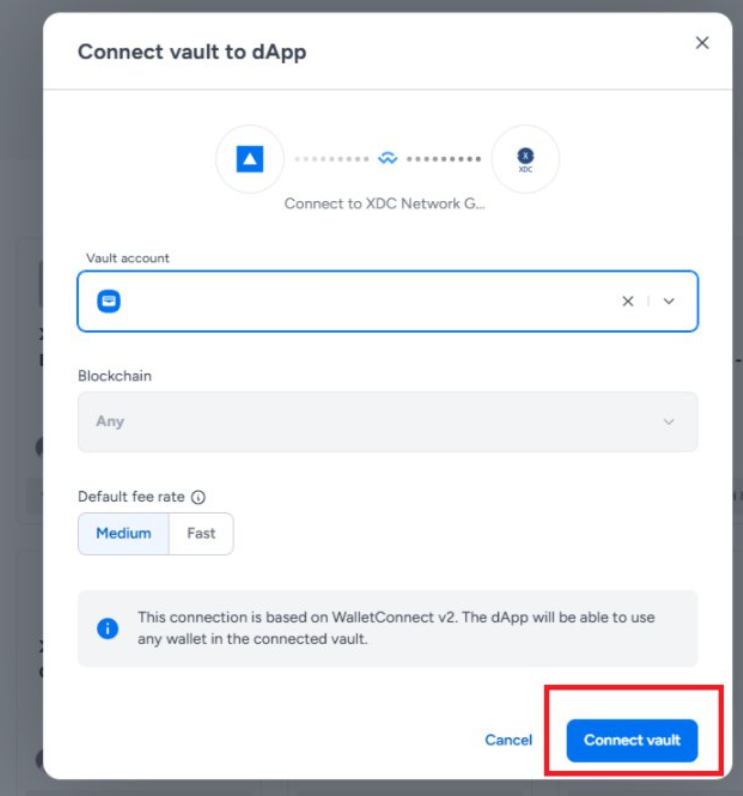
You will see:
- Vault Account dropdown
- Blockchain selection
- Default fee rate (Medium / Fast)
Action:
- Select the correct Vault account containing 10M+ XDC
- Confirm Blockchain (XDC Network)
- Click Connect Vault
Now your Fireblocks wallet is connected to the Masternode app securely via WalletConnect v2.
STEP 4: Click “Become a Candidate” & Stake 10,000,000 XDC
After successful login:
- Click Become a candidate (top right)
You will now see the Masternode staking interface.
Inside the “Become a MasterNode” panel, You will see:
- Minimum requirement: 10,000,000 XDC
- Deposit will be locked
- Stake field (pre-filled 10,000,000)
- TX fee displayed
⚠️ The deposit will be locked as part of validator staking.
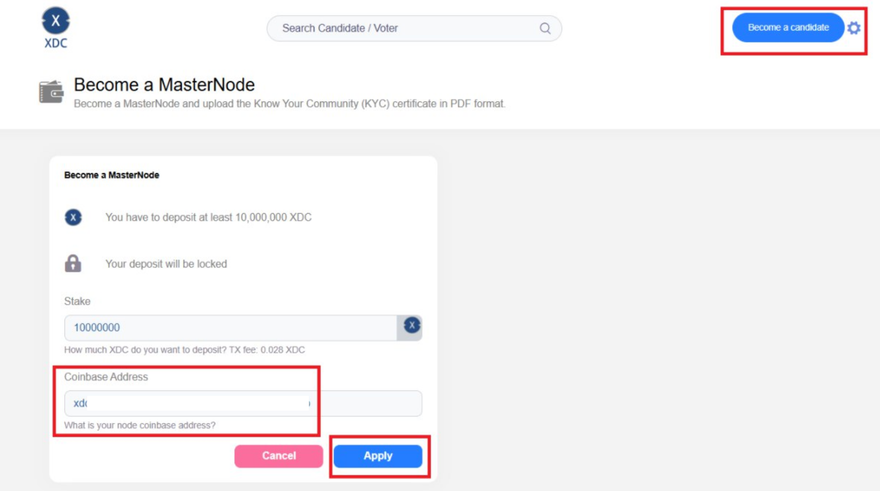
Now, In the highlighted section, You must enter:
Coinbase Address
This is your node’s validator address, generated when setting up your masternode server.
Example format:
xdc……………………………………b
⚠️ Important:
- This is NOT your Fireblocks wallet address
- It is your masternode server’s coinbase address
Once Stake amount confirmed & Coinbase address entered, Click on the Apply button.
STEP 5: Approve Transaction in Fireblocks
Once Apply is clicked:
- Fireblocks will prompt a transaction approval
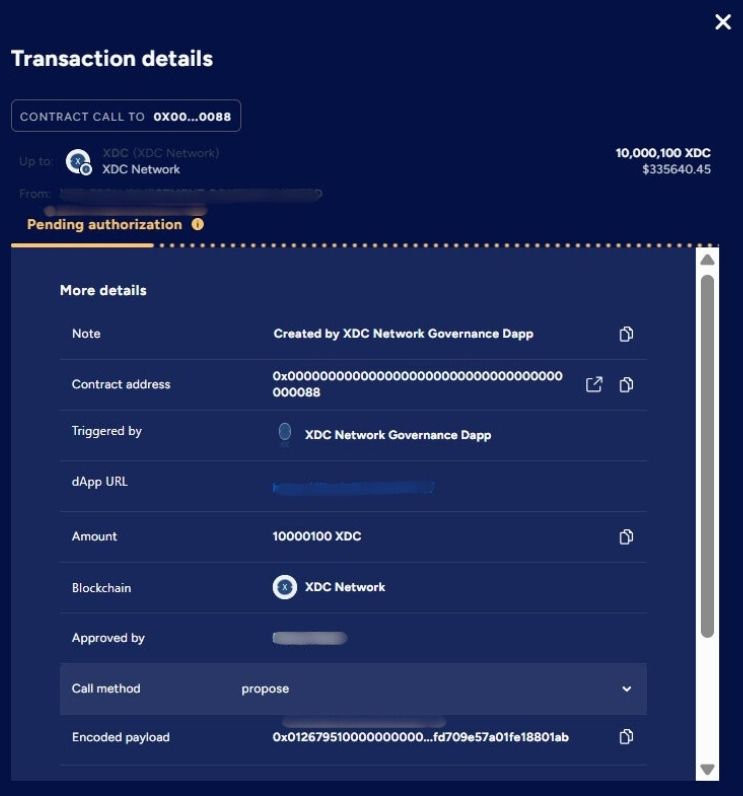
Depending on Policy Engine rules:
- It may auto approve
- It may require multiple signers
- It may require admin quorum
Approve transaction securely.
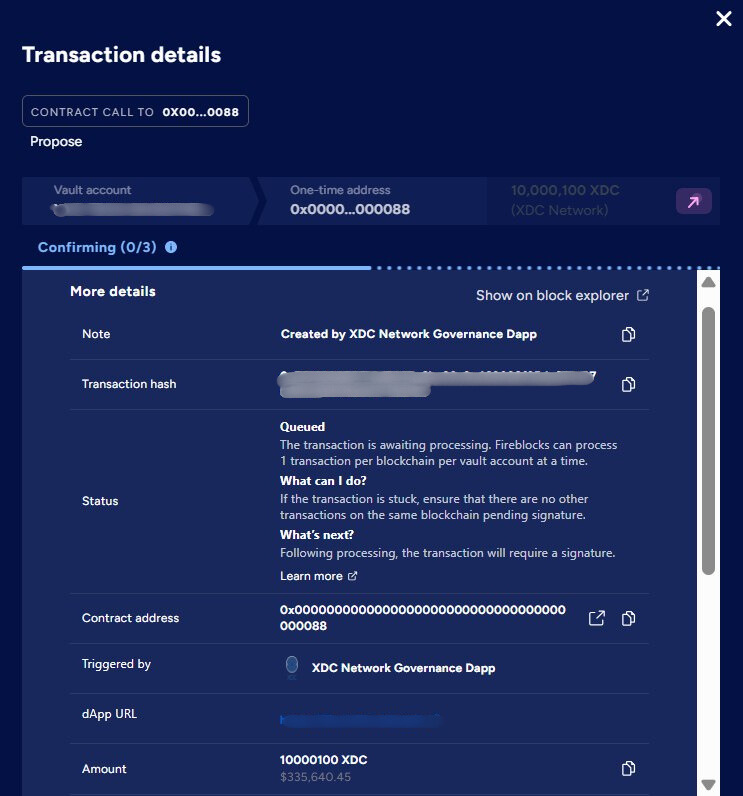
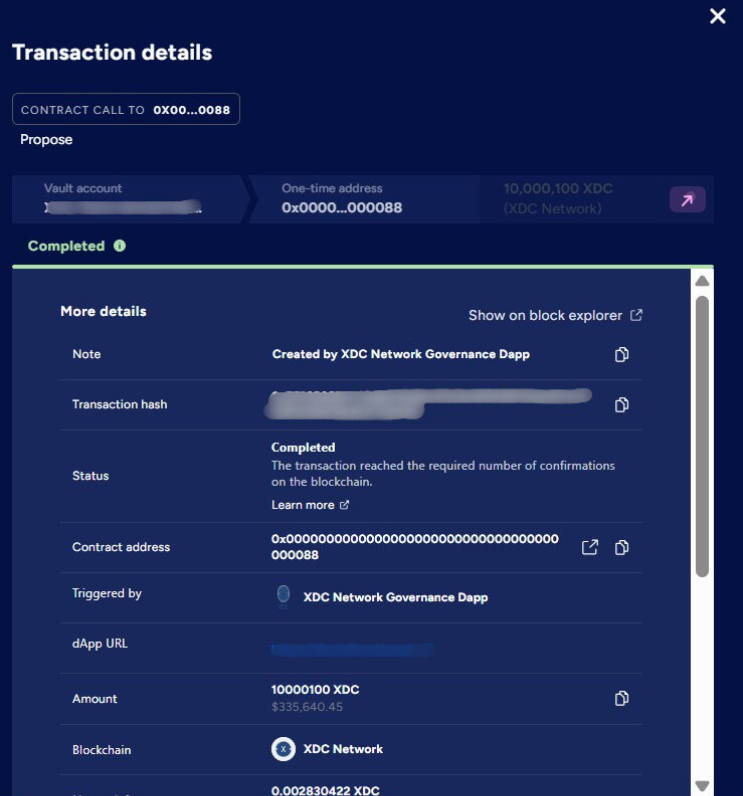
STEP 6: Transaction Confirmation
After approval:
- Transaction is broadcast to XDC Network
- You will receive a transaction hash
- Stake becomes locked
- Node enters validator candidate pool
You can verify transaction on:
https://xdcscan.com
What Happens Next?
After staking:
- Your masternode enters validator selection cycle
- Once approved in an epoch
- It becomes active validator
- Begins earning rewards
Why Fireblocks is Ideal for Institutional Masternodes
Using Fireblocks provides:
- Institutional custody of 10M+ XDC stake
- Governance enforcement through Policy Engine
- Multi-signature style MPC security
- Hardware-enclave signing
- Vault-level segregation of validator funds
- Controlled unstaking workflows
This reduces operational and governance risk significantly compared to browser wallets.
Useful Links
Disclaimer
This article is intended strictly for educational and informational purposes only. It does not constitute financial, investment, or legal advice.
Running a masternode on the XDC Network, including staking requirements and infrastructure setup, involves technical, operational, and financial considerations. Readers are encouraged to conduct their own research (DYOR) and consult with qualified professionals before making any decisions related to digital assets or blockchain participation.
The mention of platforms such as Fireblocks or technologies like WalletConnect is for informational purposes only and does not imply endorsement.
By following this guide, you acknowledge that any actions taken are at your own risk.


Discussion (0)