In this tutorial, my objective is to walk you through the steps of setting up your account on XinFin Network and guiding how to migrate it to XinFin through to issuing your first token on the XinFin network using a single Ethereum ERC-20 smart contract. XDC Network is also EVM compatible so supports all functions of the ethereum network but XDPoS consensus gives advantages like near zero gas fees, 2000 TPS, and reduces energy usage by 99% compared to Ethereum’s PoW based network.
The token will be a standard XRC20, it will have the main functions and can be used as a general base for more sophisticated applications than just transferring them
Before we start:
There are a few different components you will need in order to build your own token.
- XinFin Address (Apothem Network)
- A text editor (I.e. Sublime / Atom)
- Solidity contract (Any Ethereum ERC-20 or EVM compatible contract can be used)
XinFin address
For this tutorial, we will use an Apothem test network to issue the token so you don’t end up spending real XDC. We will use the Apothem Test network. In order to get started, go to XDCPay and create an account there and make sure you have selected Apothem network.
Text Editor
Download one of the following text editors:
- Sublime Text
- VS Code
- Atom
Contract
We will be using the smart contract that the legendary Ethereum unicorn rider, BokkyPooBah has helped us to make please check out at https://github.com/bitfwdcommunity/Issue-your-own-ERC20-token/blob/master/contracts/erc20_tutorial.sol
You will be editing this code for your own token
Basically what you will have to do in simple terms:
- Download XDCPay
- Select Apothem Network.
- Copy the address
- Go to the faucet and get 1000 test XDC
Now let’s get started:
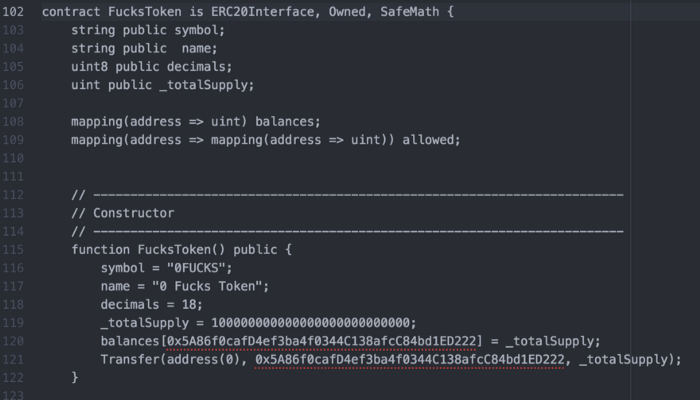
- Open the contract you downloaded in your Text Editor.
- Go to Line 3–15 and look at the comment section. Although this is a comment section, this will help you down the track. For me, 0Fucks was my first one :). Basically, you send 0Fucks to someone when you don’t care.
- Change Line 4 to the title of your Smart Contract
- Change Line 6 to the XinFin address you created in XDCPay
- Change Line 7’s Symbol to your respective coin name (Keep it short)
- Change Line 8 to the name of your token

Next:
- Go to Line 102 and change “FucksToken” to “(YourTokenName)
- Do the same for Line 115
- Go to Line 116 and change the symbol name, the same as the ones you did in the comment section
- Do the same for Line 117
- Change Line 120’s Address to be the same as the one you generated in XDCPay
- The same goes for Line 121
For the decimals and total supply on Line 118 and 119, you can just leave it as it is however I’ll explain it just for visibility. On total supply, there are actually a few considerations. The first one is that the standard (and max) is 18 decimals, meaning that a coin can be split into 18 parts.
For the decimals and total supply on Line 118 and 119, you can just leave it as it is however I’ll explain it just for visibility. On total supply, there are actually a few considerations. The first one is that the standard (and max) is 18 decimals, meaning that a coin can be split into 18 parts.
The second one is that let’s say for example you want to issue 100 tokens, on the total supply part you have to put 100 followed by the number of decimals that you choose.
Ex: If I want to emit 100 tokens, what I will put on the total supply is: 100000000000000000000; and so it goes.
After that, we are done with editing the code. Yep, that was easy. Now we are going to do some cool stuff…
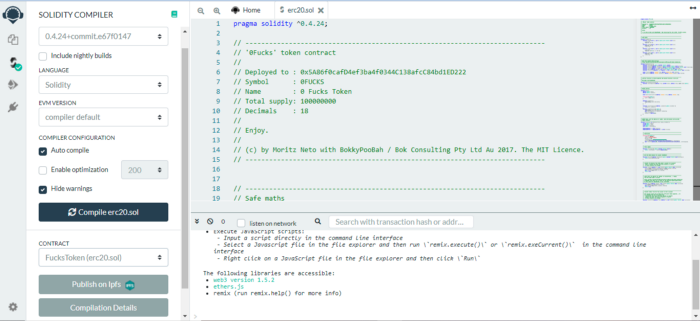
Go to https://remix.xinfin.network/
In the browser create a new file and name erc-20.sol and paste the code you just edited! If something red comes up, there is something wrong in the code. If there is a yellow warning it’s alright, let’s hope for the best.
Now Under Compile →Details →Choose the Token you are creating and compile it
After compiling the contract select the environment as injected web3 and select the contract and click on deploy.
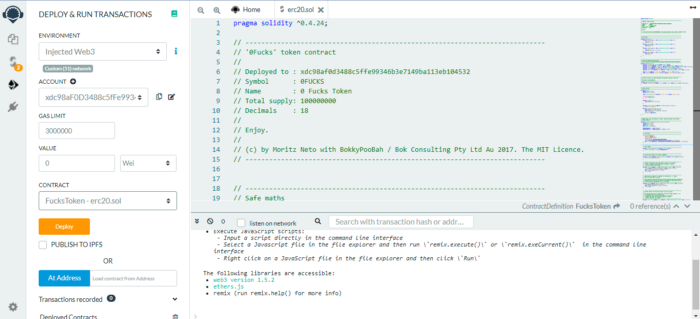
After deploying the token you will see the popup from the XDCPay accept it and confirm the transaction.
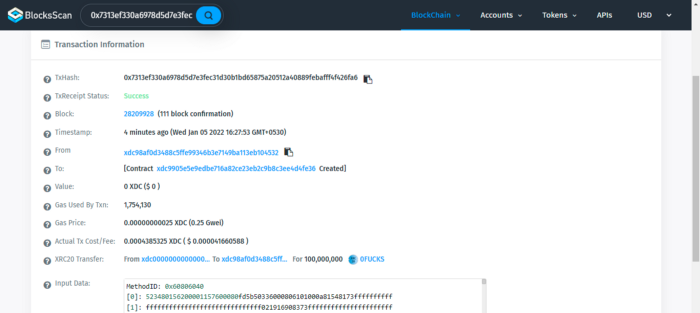
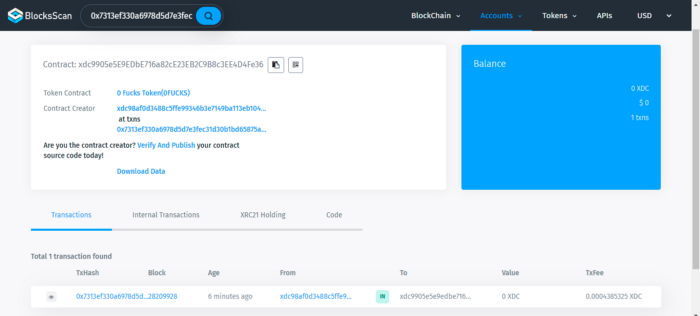
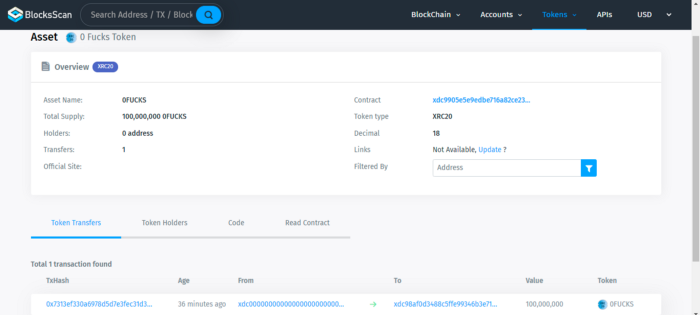
Click on the transaction tx or access https://explorer.apothem.network or check if the contract went through. If it didn’t, start again and try to figure out what you got wrong.
If everything works out, this is a sample image of what you should be seeing.
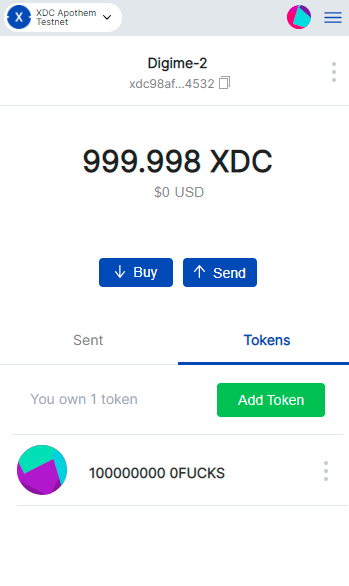
Now you need to just add the contract address on the XDCPay with token symbol and decimal
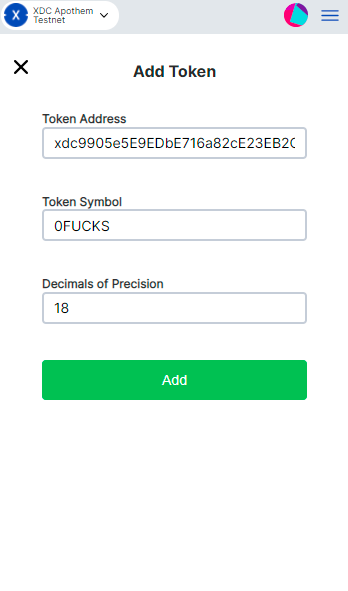
After adding the contract details you will be able to see the XRC-20 tokens on your XDCPay address
Now we are going to verify this contract to verify the contract click on the contract address and select verify and publish
Here you need to enter the Contract name, select the compiler version and paste the smartcontract and click on submit
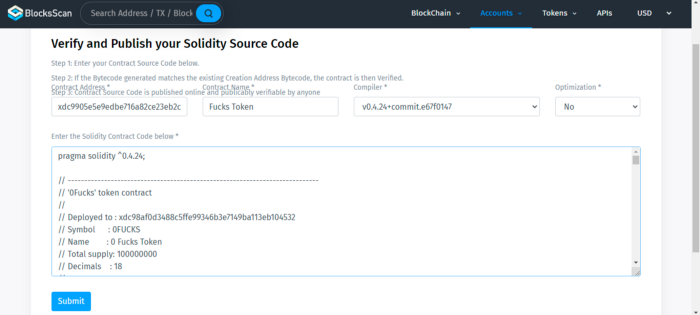
Fingers crossed finally we have verified our contract
Final Considerations:
You just made your own Cryptocurrency Token. This is the simplest way I have been able to put a token together. However, this is just the token creation process, and it means that you can deploy any ERC-20 token or a contract on XinFin Network
You’ve just unlocked some Blockchain superpowers and I hope this helped you become more interested and involved with the amazing space. But remember that with great powers come great responsibilities. I truly hope you use your ideas for good.


Discussion (0)