In this tutorial, I will walk you through the steps of setting up your account through to issuing your ICO contract on the XinFin network using a single smart contract
The tokens will be standard XRC20, you will be able to set up general specifics like the rate of XDC per token and timeline bonuses.
WARNINGS — READ THIS SHIT. FOR REAL.
With great powers come great responsibilities. I’m not responsible for you not being cautious with your XDC, or using these powers for the evil side of the force. I truly hope you do good and feel empowered by the potential that this technology puts in the hands of people.
THIS CONTRACT HAS NOT BEEN AUDITED. It means that it is experimental code, has not been verified, and can be broken, if you intend to do a REAL ICO, you HAVE to Audit the code and do a proper contract tailored to your specs.
I have absolutely no responsibility for you, your dog, your money, or your life. Be big boys and girls and own it.
Before we start:
There are a few different components you will need in order to build your own token.
- XinFin Address (Apothem Network)
- Some XDC (Apothem Network)
- A text editor (I.e. Sublime / Atom)
- Solidity contract
- Be able to cross your fingers twice during the process
XinFin address
For this tutorial, we will use a test Apothem network to issue the token so you don’t end up spending real XDC. We will use the ApothemTest network. In order to get started, go to the XDCPay extension wallet install it, and create an account there.
To get set up, click the right-hand side corner, change the network to Apothem Network at XDCPay
Text Editor
Download one of the following text editors:
- Sublime Text
- Atom
Contract
- Download the ICO smart contract by clicking here. https://github.com/RuslanWing/Smartcontracts/blob/main/XRC-20-ICO.sol
- You will be editing this code for your own ICO Contract.
Find the Apothem Faucet at https://faucet.apothem.network where you can get 1000 XDC tokens to the test XInFin XDPoS Network
Now let’s get started:
- Open the contract you downloaded in your Text Editor.
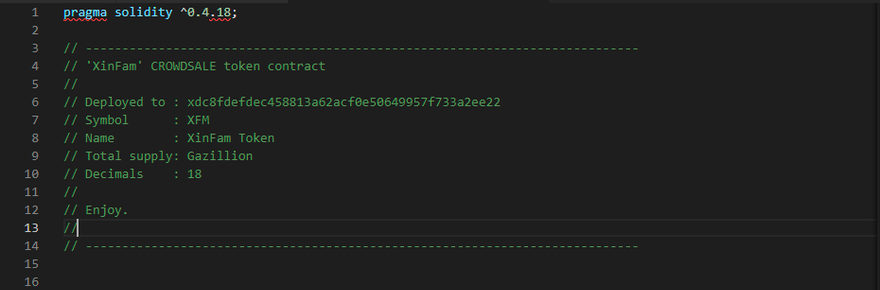
- Go to Line 3–15 and look at the comment section. Although this is a comment section, this will help you down the track. The name of the template ICO is XinFam CROWDSALE token contract.
- Change Line 4 to the title of your crowd sale.
- You will just change Line 6 after you deploy the contract on the XinFin Network.
- Change Line 7’s Symbol to your respective coin name (Keep it short)
- Change Line 8 to the name of your token
Next
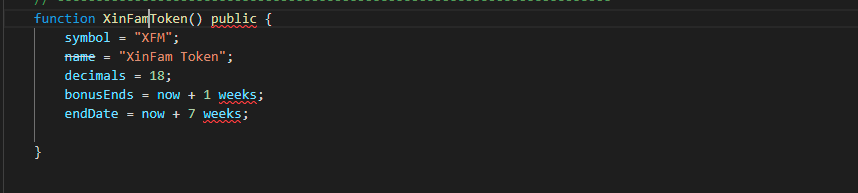
- Go to Line 102 and change “XinFam” to “(YourCrowdsaleName). DON’T USE SPACE OR IT WON’T WORK.
- Do the same for Line 118
- Go to Line 119 and change the symbol name, the same as the ones you did in the comment section
- Do the same for Line 120 Leave Decimals at 18.
- On line 122 you will have to define your first ICO parameter, when does the bonus ends?
- And on line 123, you will define when does the Crowdsale ends.
Alright, we are almost done editing the contract code.
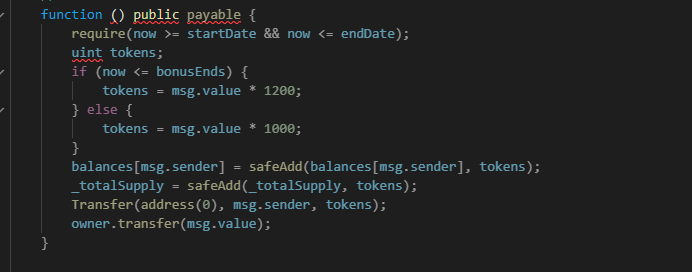
- Now, go to line 212. In that comment, write what is the amount of your tokens you will be giving away for XDC.
- On line 218, define how much people will get within the BONUS.
- On line 220, define how much people will get without the BONUS (the same ratio that you put on line 212).
Boom! The contract is done. Yes, it was that easy right? Now we are going to do some fun stuff, so bear with me until the end!
- Go to https://remix.xinfin.network/
- In the Contract create a new file ICO.sol, paste the code you just edited! If something red comes up, there is something wrong with the code. If there are any yellow warnings it’s alright, let’s hope for the best
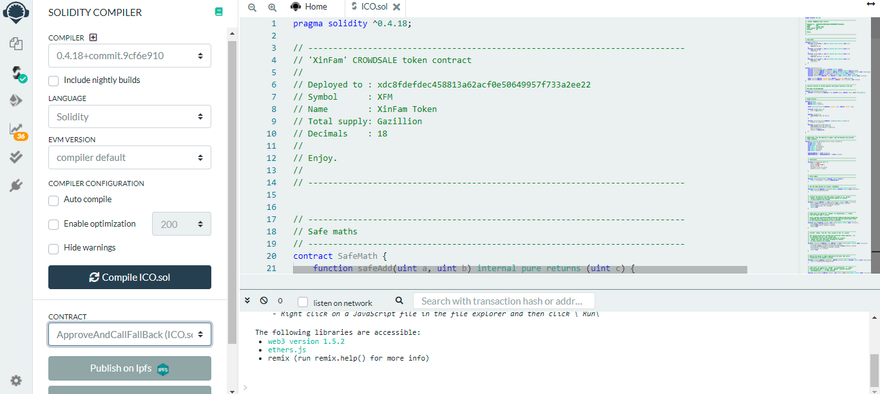
- After compiling the code you will have to deploy it on the apothem network change the environment to injected web3 and click on deploy
- After that, you will see the pop-up from XDCPay you will have to submit the transaction, and after that contract has been deployed.
Congratulations!
If everything works out, this is a sample image of what you should be seeing.
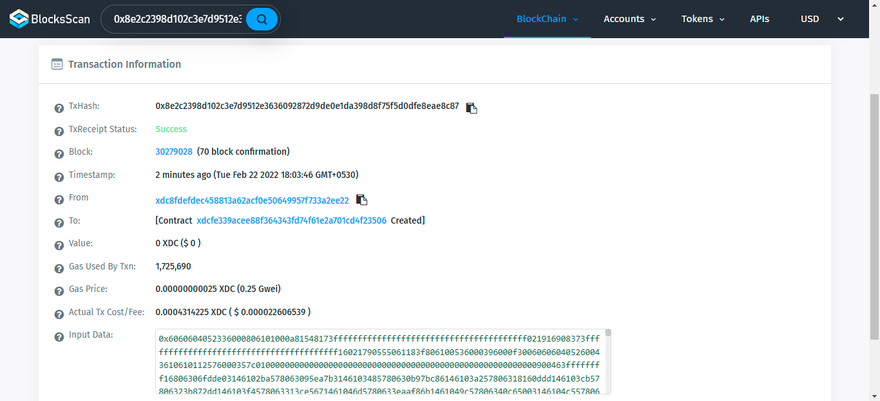
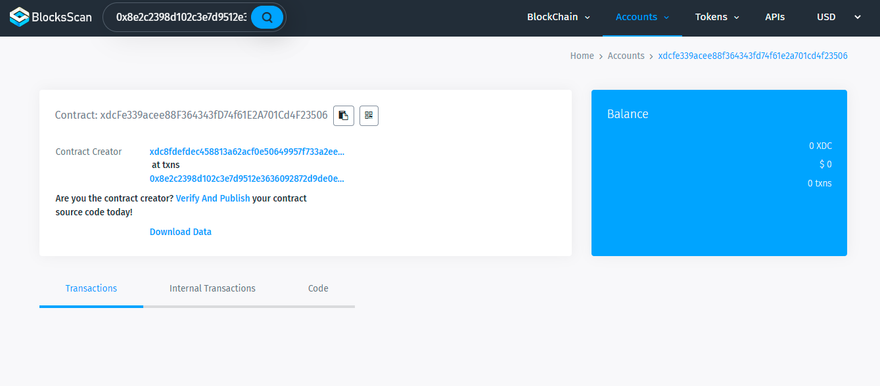
Now we are going to register this contract. To do that:
- In the Overview Tab → Click on the Contract Address
- Go to the Contract Code Tab → Click Verify and Publish
Nearly there… The following steps are really important. So pay attention. Basically what we are doing here is trying to guarantee that the code fits what you saying you are deploying and registering this on the XinFin network. FOREVER.
So if you commit mistakes, it will be wrong forever. What a good friend once told me is that on the Blockchain:
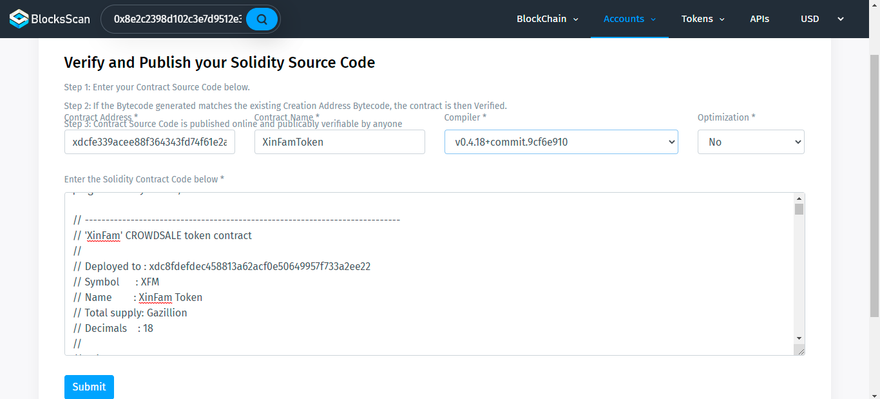
Now you have 5 things to do on this page.
Be sure that the contract address field corresponds to the contract address that you have just deployed. Remember contract address is different from the XDCPay address you created so make sure not to get them confused
The contract name has to match the one in the code, in my case is: XinFamToken. This was on Line 102 in your code
To check which version of the compiler, go back to the remix page where you will get their compiler version will be there. In most cases, it should be: v0.4.19+commit.c4cbbb05.js
On Optimisation, choose No (We haven’t enabled it before).
On ENTER THE SOLIDITY CONTRACT CODE BELOW, copy the whole code from Remix, and paste it in that area. NOT THE BYTECODE, but the code itself. Can also be copied from your text editor.
*Remember to add on line 6 the contract address that has been generated!
Now, leave the other fields in blank and click on Verify and Publish.
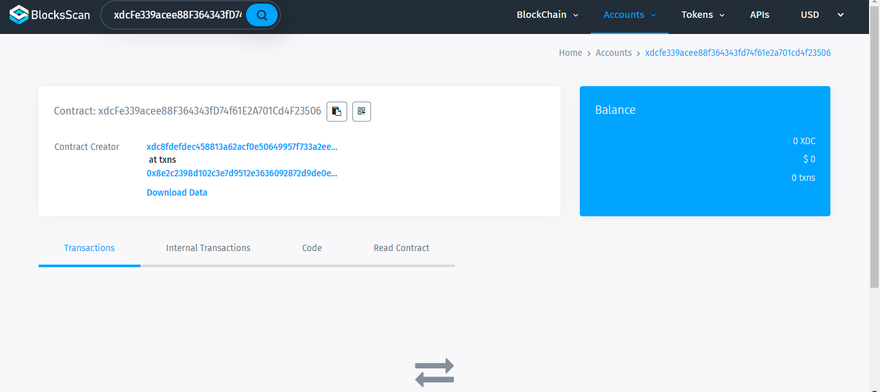
If a success page comes along with green checkmarks and stuff, you did it! You’ve made it,
If a red message comes along…try it again and see where you might have missed a step. I’m happy to try to help but remember you have to do the work.
Ok, so how does it work?
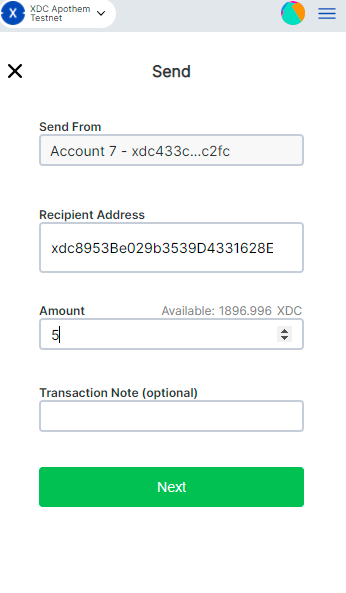
It’s pretty straightforward, you send Apothem XDC to the just deployed Contract Address and it will send you your brand new Tokens in return at the rate that you previously defined on the Code, and anyone who sends will also receive the XFM Tokens.
The Apothem Network XDC sent will be allocated to the contract owner address. You in that case
Here is the contract address xdc8953Be029b3539D4331628E93064640C94Bd02B8 let’s send some XDC tokens to the contract address from another random address to get the XFM tokens
Here is the Tx hash for the XDC tokens which has been sent to the contract address https://explorer.apothem.network/txs/0x7188758100cd1ab60753841e144a63d5951dd9554f89f1885a8a39cdcb85e139
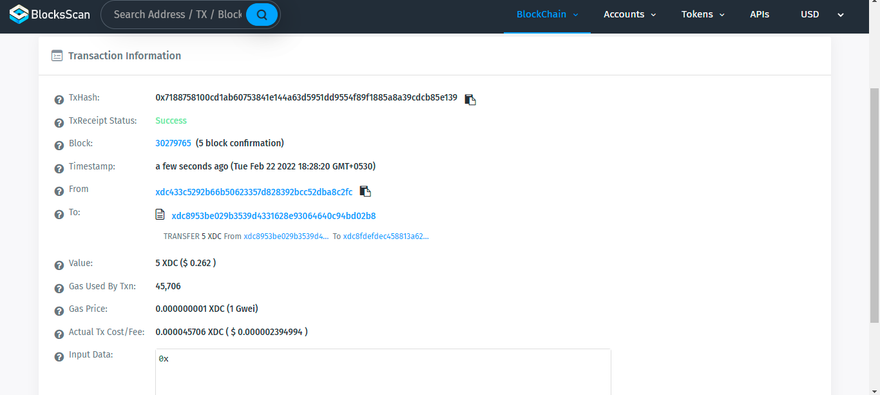
As you can see The Apothem Network XDC has been allocated to the contract owner’s address.
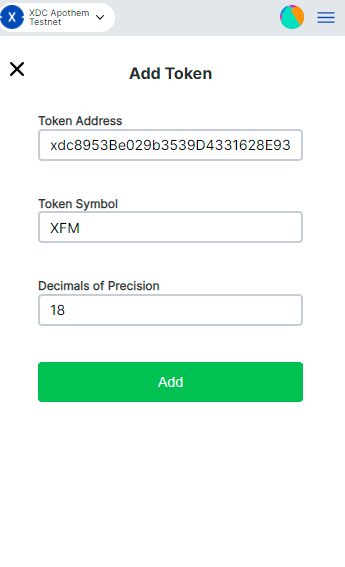
After sending the XDC you will have to add the XinFamToken to the XDCPay where you will have to add the contract address token symbol and decimal
After adding the token you will be able to see the XFM Token on the XDCPay Extension wallet
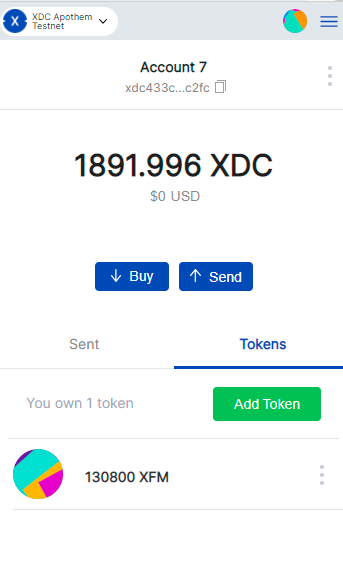
I have shared the contract address above if you wish to have some XFM tokens just send the Apothem Network XDC to the contract address you will receive the XFM tokens in the return.


Discussion (0)