
What is the Opolo Hardware wallet?
The Opolo Hardware wallet is a complete network isolated offline cold storage. The Opolo Hardware wallet gives full protection against remote and online attacks. The Opolo wallet cannot be disassembled without leaving serious damage.
Unboxing the OPOLO Cosmos
The OPOLO Cosmos comes with the following things inside the box:
OPOLO Cosmos device of the selected color
OPOLO USB type A to type C cable for desktop connection
OPOLO Card to take the seed/mnemonics backup
OPOLO Paper backup card
So let’s start on How to set up your opolo Hardware wallet device
Step 1 :- Plug the USB connector into the device and into the Desktop PC. The USB connector only works in one direction, so if you see an error on Windows that the USB is not recognized that is because the USB connector in the device is put in the opposite direction, so remove the USB from the device and flip the connector and insert in the device again. This will resolve the error.
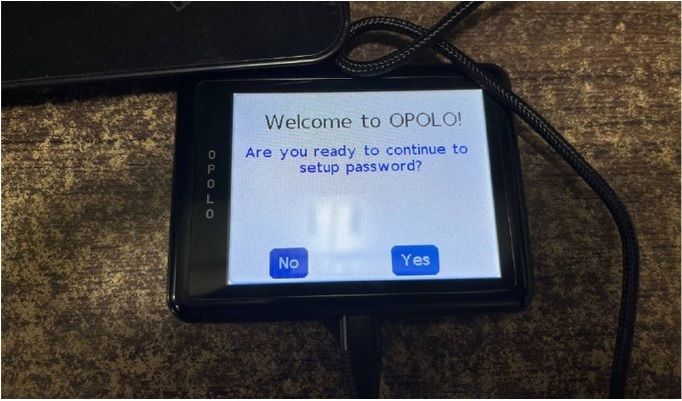
Step 2 :- For only the first time, you must see the following screen with the text “Are you ready to continue to set up a password?” followed by two buttons “No” and “Yes.” You should press “Yes” and set up the password.
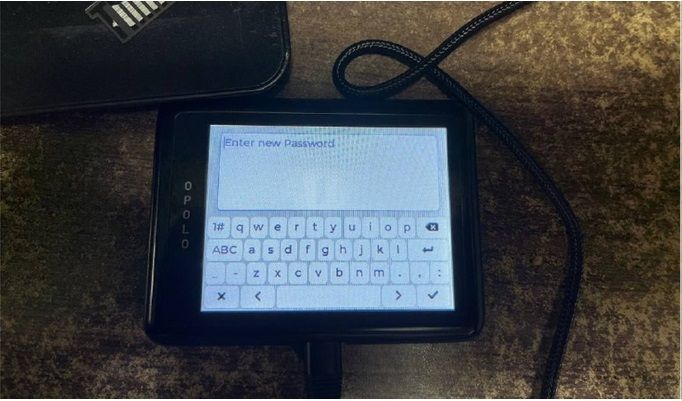
Step 3 :- Upon pressing “Yes” you will be sent to the password setup screen where you need to type the password you want to set up and confirm it. OPOLO supports passwords of up to 120 characters. Do not set up a password longer than this.
Step 4 :- Once you have confirmed the password, you will be directed to the authentication screen where you need to enter the password to authenticate the device and log in.
Step 5 :- Remember there are only 7 attempts you have to authenticate, and these attempts are being incremented for every failure until you get a success. On success, the tries count resets to zero. So be very careful while entering your password, if you have exceeded the failed attempts then you would not be able to use the wallet anymore. To avoid stealing of the seed, the wallet removes all data from the device and blocks it for further use. So do not enter the wrong password more than 7 times.
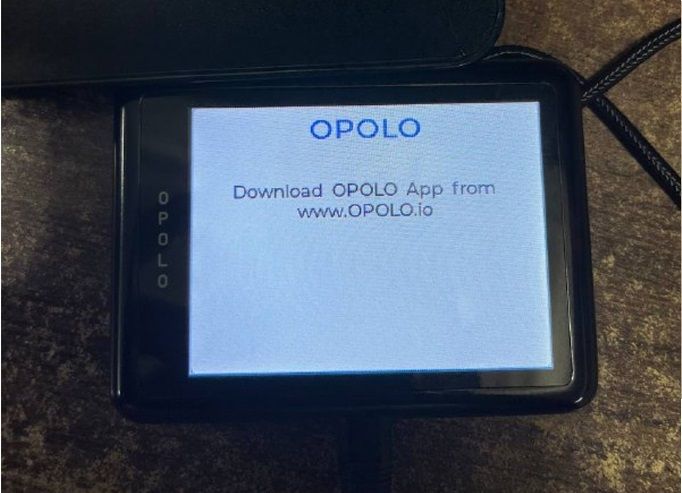
Step 6 :- Go to https://www.opolo.io/download/ and download the latest version of OPOLO Desk for your operating system.
Step 7 :- Open the OPOLO Desk App on your desktop PC
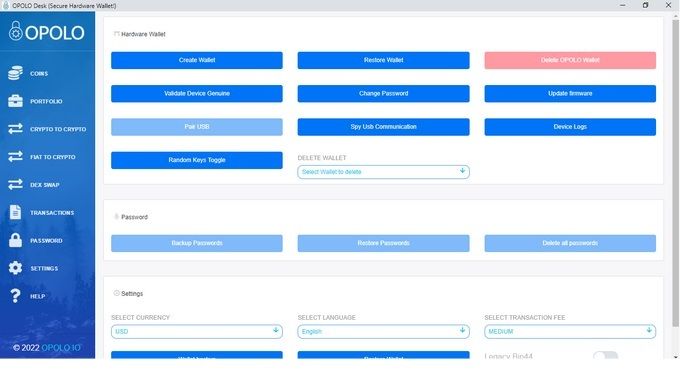
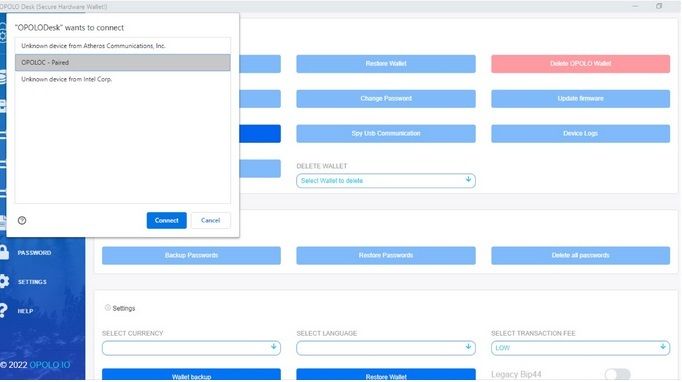
Step 8 :- With OPOLO Desk main window, you will also find a smaller window that shows which USBs are connected. Select the USB with the name “OPOLOC” or “InterBiometric” and pair the device. This step is critical, if the device is not paired, you cannot perform any operations with the device
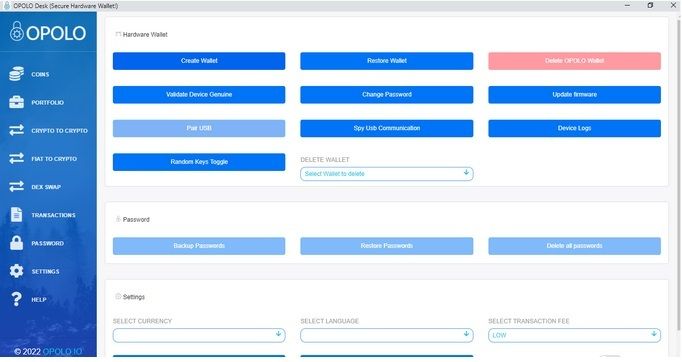
Step 9 :- Now if the device is successfully paired, you will be able to see the Settings page of OPOLO Desk and Press the button “Create New OPOLO Wallet”
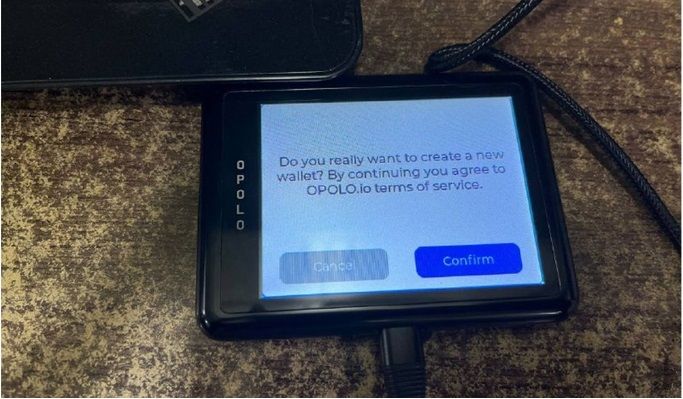
Step 10 :- Now you will be able to see the instructions on the OPOLO hardware wallet.
First, you will see the 24 words BIP39 mnemonics. You must write them down on paper, and make multiple copies. Or if you have crypto steel, note it down on there. This is very critical, if you lose this backup, you may lose all your funds. So make multiple copies of written mnemonics and put them in a secure place. You must must must take 3–4 backups on paper or steel.
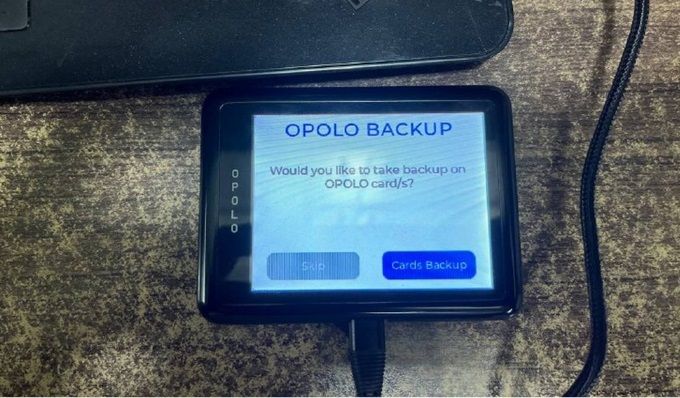
Step 11 :- Now if you continue on the device, you will be asked to take a backup on OPOLO Card. This is an optional step, but this makes life easier when you need to restore the OPOLO wallet. But this shouldn’t be the only backup you have. You must keep your paper or steel backups in case of Card failure.
Step 12 :- Place the OPOLO card under the device (on the backside) and press “Next”, on a successful backup, you will see a message with success. If you get a failure, readjust the position of the OPOLO Card on the backside of the device and press “Retry.” When you successfully save the mnemonics on the card, please carefully store it in a very secure location. Someone who gets the card can restore the wallet. Please consider it as a paper, with mnemonics written on it.
Finally, we have set upthe OPOLO hardware wallet now let’s add the XDC and XRC-20 tokens
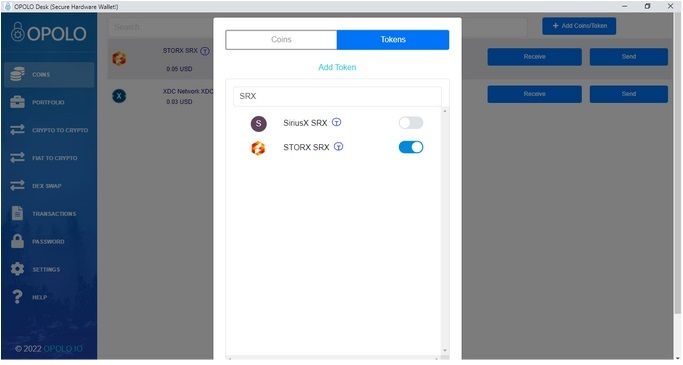
To add the SRX token click on Add coins and tokens and search for StorX SRX and add it
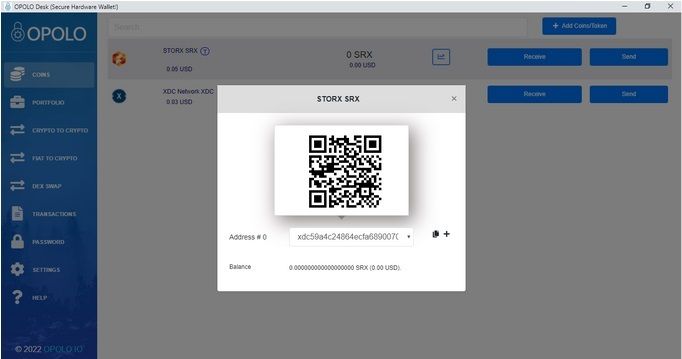
After adding the SRX token you can receive and store the SRX tokens on OPOLO hardware wallet and also make sure you have some XDC tokens as a gas fee for the transaction
If you have any questions regarding Opolo Hardware wallet please join the telegram community https://t.me/opolowallet


Discussion (0)