This article introduces how to authenticate user by:
1. Introduction
1.1 About ERC-4361
Sign in with Ethereum is a new form of authentication that enables users to control their digital identity with their Ethereum account and ENS profile instead of relying on a traditional intermediary.
Today’s login experiences rely on accounts controlled by centralized identity providers, for-profit behemoths like Google, Facebook, and Apple. Identity providers often have sole discretion over the existence and use of users’ digital identities across the web, fundamentally at odds with the best interest of users.
The Ethereum Foundation and Ethereum Name Service (ENS) put forward a Request for Proposal for Sign-in with Ethereum in 2021, which would enable users to use their Ethereum accounts to access web services instead of accounts owned by large corporations.
Sign-In with Ethereum describes how Ethereum accounts authenticate with off-chain services by signing a standard message format parameterized by scope, session details, and security mechanisms (e.g., a nonce).
Already, many services support workflows to authenticate Ethereum accounts using message signing, such as establishing a cookie-based web session which can manage privileged metadata about the authenticating address.
For Web2, this is an opportunity to give users control over their identifiers and slowly introduce their dedicated user bases to Web3. By providing a strict specification that can be followed along with any necessary tooling to ease any integration concerns, Sign-In with Ethereum has a chance at truly transforming the way in which individuals interact with apps and services.
For Web3, this is an opportunity to standardize the sign-in workflow and improve interoperability across existing services, while also providing wallet vendors a reliable method to identify signing requests as Sign-In with Ethereum requests for improved UX.
1.2 About XDCPay 2.0
The XDCPay is an extension for accessing XDC's XDPoS enabled distributed applications, or "Dapps" in your browser!
The extension injects the XDC's XDPoS web3 API into every website's javascript context, so that dapps can read from the blockchain.
The XDCPay extension also lets the user create and manage their own identities (via private keys, local client wallet), so when a Dapp wants to perform a transaction and write to the blockchain.
1.3 About XinFin
XinFin is an enterprise-ready hybrid Blockchain technology company optimized for international trade and finance. The XinFin network is powered by the native coin XDC and uses XinFin Delegated Proof of Stake (XDPoS) consensus architecture to support smart contracts, 2000TPS, 2-second transaction time, near-zero GAS fees, and KYC to Masternodes (Validator Nodes). XDC also creates an opportunity to useXinFin’s real-world use-cases such as TradeFinex.org, which helps small and medium businesses or institutions originate their own financial requirements in a digital, fully structured manner so that they can distribute it to the bank or non-bank funders themselves using a common distribution standard. It also allows access to Mycontract.co, a middleware that connects any two centralized systems using decentralized APIs running on XDC blockchain Network.
2. Run the demo
2.1 Download source code
Execute the following commands:
cd ${HOME}
git clone https://github.com/gzliudan/sign-in-with-xdcpay.git
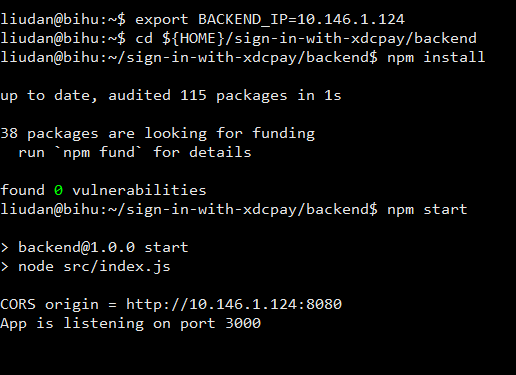
2.2 Start the backend
Execute the following commands, remember to change <BACKEND_IP> to your real IP address:
# set BACKEND_IP according to your environment
export BACKEND_IP=<BACKEND_IP>

cd ${HOME}/sign-in-with-xdcpay/backend
npm install
npm start
eg:
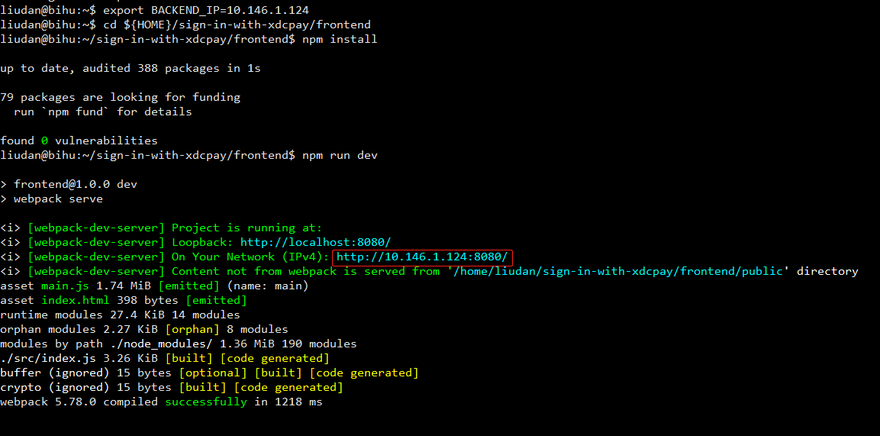
2.3 Start the frontend
Open a new terminal window, execute the following commands, remember to change <BACKEND_IP> to your real IP address:
# set BACKEND_IP according to your environment
export BACKEND_IP=<BACKEND_IP>

cd ${HOME}/sign-in-with-xdcpay/frontend
npm install
npm run dev
eg:
3. Test the demo
3.1 Open web page
Open the url which is after On Your Network (IPv4): in the above screenshoot, such as http://10.146.1.124:8080/.
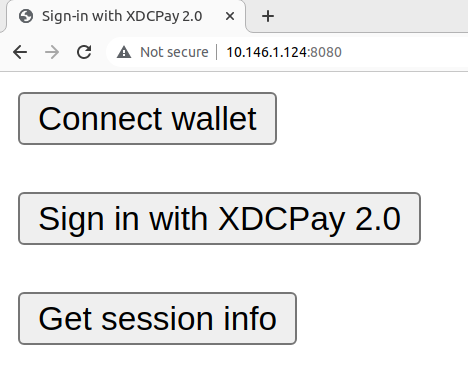
3.2 Connect the wallet
Click Connect wallet button:
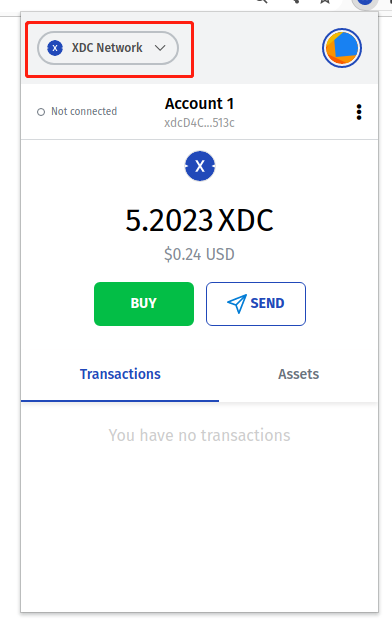
3.2.1 Switch to XinFin network
If your XDCPay's current network is not XinFin network, please swith to XinFin network in XDCPay manually:
3.2.2 Connect XDCPay account
If there is no account connected to the XDCPay, the web page will request Connect With XDCPay:
3.2.2.1 Choose an account
Select the account(s) if your XDCPay contains multiple accounts.
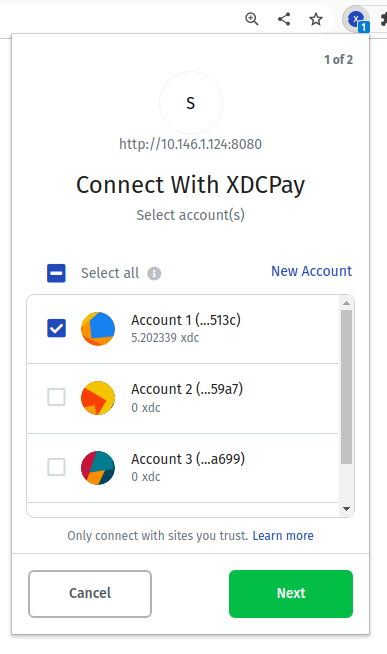
3.2.2.2 Connect to account
Then click Next button:
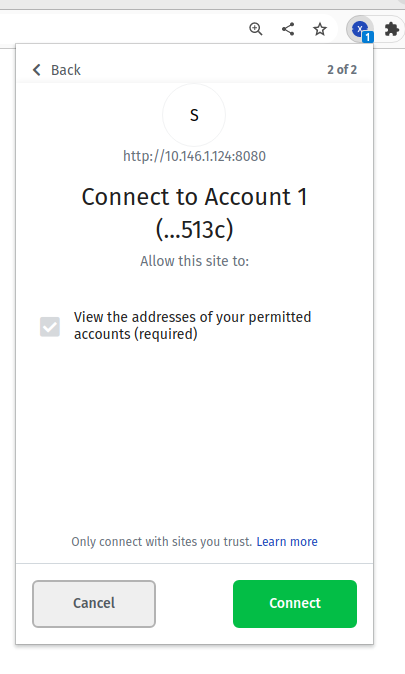
At last click Connect button on the XDCPay's second popup window.
3.2.3 Show connect status
If it's connected, the web page will popup a window:
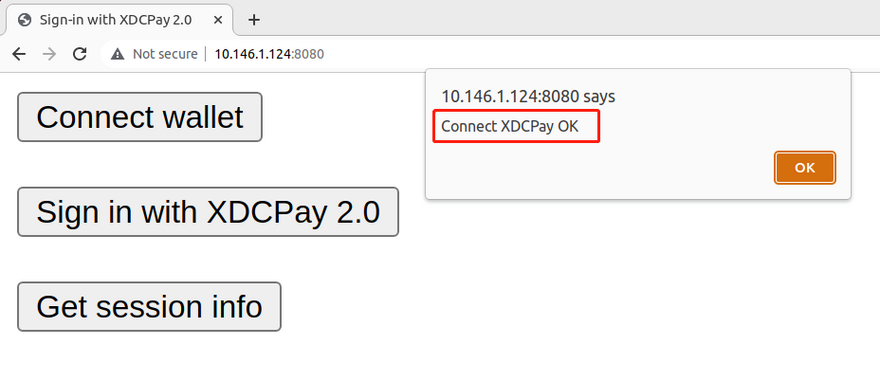
It shows Connect XDCPay OK, click OK button to close it.
3.3 Get information before sign in
Click Get session info button, the web page will popup a window:
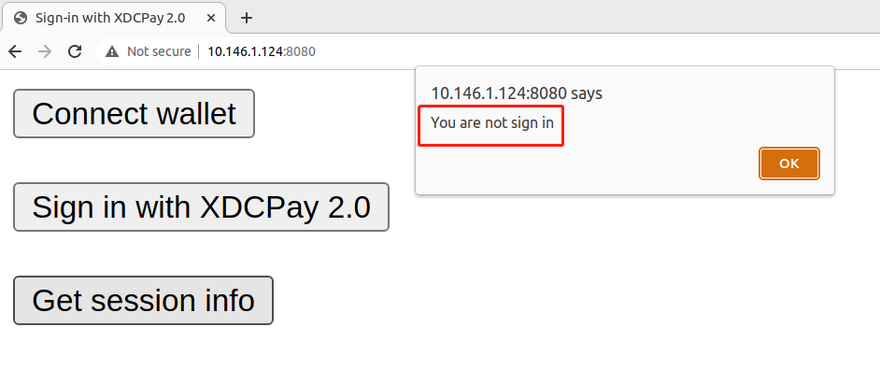
It shows You are not sign in, click OK button to close it.
3.4 Sign in with XDCPay
Click Sign in with XDCPay 2.0 button, the XDCPay will prompt you to sign the below message:
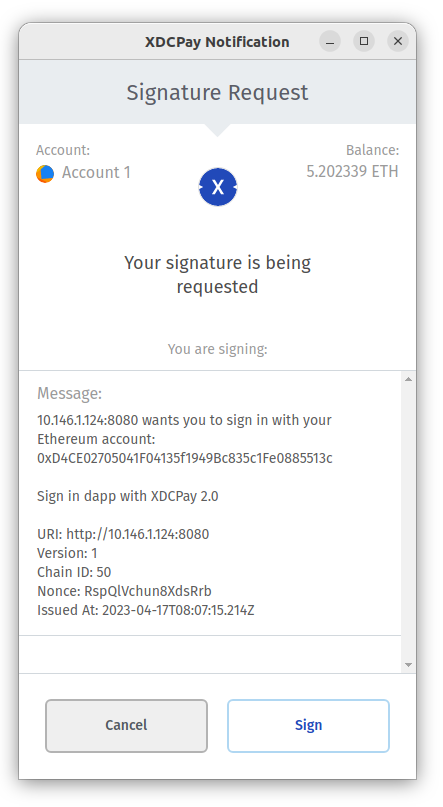
Then click Sign button on the XDCPay's popup window. At last the web page will popup a window:
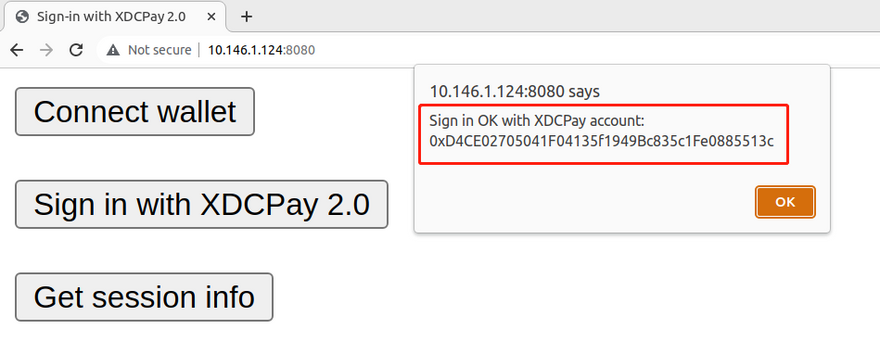
It shows sign in Ok with XDCPay account: 0XD4CE02705041F04135F1949Bc835c1Fe0885513C, click OK button to close it.
3.5 Get information after sign in
Click Get session info button, the web page will popup a window:
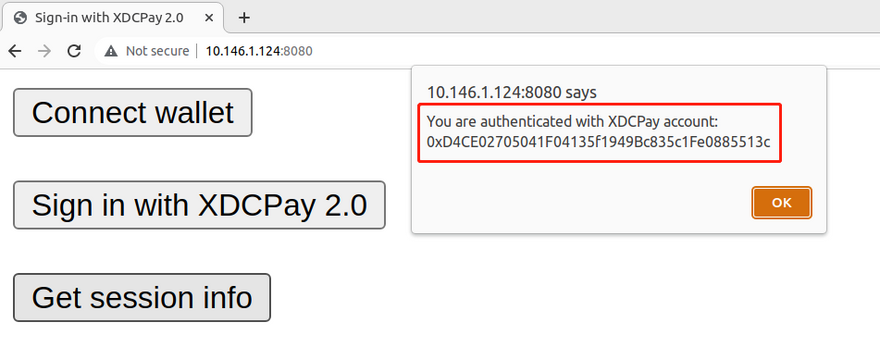
It shows You are authenticated with XDCPay account: 0xD4CE02705041F04135F1949Bc835c1Fe0885513C, click OK button to close it.
4. Some source codes
4.1 The backend
The backend server handle the user's submission using Express.js, it
- gives the frontend a nonce to include in the SIWE message
- verifies the submission
- returns the authenticating state
As such, this basic example only provides three endpoints:
-
/nonce: generate the nonce for the interaction via GET request -
/verify: verify the submitted SIWE message and signature via POST request -
/info: retrieve the information from the session in place via GET request
4.1.1 endpoint nonce
This endpoint returns a different nonce for each request.
app.get("/nonce", async function (req, res) {
  req.session.nonce = generateNonce();
  res.setHeader("Content-Type", "text/plain");
  res.status(200).send(req.session.nonce);
});
Open a new terminal window, run below command to test:
curl 'http://localhost:3000/nonce' && echo
4.1.2 endpoint verify
4.1.2.1 validate SiweMessage object
const message = new SiweMessage(req.body.message);
We validate the received SIWE message by parsing it back into a SiweMessage object (the constructor handles this), assigning the received signature to it and calling the validate method:
const fields = await message.validate(req.body.signature);
message.validate(req.body.signature) in the above snippet makes sure that the given signature is correct for the message, ensuring that the XinFin blockchain address within the message produced the matching signature. In other applications, you may wish to do further validation on other fields in the
message, for example asserting that the authority matches the expected domain, or checking that the named address has the authority to access the named URI.
4.1.2.2 req.session
req.session.siwe = fields;
req.session.cookie.expires = new Date(fields.expirationTime);
The session (req.session) stores the nonce for the initial validation of the message, and once that's done, more can be added. For example here we store the message's fields, so we can always reference the address of the user.
4.1.3 endpoint info
This endpoint is used to retrieve the information from the session in place, without having to send the message and signature every time.
app.get("/info", function (req, res) {
  if (!req.session.siwe) {
    res.status(401).send("You are not sign in");
    return;
  }
  res.setHeader("Content-Type", "text/plain");
  res.send(
    `You are authenticated with XinFin blockchain account: ${req.session.siwe.address}`
  );
});
4.2 The frontend
4.2.1 ethers.js
ethers.js is a library that provides functionality for interacting with the Ethereum blockchain. We use it here for connecting the webpage to extension wallets.
4.2.2 XDCPay
const provider = new ethers.providers.Web3Provider(window.ethereum);
const signer = provider.getSigner();
The XDCPay extension injects the window.ethereum object into every web page, and the ethers library provides a convenient provider class to wrap it. We then use this provider to connect to the wallet, and access signing capabilities.
4.2.3 eth_requestAccounts
try {
  await provider.send("eth_requestAccounts", []);
  message = `Connect XinFin blockchain OK`;
} catch (err) {
  message = `Fail to request account: ${err.message}`;
}
The eth_requestAccounts function will send a request to the XDCPay extension to ask permission to view information about the XinFin accounts that it controls. XDCPay will then show a window to the user asking them to authorize our application to do so. If they authorize the request then we've connected their account.
4.2.4 signMessage
await signer.signMessage(message);
Sign message with the above code.
4.2.5 SiweMessage
Creating SIWE messages in JavaScript is straightforward when using the siwe library:
const message = new SiweMessage({
  domain,
  address,
  statement,
  uri: origin,
  version: "1",
  chainId: "50", // chain id of XinFin blockchain
  nonce: await res.text(),
});
The SiweMessage's fields we are most interested in are address and statement. The address is the XinFin blockchain address which the user is signing in with, and the statement as this will describe to the user what action we wish to perform on their behalf.


Discussion (1)
unable to install the (add to browser) download error: download interrupted!
need to connect my Trezor to XDCPay....v1 or v2
any help is welcome.
thanks